background image

4/2011

01 29 2 210 822

© BMW AG, Munich

(Z/Z)

18

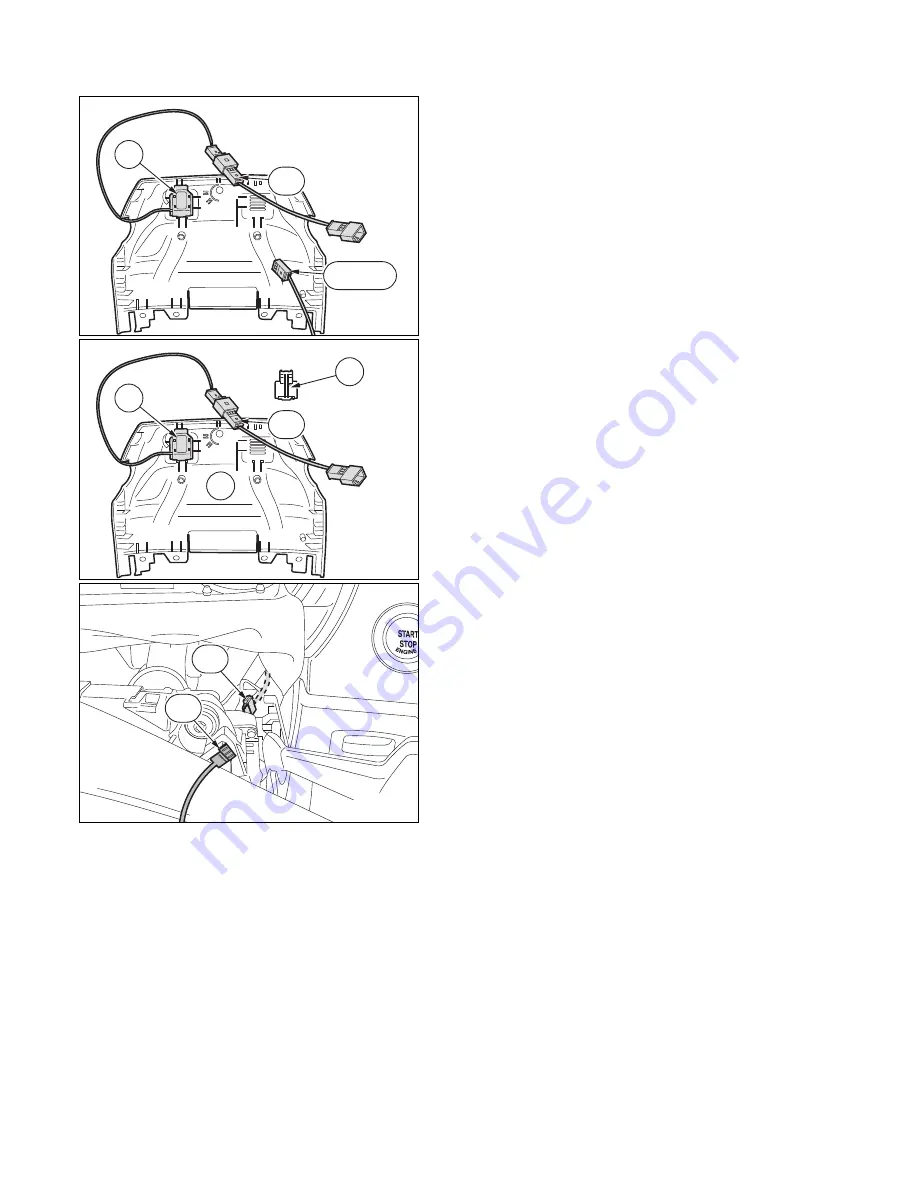
11. Installing and connecting the hands-free microphone (E93 cars only)

Cars with SA 620 only

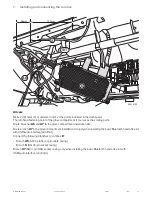
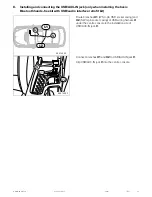
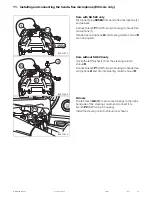
Disconnect plug 

X3564

 from hands-free microphone (1) 

and tie back.
Connect branch 

P1

 (SW 3-pin pin housing) to hands-free 

microphone (1).
Hands-free microphone 

and


steering column shroud

are not required.

Cars without SA 620 only

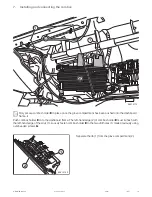
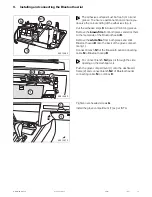
Unclip the left finisher (1) from the steering column 

shroud 

R

.

Connect branch 

P1

 (SW 3-pin pin housing) to hands-free 

microphone

O

 and clip into steering column shroud

R

.

All cars

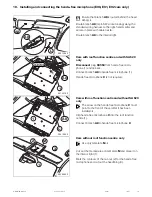
Route branch 

A8

 (SW 3-pin socket casing) on the right-

hand side of the steering column and connect it to 

branch

P2

 (SW 3-pin pin housing).

Install the steering column shroud (not shown).

1

P1 

X3564

093 0187 Z

O

R

1

P1 

093 0160 Z

A8

P2

093 0161 Z

Summary of Contents for 65 41 2 152 528

Page 1: ...lation of the total costs for the programming time must be factored into the calculation of retrofitting costs no invoicing via warranty Important information These installation instructions are primarily designed for use within the BMW dealership organisation and by authorised BMW service companies In any event the target group for these installation instructions is specialist personnel trained o...

Page 2: ...n lead terminals must be used All pictures show LHD cars proceed accordingly on RHD cars Program encode the retrofit with ISSS Integrated Software Service Station via the Conversions path When installing the basic Bluetooth hands free kit with USB audio interface retrofit kit two coding operations combox retrofit SA 644 USB audio SA 6FL retrofit must be carried out Ordering instructions The follow...

Page 3: ...rness on the radio receiver 10 7 Installing and connecting the combox 11 8 Installing and connecting the USB AUX IN jack only when installing the basic Bluetooth hands free kit with USB audio interface retrofit kit 14 9 Installing and connecting the Bluetooth aerial 15 10 Installing and connecting the hands free microphone E90 E91 E92 cars only 16 11 Installing and connecting the hands free microp...

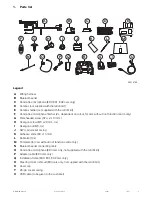
Page 4: ...agon screw M5 x 20 mm 4 x I Hexagon nut M5 4 x J SW 4 pin socket casing K Adhesive strips 80 x 15 mm L Cable tie 10 x M Template for cars without roof function centre only N Bluetooth aerial connecting cable O Hands free microphone E93 cars only not supplied with the retrofit kit P Adapter cable E93 cars only Q Installation frame E90 E91 E92 cars only R Steering column shroud E93 cars only not sup...

Page 5: ...oth hands free kit with USB audio interface retrofit kit V USB AUX IN jack only included in the basic Bluetooth hands free kit with USB audio interface retrofit kit W BL 54 pin socket casing only included in the basic Bluetooth hands free kit with USB audio interface retrofit kit not required AU X IN W V U 090 1397 Z ...

Page 6: ...e trim right 51 45 Pedal trim only cars without Flash adapter built after 09 08 51 45 185 Release the centre console only when installing the basic Bluetooth hands free kit with USB audio interface retrofit kit AUX IN jack only when installing the basic Bluetooth hands free kit with USB audio interface retrofit kit E90 E91 E92 cars only A pillar trim on the right 51 43 148 Roof function centre fro...

Page 7: ...e connector MOST GN On the radio receiver s disconnected fibre optic cable A6 SW 2 pin fibre optic cable casing MOST On combox D X34139 A7 52 pin socket casing On combox D X34130 A8 SW 3 pin socket casing Mic E90 E91 E92 cars only On hands free microphone C On branch P2 X3564 N Bluetooth aerial connecting cable N1 Fakra socket casing GN BT aer On combox D X34128 N2 Fakra socket casing GN BT aer On...

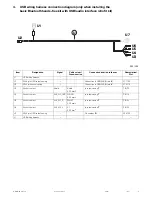
Page 8: ...Socket contact Shield Shield 0 35 mm2 In socket casing T PIN 22 U4 Socket contact AUX_NF_GND WS GN 0 35 mm2 In socket casing T PIN 10 U5 Socket contact AUX_NF_R WS RT 0 35 mm2 In socket casing T PIN 24 U6 Socket contact AUX_NF_L VI 0 35 mm2 In socket casing T PIN 23 U7 SW 4 pin HSD socket casing On combox D X34135 U USB wiring harness U1 U2 U3 U4 U5 U6 U7 U 090 1398 4 USB wiring harness connection...

Page 9: ... cable O Hands free microphone E93 cars only P Adapter cable E93 cars only U USB wiring harness only when installing the basic Bluetooth hands free kit with USB audio interface retrofit kit V USB AUX IN jack only when installing the basic Bluetooth hands free kit with USB audio interface retrofit kit 1 Radio connectors X13812 and X13815 V O 1 U D B A N A C P 090 1553 Z 5 Installation and cabling d...

Page 10: ...N 15 Branch A2 BR cable to PIN 12 Connect branch A3 to socket casing J Unclip fibre optic cable casing X13815 SW 2 pin from plug X13812 SW 16 pin of the radio receiver Disconnect the outgoing fibre optic cable from fibre optic cable casing X13815 PIN 2 and connect branch A4 OR cable Clip fibre optic cable casing X13815 into plug X13812 Unlock the fibre optic cable connector 1 on branch A5 and conn...

Page 11: ...box D All cars Disconnect the cables as follows from branch A7 and connect to socket casing T From PIN 1 to PIN 25 From PIN 19 to PIN 12 From PIN 21 to PIN 11 From PIN 36 to PIN 14 From PIN 17 to PIN 1 Only cars without cup holders in the dashboard The 26 pin connection 1 must point in the direction shown Screw combox D using hexagon screws H and hexagon nuts I to combox mount E Only cars with cup...

Page 12: ...to the glove compartment installation site Route branch U7 to the glove compartment installation site only when installing the basic Bluetooth hands free kit with USB audio interface retrofit kit Connect the following branches to combox D Branch A6 SW 2 pin fibre optic cable casing Branch S GN 26 pin socket casing Branch U7 SW 4 pin HSD socket casing only when installing the basic Bluetooth hands ...

Page 13: ...n pushed onto the dashboard frame Push combox holder E onto the dashboard frame The left hand edge 2 of combox holder E must lie flush with the left hand edge of the strut 1 Loosely fasten combox holder E to the two drill holes 1 made previously using oval headed screws G Separate the rib 1 from the glove compartment 2 1 G 1 2 E 090 1577 Z 1 2 090 1314 Z ...

Page 14: ...th USB audio interface retrofit kit Route branches U1 WS 4 pin HSD socket casing and U2 SW 4 pin socket casing of USB wiring harness U under the centre console to the installation site of USB AUX IN jack V Connect branches U1 and U2 to USB AUX IN jack V Clip USB AUX IN jack V into the centre console E65 U1 U2 U V 090 1406 Z AUX IN V U1 U2 090 1400 Z ...

Page 15: ...side of the Bluetooth aerial B Remove the white film from both pieces and stick Bluetooth aerial B onto the back of the glove compart ment 1 Connect branch N1 of the Bluetooth aerial connecting cable N to Bluetooth aerial B To connect branch N2 grasp it through the side opening on the dashboard Push the glove compartment 1 onto the dashboard frame 2 and connect branch N2 of Bluetooth aerial connec...

Page 16: ...ie back Connect branch A8 to hands free microphone 1 Hands free microphone C is not required Cars with roof function centre and without SA 620 only The arrow on the hands free microphone C must point to the front of the car after it has been installed Clip hands free microphone C into the roof function centre 1 Connect branch A8 to hands free microphone C Cars without roof function centre only Use...

Page 17: ...and bend the retaining lugs 3 Clip hands free microphone C into hands free micro phone cover F The arrow on the hands free microphone C must point to the front of the car after it has been installed Guide branch A8 through the installation frame Q and connect to hands free microphone C Clip hands free microphone finisher F into installation frame G 2 1 3 Q 082 0096 Z C F 082 0097 Z C F A8 Q 090 13...

Page 18: ...e O and steering column shroud R are not required Cars without SA 620 only Unclip the left finisher 1 from the steering column shroud R Connect branch P1 SW 3 pin pin housing to hands free microphone O and clip into steering column shroud R All cars Route branch A8 SW 3 pin socket casing on the right hand side of the steering column and connect it to branch P2 SW 3 pin pin housing Install the stee...

Page 19: ...hrough the created action plan When installing the basic Bluetooth hands free kit retrofit kit retrofit SA 644 coding must be carried out When installing the basic Bluetooth hands free kit with USB audio interface retrofit kit two coding operations combox retrofit SA 644 USB audio SA 6FL retrofit must be carried out If using ISTA P please note the instructions in the ISTA P application documentati...

Page 20: ... 35 VI 0 14 BR 22 10 24 23 3 4 2 1 1 2 3 4 1 4 3 2 V X34130 A7 X34128 N1 X34139 A6 X34130 A7 1 B402 C W18 B U500 D X3564 A8 2 1 1 12 11 25 X14080 N2 0 35 GE 0 35 SW MIC MIC Schirm 1 2 15 X13812 A1 U3 U6 30 2 5 RT GN 31 2 5 BR A2 12 X60681 X14118 U2 A3 1 2 2 5 RT GN 2 5 BR GN OR A5 X13815 A4 1 14 J 2 5 RT GN 2 5 BR 1 2 X13016 X1716 2 GN B402 O 12 11 25 MIC MIC 1 2 1 2 1 2 1 2 0 35 GE 0 35 SW 0 35 G...

Page 21: ...U1 WS 4 pin HSD socket casing X17183 only when installing the basic Bluetooth hands free kit with USB audio interface retrofit kit U2 SW 4 pin socket casing X14118 only when installing the basic Bluetooth hands free kit with USB audio interface retrofit kit U3 U6 Connected cables in X34130 26 pin socket casing only when installing the basic Bluetooth hands free kit with USB audio interface retrofi...

Reviews: