33.14
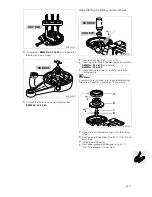
Shimming housing cover
•
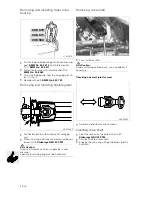
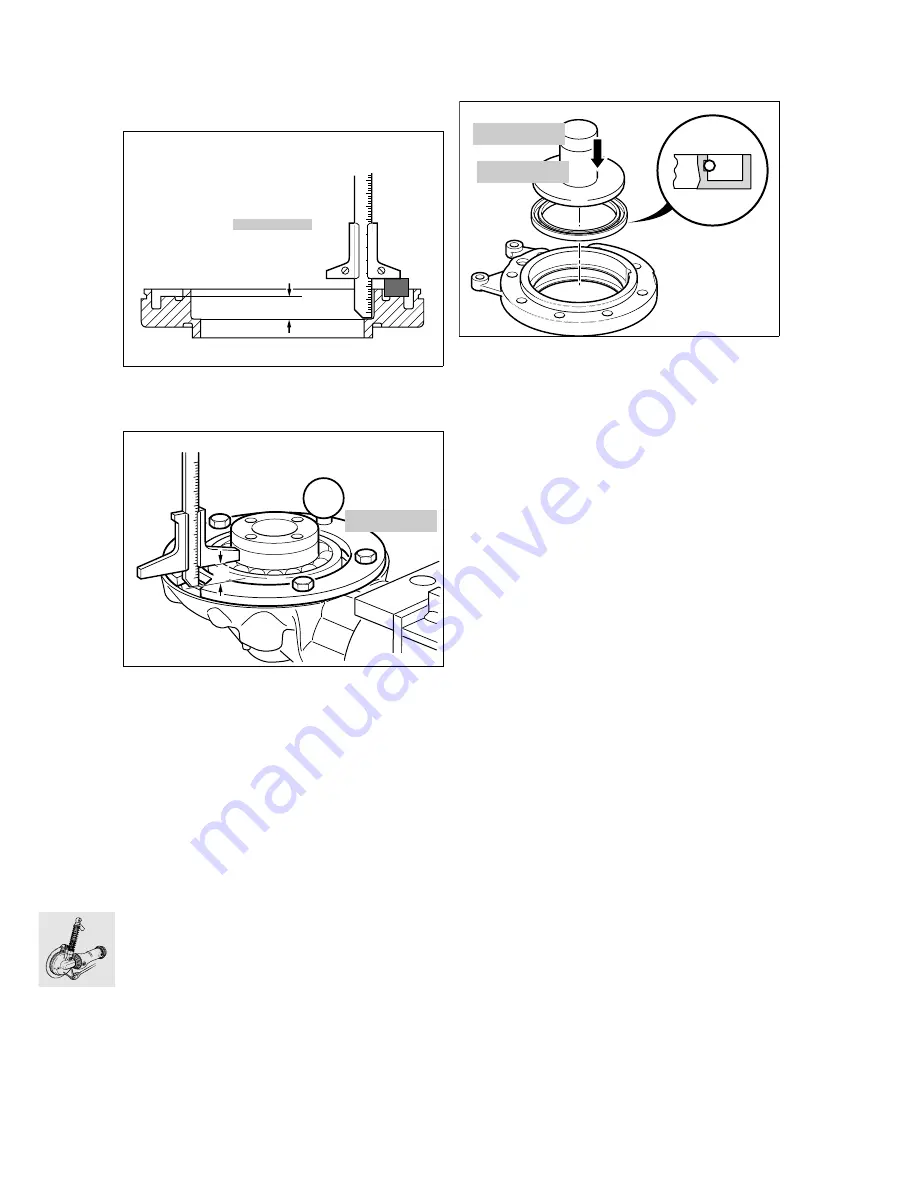
To obtain the correct roller bearing preload, the
housing cover must be shimmed.
•
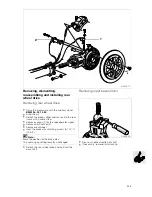
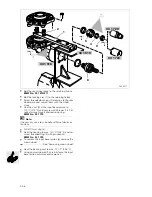
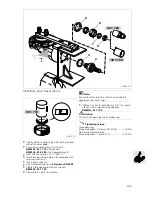
Using depth gauge,
BMW No. 00 2 550
, meas-
ure distance a.
•
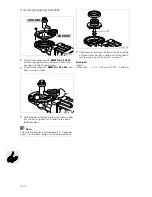
Place measuring ring,
BMW No. 33 2 601
, in po-
sition and secure it.
•
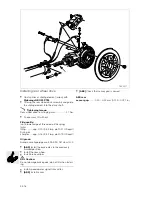
Measure from the outer ball bearing race through
the cutout in the measuring ring to the housing
joint face and determine distance b.
•
Distance a – distance b = shim thickness (without
preload).
•
Apply a light coat of grease to the selected shim
washer, and install it.
Preload:
............ 0.05...0.1 mm (0.0020...0.0039 in)
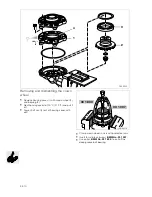
Installing housing cover
•
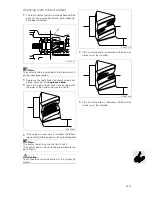
Lightly oil the lip and outer edge of the sealing
ring.
•
Using drift,
BMW No. 33 1 870
, and handle,
BMW No. 00 5 500
, drive in the sealing ring.
•
Install O-ring and apply a light coat of oil/grease.
•
Heat housing cover to 80 °C (176 °F)/install.
•
Tighten retaining bolts in a crosswise pattern.
X
Tightening torque:
Housing cover.............................................. 35 Nm
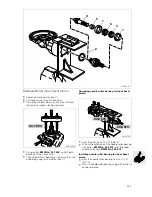
Installing splined element
•
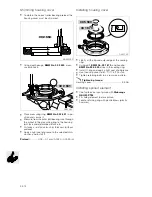
Coat splines on input pinion with
Staburags
NBU 30 PTM
.
•
Fit sliding element to drive pinion.
•
Locate retaining ring with gentle blows (plastic
hammer).
a
00 2 550
KR330290
b
33 2 601
C330080
C330120
33 1 870
00 5 500
Summary of Contents for R 1200 C
Page 1: ...BMW AG Motorcycle Division After Sales R 850 C R 1200 C Repair Manual ...
Page 4: ......
Page 18: ...00 10 ...
Page 40: ...11 4 ...
Page 47: ...11 11 Sectioned drawing of engine ...
Page 48: ...11 12 Lubricating oil circuit ...
Page 49: ...11 13 Coolant circuit ...
Page 50: ...11 14 ...
Page 61: ...11 25 Removing cylinder head RS110110 M6 x 30 M6 x 30 M6 x 30 M10 x 70 ...
Page 100: ...11 64 ...
Page 102: ...12 2 ...
Page 104: ...12 4 ...
Page 112: ...12 12 ...
Page 114: ...13 2 ...
Page 116: ...13 4 ...
Page 120: ...13 8 ...
Page 122: ...16 2 ...
Page 124: ...16 4 ...
Page 128: ...16 8 ...
Page 130: ...18 2 ...
Page 132: ...18 4 ...
Page 134: ...21 2 ...
Page 136: ...21 4 ...
Page 140: ...21 8 ...
Page 142: ...23 2 ...
Page 144: ...23 4 ...
Page 166: ...23 26 ...
Page 168: ...31 2 ...
Page 170: ...31 4 ...
Page 180: ...32 2 ...
Page 182: ...32 4 ...
Page 188: ...33 2 ...
Page 190: ...33 4 ...
Page 206: ...33 20 ...
Page 210: ...34 4 ...
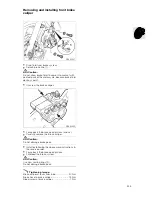
Page 226: ...34 20 Removing and installing brake lines Removing and installing front brake line C340020 ...
Page 227: ...34 21 Removing and installing rear brake line C340030 ...
Page 230: ...36 2 ...
Page 232: ...36 4 ...
Page 240: ...36 12 ...
Page 242: ...46 2 ...
Page 244: ...46 4 ...
Page 254: ...51 2 ...
Page 257: ...52 1 Contents Page 52 Removing and installing seat 3 52 Seat ...
Page 258: ...52 2 ...
Page 260: ...52 4 ...
Page 262: ...61 2 ...
Page 263: ...61 3 61 Technical data R 850 C R 1200 C Battery Amp h 19 ...
Page 264: ...61 4 ...
Page 268: ...61 8 Wiring harness View from left C619020 1 2 3 ...
Page 269: ...61 9 1 C619021 ...
Page 270: ...61 10 2 C619022 ...
Page 271: ...61 11 3 C619023 ...
Page 272: ...61 12 Wiring harness View from right 1 2 3 C619030 ...
Page 273: ...61 13 1 C619011 ...
Page 274: ...61 14 2 C619012 ...
Page 275: ...61 15 3 C619013 ...
Page 276: ...61 16 ...
Page 278: ...62 2 ...
Page 280: ...62 4 ...
Page 282: ...62 6 ...
Page 284: ...63 2 ...
Page 286: ...63 4 ...
Page 288: ...63 6 ...

