00.26
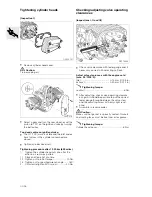
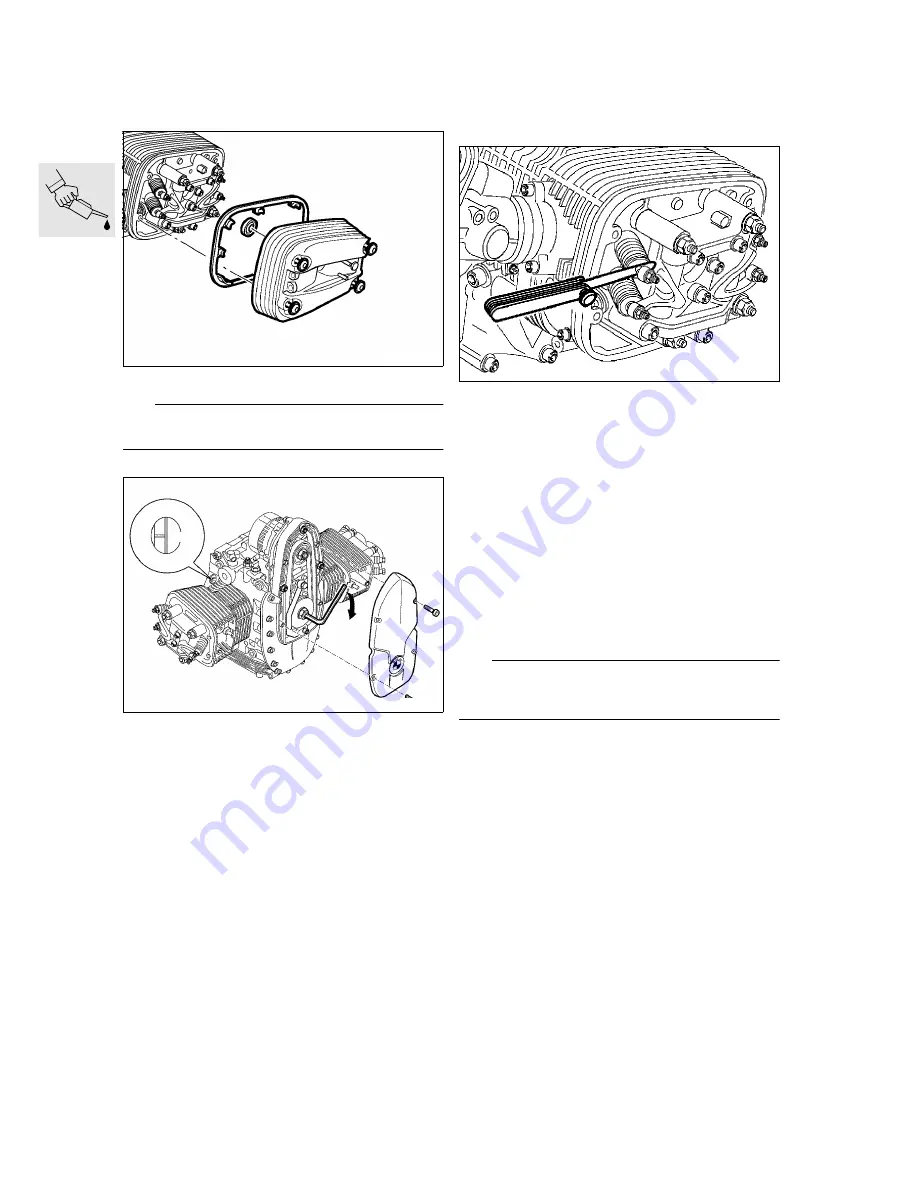
Tightening cylinder heads
(Inspection I)
•
Remove cylinder head cover.
e
Caution:
Trap escaping oil.
•
Select a gear and turn the rear wheel, or set the
piston to TDC on the ignition stroke by turning
the belt pulley.
Top dead centre on ignition stroke:
•
The OT (TDC) mark is visible and the inlet and ex-
haust valves in the cylinder concerned are
closed.
•
Tighten cylinder head nuts.
Tightening procedure after 1 000 km (600 miles)
1.
Tighten the cylinder head nuts one after the
other in a crosswise pattern
1.1. Slacken off one nut at a time
1.2. Tighten nut to initial torque.................... 20 Nm
1.3. Tighten nut to specified wrench angle ...... 180
°
2.
Unfasten/retighten M10 screw .............. 40 Nm
Checking/adjusting valve operating
clearances
(Inspections I, II and III)
•
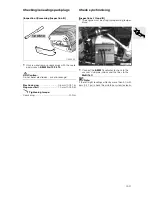
Check valve clearance with feeler gauge and, if
necessary, correct with adjusting nut/lock.
Adjust valve clearances with the engine cold
(max. 35
°
C/95
°
F):
Inlet ........................................... 0.15 mm (0.006 in)
Exhaust ..................................... 0.30 mm (0.012 in)
X
Tightening torque:
Locknut.......................................................... 8 Nm
•
After adjusting, check valve operating clearanc-
es again; it should be possible to pull the correct
feeler gauge through between the valve stem
and the adjusting screw with only slight resist-
ance.
•
Assemble in reverse order.
e
Caution:
Make sure that gasket is correctly seated. Gaskets
and sealing faces must be free from oil or grease.
X
Tightening torque:
Cylinder head cover ....................................... 8 Nm
C000210l
C000070
TDC
RS110980
Summary of Contents for R 1200 C
Page 1: ...BMW AG Motorcycle Division After Sales R 850 C R 1200 C Repair Manual ...
Page 4: ......
Page 18: ...00 10 ...
Page 40: ...11 4 ...
Page 47: ...11 11 Sectioned drawing of engine ...
Page 48: ...11 12 Lubricating oil circuit ...
Page 49: ...11 13 Coolant circuit ...
Page 50: ...11 14 ...
Page 61: ...11 25 Removing cylinder head RS110110 M6 x 30 M6 x 30 M6 x 30 M10 x 70 ...
Page 100: ...11 64 ...
Page 102: ...12 2 ...
Page 104: ...12 4 ...
Page 112: ...12 12 ...
Page 114: ...13 2 ...
Page 116: ...13 4 ...
Page 120: ...13 8 ...
Page 122: ...16 2 ...
Page 124: ...16 4 ...
Page 128: ...16 8 ...
Page 130: ...18 2 ...
Page 132: ...18 4 ...
Page 134: ...21 2 ...
Page 136: ...21 4 ...
Page 140: ...21 8 ...
Page 142: ...23 2 ...
Page 144: ...23 4 ...
Page 166: ...23 26 ...
Page 168: ...31 2 ...
Page 170: ...31 4 ...
Page 180: ...32 2 ...
Page 182: ...32 4 ...
Page 188: ...33 2 ...
Page 190: ...33 4 ...
Page 206: ...33 20 ...
Page 210: ...34 4 ...
Page 226: ...34 20 Removing and installing brake lines Removing and installing front brake line C340020 ...
Page 227: ...34 21 Removing and installing rear brake line C340030 ...
Page 230: ...36 2 ...
Page 232: ...36 4 ...
Page 240: ...36 12 ...
Page 242: ...46 2 ...
Page 244: ...46 4 ...
Page 254: ...51 2 ...
Page 257: ...52 1 Contents Page 52 Removing and installing seat 3 52 Seat ...
Page 258: ...52 2 ...
Page 260: ...52 4 ...
Page 262: ...61 2 ...
Page 263: ...61 3 61 Technical data R 850 C R 1200 C Battery Amp h 19 ...
Page 264: ...61 4 ...
Page 268: ...61 8 Wiring harness View from left C619020 1 2 3 ...
Page 269: ...61 9 1 C619021 ...
Page 270: ...61 10 2 C619022 ...
Page 271: ...61 11 3 C619023 ...
Page 272: ...61 12 Wiring harness View from right 1 2 3 C619030 ...
Page 273: ...61 13 1 C619011 ...
Page 274: ...61 14 2 C619012 ...
Page 275: ...61 15 3 C619013 ...
Page 276: ...61 16 ...
Page 278: ...62 2 ...
Page 280: ...62 4 ...
Page 282: ...62 6 ...
Page 284: ...63 2 ...
Page 286: ...63 4 ...
Page 288: ...63 6 ...


