Form
No.
1540-69
r9/29/17 ©
2017
Bobrick
Washroom
Equipment,
Inc. Printed
in
U.S.A.
Page 12
Stile
Stile
Panel
Front Headrail
Outswing Door
Return Headrail
*
End Cap
Stile
Stile
Panel
# 12 x 2''
St. Stl. Sheet-Metal
Screws
Stile
Stile
Panel
Return Headrail
Front Headrail
Headrail Bracket
Back Wall
# 12 x 7/16''
St. Stl.
Sheet-Metal
Screws
Wall
INSTALL HEADRAIL (IF APPLICABLE)
STEP 7
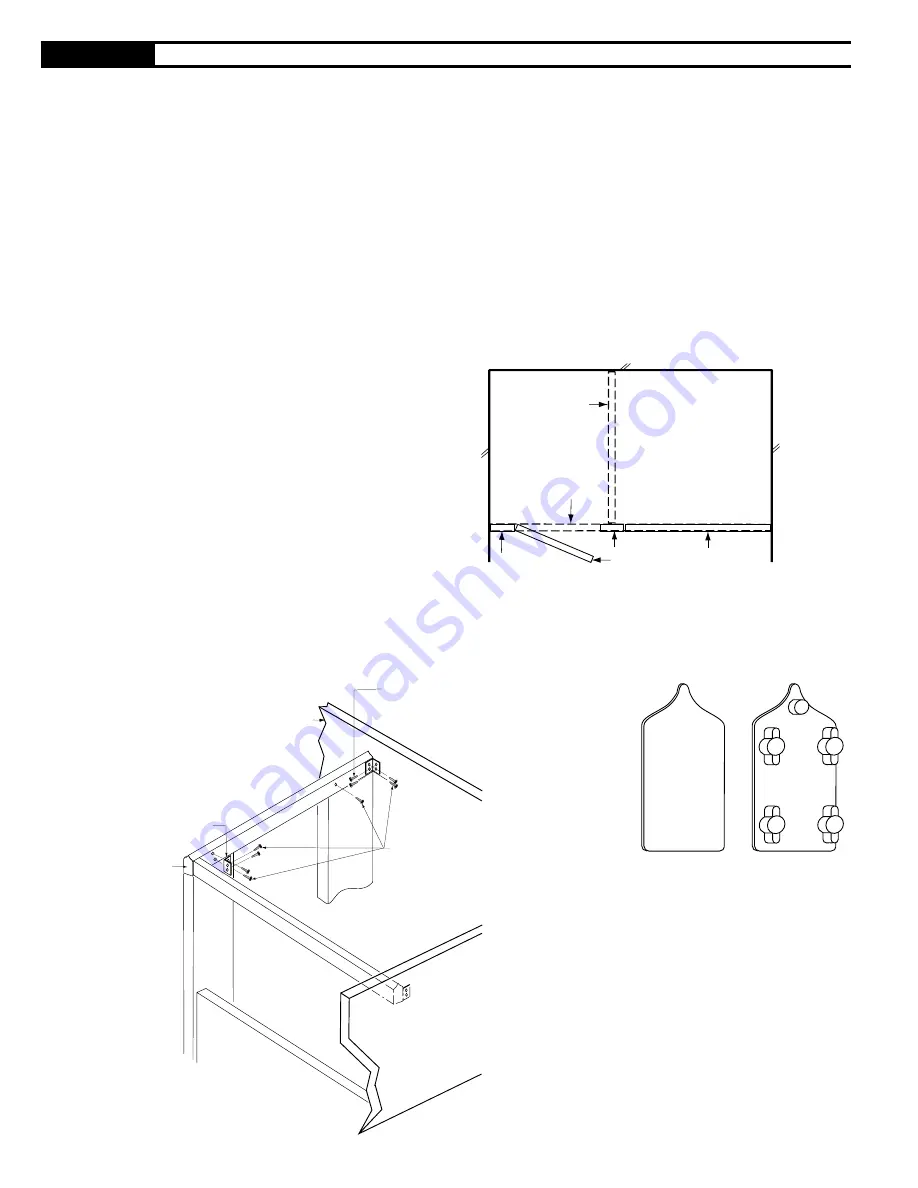
Fig. 7a: Alcove Configuration.
Fig. 7b: Headrail Installation Hardware.
Corner Configuration.
Back view
Front view
Fig. 7c: Detail of End Cap.
Note: Bobrick provides headrail in 84" (213cm) long
sections. Headrail seams must be located over stiles.
A. Measure wall-to-wall dimension less 1/4" (6mm). For
corner application, measure from wall to outside edge
of stile less 1/8" (3mm).
B. Place headrail over top of stiles
.
C. Drill 3/16" (.187) x 3/4" (4.7 x 19mm) pilot holes
through interior sides of headrail into stiles. Fasten
headrail to stile using #12 x 7/16" (M5.5 x 10mm)
screws.
D. For corner and alcove layouts, cut return headrail 1/8"
less than dimension from inner edge of headrail to the
back wall.
E. Using headrail L-bracket as a template, mark the
location for mounting holes in back of front headrail
and wall.
F. Drill 3/16" (.187) x 3/4" (4.7 x 19mm) pilot holes.
Fasten headrail L-bracket to stile using #12 x 7/16"
(M5.5 x 10mm) screws.
G. Drill 3/16'' (.187) x 2" (50mm) pilot holes in wall. Fasten
headrail L-bracket to wall using #12 x 2" (M5.5 x
50mm) screws.
H. Insert headrail return piece into headrail L-bracket.
Secure with #12 x 7/16" (M5.5 x 10mm) screws.
I. For corner layouts, install end cap to finish open
headrail end.


