background image

Form No. 715-69 Multi Language  (Rev. 3-29-16)    © 2016 Bobrick Washroom Equipment, Inc.    Printed in U.S.A.

Electrical Connection

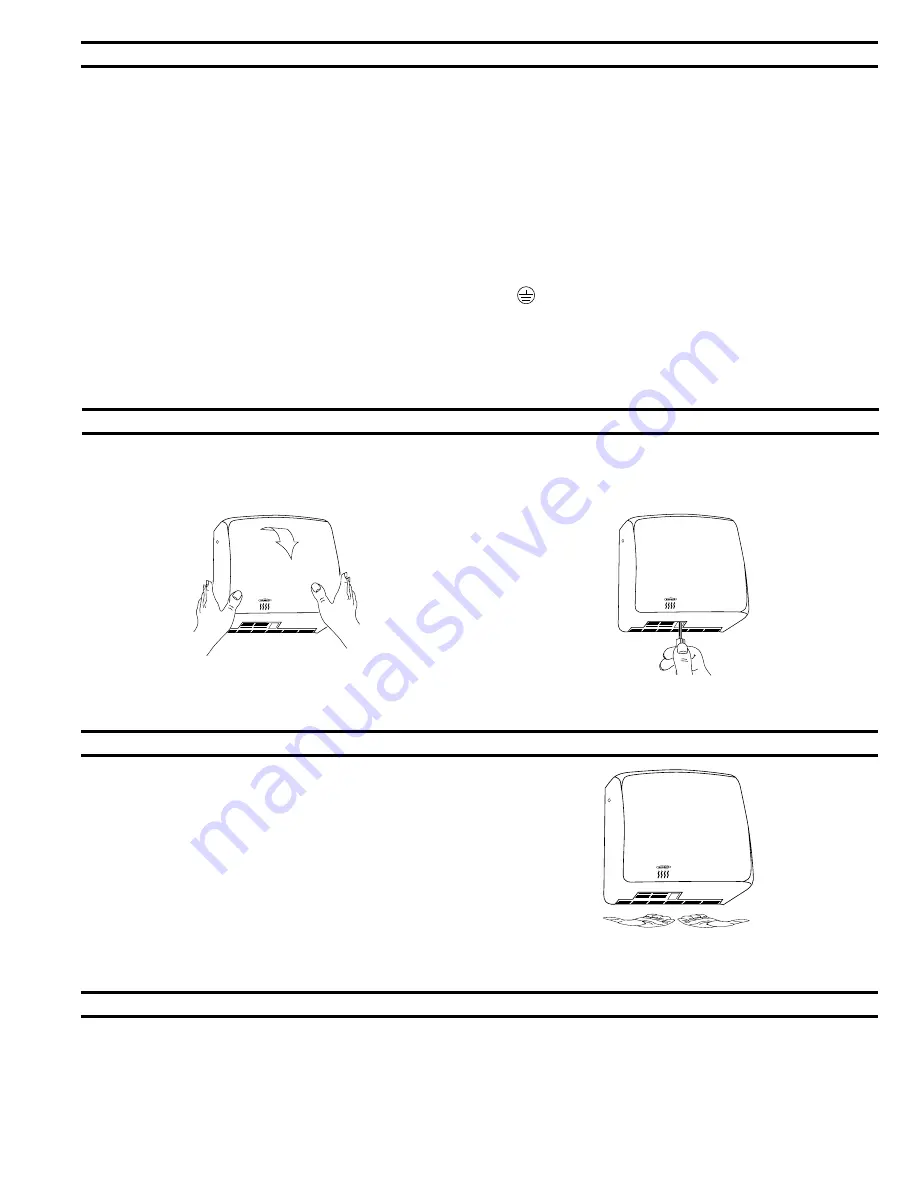
Replace Cover

Check Dryer Operation

Maintenance

3

for ProPer eLectricAL coNNectioNs, checK LocAL BuiLdiNG code. uNit must Be iNstALLed By A QuALified LiceNsed 
eLectriciAN

1. 

Connect dryer to nearest distribution panel. Use wire as required by local electrical code. In the United States and Canada use No. 12 wire or  

 larger.

2. 

Wiring Instructions:


a.  This appliance is intended for connection to fixed wiring.


b.  A fused means for disconnection in all poles must be provided in the fixed wiring in accordance with the wiring rules. 


c.  Check that the electrical rating shown on the Hand Dryer (rating label) is compatible with the electrical supply.


d.  WARNING: THE 115 Volt Dryer MUST BE EARTHED.


e.  Installation and wiring must conform to current IEE Regulations (UK), local or appropriate regulation (other countries).

 f. 

for 115 Volt dryers: 

Connect ground/earth supply the terminal marked       , the 

Live supply

 to terminal marked 

L

 and neutral supply to  


terminal marked 

N

A dedicAted LiNe is reQuired for eAch 115 VoLt dryer.


g. 

for 208–240 Volt dryers: 

Connect the 208-240 Volt wires to terminals marked 

L (L1)

 and 

N (L2)

.

3. 

Secure electrical wire in strain relief clamp provided on mounting base.

1.  Fit cover over mounting base. 

NOTE:

 Four sides of cover overlap the  

  mounting base and should be flush with the sides, top and bottom of  
  the mount ing base.

2. Replace and tighten three screws, one on each side and one on the   
  bottom to secure cover to mounting base.

1. Turn electrical power supply on.
2. Position hands under air-outlet, within 4'' (100mm) of the bottom of the dryer.
3. Dryer should turn on. Warm air should blow from air-outlet.
4. Remove hands from under air-outlet and dryer should stop (within 2 seconds).

1.   Exterior of cover should be cleaned with a damp cloth to remove dust and surface dirt. Do not use abrasive agents or solvents as  


they may permanently damage surface of cover.

2.   At least once every 6 months remove cover. Using a small brush or vacuum, clean out buildup of dust and lint from air-intake grille  


and baffle.

NOTE:

 if dryer is installed where there is a lot of dust and dirt in the air, the interior of the dryer should be cleaned out more frequently.

Summary of Contents for ELAN B-715

Page 1: ...ructions Elan Surface Mounted Hand Dryer Pages 2 3 Instrucciones De Instalación Secadores De Manos Para Montar Sobre Pared Bobrick Elan Pages 4 5 Einbauanleitung Bobrick Elan Aufputzmontierte Händetrockerner Pages 6 7 Instructions Puor L installation Bobrick Elan Seches Mains En Applique Pages 8 9 Istruzioni Per L installazione Asciugamani Automatici A Parete Bobrick Elan Pages 10 11 1 ...

Page 2: ...ng base has 1 2 square 13mm opening in lower right corner to accommodate connection of electrical conduit 4 Drill four holes for 10 M4 8 mounting bolts or screws not furnished 5 For masonry walls provide four 10 expansion shields or anchors and secure with four 10 M4 8 sheet metal screws not furnished For plaster or dry wall construction provide concealed backing to comply with local building code...

Page 3: ...nd neutral supply to terminal marked N A Dedicated line is required for each 115 Volt dryer g For 208 240 Volt Dryers Connect the 208 240 Volt wires to terminals marked L L1 and N L2 3 Secure electrical wire in strain relief clamp provided on mounting base 1 Fit cover over mounting base Note Four sides of cover overlap the mounting base and should be flush with the sides top and bottom of the moun...

Page 4: ...e montaje Modelo B 715 115V CA 15 A 1725 W 60 Hz Monofásico Clasificado cULus Modelo B 715E 220 240V CA 7 A 1500 1700 W 50 60 Hz Monofásico Aprobado VDE y marcado CE B 715E no está disponible en los Estados Unidos y Canadá Las instrucciones y el patrón proporcionan información que ayudan instalar los Secadores Bobrick B 715 115V B 715E 220 240V Retenga la hoja de instrucciones de instalación para ...

Page 5: ...rminal marcado el suministro eléctrico Con Corriente al terminal marcado L y el Neutro al terminal marcado N 3 Sujetar el cable eléctrico usando la abrazadera de alivio de tensión provista en la base de montaje ADVERTENCIA TENER EN CUENTA QUE LAS LAMINACIONES DEL MOTOR ESTÁN BAJO TENSIÓN DESCONECTAR LA ALIMENTACIÓN DE RED ANTES DE HACER CUALQUIER TRABAJO DE REVISIÓN O MANTENIMIENTO DEL SECADOR NO ...

Page 6: ...Löchern für Befestigungsschrauben an der Grundplatte Waschräume Männer 1170mm 46 Waschräume Frauen 1120mm 44 Waschräume Kinder von 3 9 Jahren 815mm 32 Waschräume Kinder von 9 12 Jahren 915mm 36 Waschräume Kinder von 12 15 Jahren 1015mm 40 Waschräume Kinder von 15 18 Jahren 1120mm 44 Für Behinderte 965mm 38 Modell B 715 115V WS 15 A 1725 W 60 Hz einphasig cULus geprüft Modell B 715E 220 240V WS 7 A...

Page 7: ...neten und den Neutralleiter mit der mit N gekennzeichneten Klemme verbinden 3 Befestigen Sie den Draht an der Zugentlastungsklemme die an der Grundplatte angebracht ist WARNHINWEIS ANKERFOLIEN SIND STROMFÜHREND SCHALTEN SIE DIE STROMVERSORGUNG AUS BEVOR IRGENDWELCHE WARTUNGS ODER INSTANDHALTUNGSARBEITEN AM TROCKNER AUSGEFÜHRT WERDEN DER TROCKNER DARF NUR BE ANGEBRACHTEM GEHÄUSE Die Installation mu...

Page 8: ...çonnerie prévoir quatre écrans ou ancrages N 10 puis fixer avec quatre vis à tôle N 10 M4 8 non fournies Pour les murs en plâtre ou maçonnerie sèche prévoir un renforcement dissimulé conforme aux codes locaux de construction et fixer avec quatre vis à tôle à tête ronde N 10 M4 8 ou cinq boulons articulés de 5 mm non fournis NOTA Utiliser des vis de 50 mm de long dans les deux trous de montage supé...

Page 9: ...la borne marquée L et l alimentation neutre à la borne marquée N 3 Fixer le câble électrique dans la pince de décharge des contraintes prévue sur le socle 1 Mettre l alimentation électrique sous tension 2 Placer les mains sous la trajectoire de l air à 100 mm de la partie inférieure du sèche mains 3 Le sèche mains doit se mettre en marche De l air chaud doit sortir de la soufflerie d air 4 Retirer...

Page 10: ...o NOTA L alimentazione elettrica a parete è posizionata nell angolo inferiore destro della base di montaggio Il fondo della base di montaggio è provvisto di un apertura quadrata di 13 mm in prossimità dell angolo inferiore destro per alloggiare il collegamento del tubo del cablaggio elettrico 4 Praticare quattro fori per i bulloni di montaggio 10 M4 8 o viti non forniti in dotazione 5 Per le paret...

Page 11: ...morsetto contrassegnato L e il cavo neutro al morsetto contrassegnato N 3 Fissare il cavo elettrico nel morsetto di protezione fornito sulla base di montaggio 1 Attivare l alimentazione elettrica 2 Posizionare le mani sotto lo sbocco d uscita dell aria ad una distanza non maggiore di 100 mm dal fondo dell asciugamano 3 L asciugamano dovrebbe accendersi Dallo sbocco di uscita dell aria dovrebbe usc...

Page 12: ...e Bobrick Washroom Equipment Inc ESTA GARANTÍA NO CUBRE DAÑOS ACCIDENTALES EL MANEJO O INSTALACIÓN INADECUADAS NI REPARACIONES POR PERSONAS NO AUTORIZADAS Y EXCLUYE ESPECÍFICAMENTE CUALESQUIER RECLAMOS POR DAÑOS INDIRECTOS ACCIDENTALES O CONSECUENCIALES A PROPIEDAD SE LIMITAN LAS GARANTÍAS IMPLÍCITAS DE COMERCIALIBILIDAD Y APTITUD PARA UN PROPÓSITO ESPECÍFICO A LA MISMA DURACIÓN QUE LA SUSODICHA G...

Page 13: ...éventif Pour toute réparation ou échange de pièce défectueuse envoyer la pièce avec la date d installation et le numéro de série à BOBRICK Warranty GARANZIA LIMITATA IMPORTANTE DA CONSERVARE Data dell installazione __________________________________________________________________________________________________________ N di serie ___________________________________________________________________...

Page 14: ...nue North Hollywood CA 91605 6213 Telephone 818 764 1000 FAX 818 503 9941 or email customerservice bobrick com In Canada BOBRICK WASHROOM EQUIPMENT COMPANY 45 Rolark Drive Scarborough Ontario M1R 3B1 FAX 877 423 8555 International BOBRICK WASHROOM EQUIPMENT INC 6901 Tujunga Avenue North Hollywood CA 91605 6213 818 764 1000 FAX 818 503 9941 BOBRICK WASHROOM EQUIPMENT Pty Ltd Australia 1 800 353158 ...

Reviews: