83
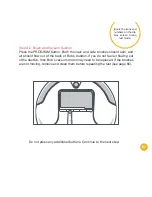
Step Two: Wall Sensors
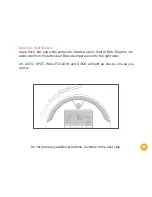
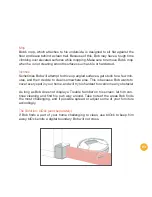
Use a thick, flat, and white surface to imitate a wall in front of Bob. Drag the imi-
tation wall from the left side of Bob's bumper around to the right side.
UV, AUTO, SPOT, WALL FOLLOW, and DOCK will light up one-by-one as you
do this.
UV
DIRT
TROUBLE NR.
CAPACITY
AUTO
SPOT
WALL FOLLOW
DOCK
MIN. CLEANING
CHARGING
READY
Do not press any additional buttons. Continue to the next step.
Summary of Contents for Bob PetHair
Page 1: ...OWNER S MANUAL bObsweep PetHair ...
Page 8: ...1 2 3 4 5 6 7 8 9 10 11 12 13 14 ...
Page 9: ...9 Top View 1 Bumper 2 Transmitter 3 Cover Buttons 4 Display Screen Bob s Anatomy 4 2 1 3 ...
Page 11: ...11 1 Remote Control 2 Charging Station 1 2 ...
Page 13: ...Get Bob Ready to Clean ...
Page 19: ...Remote Control ...
Page 24: ...Charging Bob ...
Page 32: ...Cleaning Modes ...
Page 39: ...Cleaning Schedule ...
Page 49: ...Parts Maintenance ...
Page 62: ...Sensors ...
Page 68: ...Troubleshooting ...
Page 89: ...Warranty Information ...

