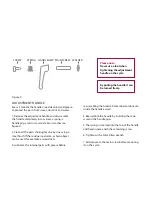
Please note
Do not over-
tighten the nuts.
They should only
be hand tight.
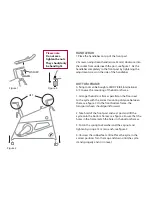
Figure 1
WASHER
LIFT
Figure 2
BOTTOM FRAME
A fi xing tool can be bought at BODY BIKE International
A/S to ease the mounting of the bottom frame.
1. Arrange the bottom frames parallel on the fl oor next
to the cycle with the correct mounting distance between
them, see fi gure 2. On the front bottom frame, the
transport wheels should point forward.
2. Take hold of the front post and seat post and lift the
cycle onto the bottom frames, see fi gure 2. Ensure that the
holes in the frame match the holes in the bottom frames.
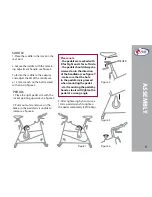
3: Put on the spring lock washer and the cap nut and
tighten by using a 13 mm wrench, see fi gure 3.
4: Unscrew the rubber feet a little. Place the cycle in the
correct position. Turn them up and down until the cycle
stands properly and it is in level.
HANDLEBAR
1: Place the handlebar on top of the front post.
2: Screw an adjustment handle (size 32mm) clockwise into
the socket from underneath the post, see fi gure 1. Fix the
handlebar completely to the front post by tightening the
adjustment screw on the side of the handlebar.
Figure 3


