background image

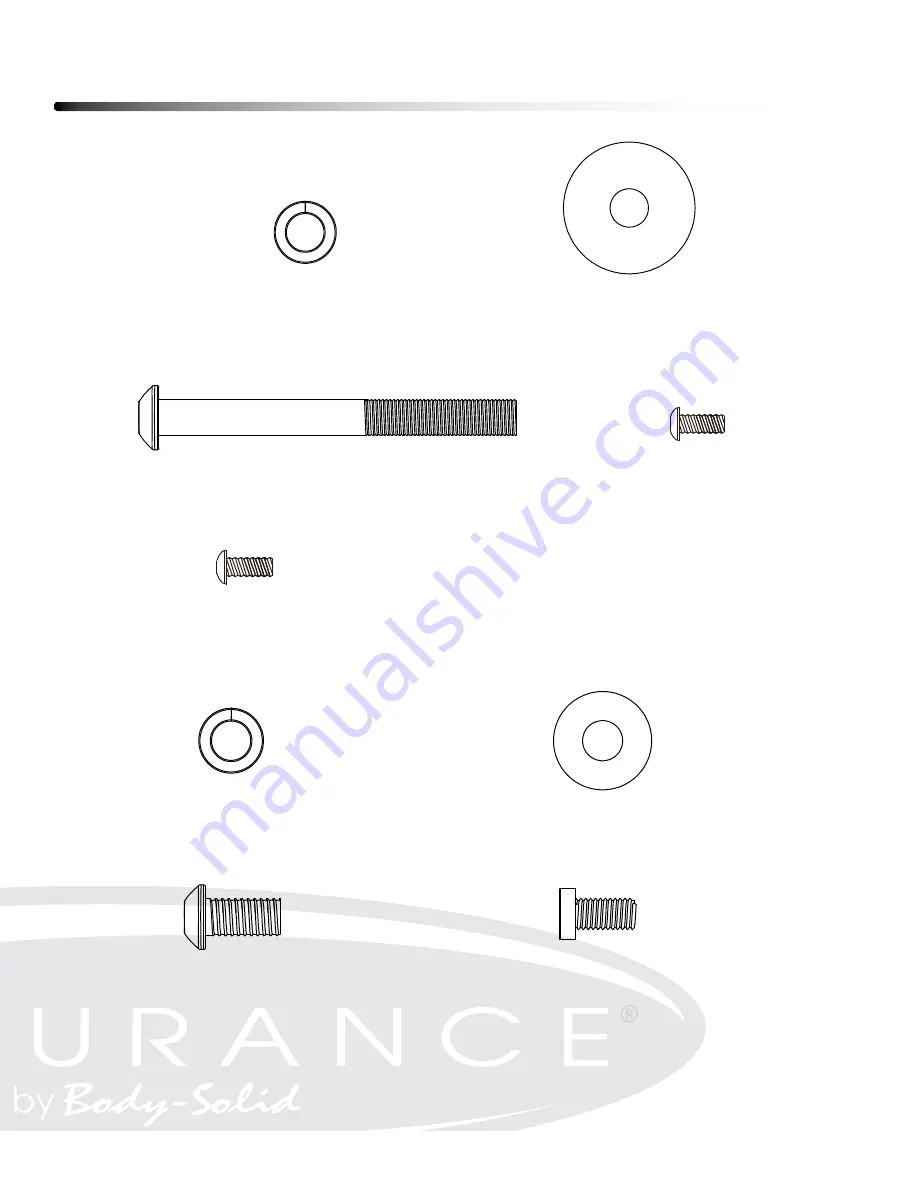
Hardware Pack Check List

11


-5- 

Assembly Pack Check List   

Step2 

Step3 

Step1 

#117 - 3/8" x16.5 x2.0T x4H 

Split Washer (6 pcs) 


#144 - 3/8”-16 x 3” 

Button Head Socket Bolt (6 pcs) 


#134 - M5 x 12mm 

Phillips Head Screw (4 pcs) 


#116 -

ψ

3/8" x 35 x 2T   

Flat Washer (6 pcs) 

#134 - M5 x 12mm 

Phillips Head Screw (4 pcs) 


#117 - 3/8" x16.5 x2.0T x4H 

Split Washer (6 pcs) 


#125 -

ψ

3/8" x25 x2T   

Flat Washer (6 pcs) 

#145 – 3/8”-16 x3/4” 

Button Head Socket Bolt (6 pcs) 


#146 – M8 x1.25x12mm 

Socket Head Cap Bolt (6 pcs) 


Summary of Contents for Endurance T100A

Page 1: ...v 091709 T100A Endurance T100A Treadmill User Manual v T100A 030513 PLEASE CAREFULLY READ THIS ENTIRE MANUAL BEFORE OPERATING YOUR NEW TREADMILL Z100 Z300 Z500 Z700 T100 OWNER S MANUAL ...

Page 2: ...g up your treadmill VIII OPERATING YOUR TREADMILL IX OPERATING THE CONSOLE X PROGRAM FEATURES XI TARGET HEART RATE XII CHEST STRAP OPERATION XIII HEART RATE CONTROL OPERATION XIV GENERAL MAINTENANCE XV TROUBLESHOOTING GUIDE XVI SETTING SERVICE GUIDE XVII PARTS LIST XVIII EXPLODED VIEW DIAGRAM 3 4 5 6 9 10 11 12 17 18 19 20 22 23 29 30 31 32 33 34 35 36 37 38 39 42 43 ...

Page 3: ...tions and designs are subject to change without notice Even though we have prepared this manual with extreme care neither the publisher nor the author can accept responsibility for any errors in or omission from the information given Reference Drawings 3 ...

Page 4: ... manuals in order to ensure that only superior products are released from our factories Please take the time to carefully read through this manual thoroughly Instructions contained in this document are not intended to cover all details or variations possible with Endurance Equipment or to cover every contingency that may be met in conjunction with installation operation maintenance or troubleshoot...

Page 5: ...ir Never drop or insert objects into any opening in the equipment Always check the unit before each use Make sure that all fasteners are secure and in good working condition Do not use the equipment outdoors or near water Personal Safety During Assembly It is strongly recommended that a qualified dealer assemble the equipment Assistance is required Before beginning assembly please take the time to...

Page 6: ...port and loose fitting breathable clothing will reduce the risk of injury Maintaining equipment in proper operating condition is of utmost importance for a safe cardio training program Read and study all warning labels on this machine It is absolutely necessary that you familiarize yourself and all others with the proper operation of this machine prior to use Keep hands limbs loose clothing and lo...

Page 7: ...d it must be held in place by a metal screw Important Electrical Information Grounding Instructions ELECTRICAL SAFETY WARNING NEVER use a RCD Residual Current Device U S ver GFCI wall outlet with this treadmill As with any appliance with a large motor the RCD GFCI will trip often Route the power mains cord away from any moving part of the treadmill including the elevation mechanism and transport w...

Page 8: ...ung children off the treadmill at all times Exercise equipment has many moving parts In the interest of safety keep others especially children and pets at a safe distance while you exercise FCC WARNING POSSIBLE RADIO TELEVISION INTERFERENCE NOTE This equipment has been tested and found to comply with Part 15 of the FCC rules These limits are designed to provide reasonable protection against harmfu...

Page 9: ... operate the unit Always hold on to a handrail or hand bar while making control changes incline speed etc Do not use excessive pressure on console control keys They are precision set to function properly with little finger pressure Pushing harder is not going to make the unit go faster or slower If you feel the buttons are not functioning properly with normal pressure contact your dealer SAFETY TE...

Page 10: ... may have extra holes that you will not use Use only those holes indicated in the instructions and illustrations NOTE To find out the length of a particular bolt measure its shank the long narrow part beneath the head Refer to the following diagram Do not fully tighten bolts until instructed to do so NOTE After assembly you should check all functions to ensure correct operation If you experience p...

Page 11: ...8 16 x 3 Button Head Socket Bolt 6 pcs 134 M5 x 12mm Phillips Head Screw 4 pcs 116 ψ3 8 x 35 x 2T Flat Washer 6 pcs 134 M5 x 12mm Phillips Head Screw 4 pcs 117 3 8 x16 5 x2 0T x4H Split Washer 6 pcs 125 ψ3 8 x25 x2T Flat Washer 6 pcs 145 3 8 16 x3 4 Button Head Socket Bolt 6 pcs 146 M8 x1 25x12mm Socket Head Cap Bolt 6 pcs ...

Page 12: ... right upright 34 is with preinstalled lower computer cable A To install uprights on the frame base special care must be taken not to pinch the cable between the upright and frame base B Attach Left Upright 33 to Frame Base using One Retaining Plate 98 Three 3 8 16 x 3 Button Head Socket Bolts 144 Three 3 8 Lock Washers 117 Three 3 8 Flat Washers 116 C Attach Motor Base Caps 26 27 to Frame Base us...

Page 13: ...Above shows STEP 1 assembled and completed Step 1 13 ...

Page 14: ...sented A Connect Upper Computer Cable B 41 Hand Pulse Assembly C D 37 38 Touch Pad Backlit Cable E 43 and Groud Wire F 35 to the board on on back of the console 28 B Attach Console Assembly 28 to Console Support 5 using Four M5x12mm Phillips Head Screws 134 Step 2 14 ...

Page 15: ...Above shows STEP 2 assembled and completed Step 2 15 ...

Page 16: ... to Mounting Brackets 3 4 using Six M8x12mm Socket Head Cap Screws 146 B Connect Upper Computer Cable F 41 to Lower Computer Cable A 42 C Attach the Mounting Brackets 3 4 to the Uprights using Six 3 8 16 x 3 4 Button Head Socket Bolts 145 Six 3 8 Lock Washer 117 Six 3 8 Flat Washer 125 Step 3 16 ...

Page 17: ...Above shows STEP 3 assembled and completed Step 3 17 ...

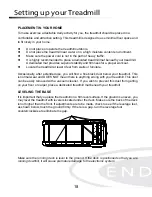
Page 18: ...k dust below your treadmill This is normal wear and DOES NOT mean there is anything wrong with your treadmill This dust can be easily removed with a vacuum cleaner If you wish to prevent this dust from getting on your floor or carpet place a dedicated treadmill mat beneath your treadmill LEVELING THE BASE It is important that you place the treadmill on a firm level surface If the ground is uneven ...

Page 19: ...f the treadmill to a comfortable angle 4 Simply roll the treadmill on its front two wheels to the desired location 5 Gently lower the rear of the treadmill to ground level STORE YOUR TREADMILL Please follow these safety precautions especially if you have children at home We suggest to take the following precautions when storing your treadmill 1 When you finish your workout turn the power switch to...

Page 20: ...ill will then enter idle mode which is the starting point for operation Operation of Your Treadmill 20 Getting familiar with the control panel Console Getting Started Power the treadmill on by plugging it into an appropriate wall outlet then turn on the power switch located at the front of the treadmill below the motor hood Ensure that the safety key is installed as the treadmill will not power on...

Page 21: ...the STOP button is pressed a third time the console will return to the idle mode start up screen If the STOP button is held down for more than 3 seconds the console will reset When you are setting data such as age and time for a program pressing the STOP key will allow you to go back one step for each key press Incline Incline may be adjusted anytime after the belt starts moving Press and hold the...

Page 22: ...d anytime the computer is receiving a Grip Pulse signal You may use the Grip Pulse feature while in Heart Rate Control The TREADMILL will also pick up wireless heart rate transmitters that are Polar compatible Heart Rate Bar Graph Displays a graphical representation of your heart rate as a percentage of your maximum heart rate When you enter your age during programming the console will calculate y...

Page 23: ...window will now be blinking a value indicating your Age Entering the correct Age will affect the Heart rate bar graph accuracy and also needed for the HR pro grams Use the UP DOWN FAST SLOW keys to adjust you can also use numeric keypads 0 9 on the console to make adjustments and then press ENTER The INCLINE window will now be blinking a value indicating your Bodyweight Entering your correct bodyw...

Page 24: ...0 mph Prog SEG Warm up 1 2 3 4 5 6 7 8 9 10 11 12 13 14 15 16 17 18 19 20 21 22 23 24 Cool down P1 Speed 2 0 30 40 50 60 60 70 70 70 80 80 70 80 80 100 100 70 80 80 70 70 80 80 70 60 60 50 40 30 20 Incline 0 0 0 0 1 2 3 3 4 3 3 4 4 5 3 3 4 3 3 4 4 5 4 3 1 1 0 0 0 0 P2 Speed 2 0 30 40 50 60 60 70 80 100 100 100 100 100 100 100 100 100 100 100 100 100 100 100 80 70 60 50 40 30 20 Incline 0 0 0 0 1 2...

Page 25: ...the message window will show PRESS 1 OR 2 TO SELECT THEN PRESS ENTER You can choose U1 or U2 for setting by pressing 1 or 2 button then ENTER button Note that the dot matrix display portion will light a single row of dots at the bottom Unless there is a previously saved program After pressing ENTER button the message window will show ADJUST TIME THEN PRESS ENTER with TIME window is blinking Use th...

Page 26: ...e segments for incline When the setting is completed the message window will show PRESS START TO BEGIN WORKOUT OR ENTER TO MODIFY Press the START button to begin the work out and also save the program to memory 5 Km and 10Km Run This program automatically sets a 5K or 10K 5 or 10 kilometer distance as your goal The track display will show one loop that is the equivalent of 5 or 10 kilometers and t...

Page 27: ...evation alterna you reach 85 of your Target heart rate THR THR 220 AGE x0 85 The time it takes reach THR determines the test score as shown in the chart below Stage Time Speed Grade VO2 Max 1 0 to 1 00 4 5mph 0 31 15 2 1 1 15 4 5mph 2 32 55 2 2 1 30 4 5mph 2 33 6 2 3 1 45 4 5mph 2 34 65 2 4 2 00 4 5mph 2 35 35 3 1 2 15 5 0mph 2 37 45 3 2 2 30 5 0mph 2 39 55 3 3 2 45 5 0mph 2 41 3 3 4 3 00 5 0mph 2...

Page 28: ...w asked to enter your Weight You may adjust the weight setting by using UP DOWN FAST SLOW keys or numeric keys with the adjustment shown in the IN CLINE window then press ENTER to continue 4 Now press START to begin the test During the test The console must be receiving a steady heart rate for the test to begin You may use the hand pulse sensors or wear a heart rate chest strap transmitter The tes...

Page 29: ...28 below average 37 41 35 39 31 34 29 31 26 29 22 25 poor 30 36 30 34 26 30 25 28 22 25 20 21 very poor 30 30 26 25 22 20 VO2max for female and non fitted male 18 25 26 35 36 45 46 55 56 65 65 years old years old years old years old years old years old excellent 56 52 45 40 37 32 good 47 56 45 52 38 45 34 40 32 37 28 32 above average 42 46 39 44 34 37 31 33 28 31 25 27 average 38 41 35 38 31 33 28...

Page 30: ...ine your pulse rate per minute It is recommend to take a heart rate measurement at rest after warming up during the workout and two minutes into cooling down after the workout to accurately track progress as it relates to better fitness During your first several months of exercising the AHA recommends aiming for the lower part of the target heart rate zone 60 then gradually progressing up to 75 Ac...

Page 31: ...ional can help you determine the exercise intensity that is appropriate for your age and condition MHR MaximumHeartRate THR TargetHeartRate 220 Age MaximumHeartRate MHZ MHZ x 60 60 ofyourMaximumHeartRate MHZ x 75 75 ofyourMaximumHeartRate For example if you are 30 years old your calculations will be as follows 220 30 190 190 x 60 114 Low End or 60 of MHZ 190 x 75 142 High End or 75 of MHZ 30Year O...

Page 32: ...TIONS AND TIPS FOR CHEST STRAP 1 It is the owner s responsibility to ensure that all users of this unit have read the Owner s Manual and are familiar with warnings and safety precautions 2 Do not place chest strap near devices that generate large magnetic fields TV sets electric motors radios and high voltage power lines can affect the transmitter s perfor mance These items can interfere with the ...

Page 33: ...button to execute the program When ENTER button is pressed the message window shows PRESS 1 OR 2 TO SELECT THEN PRESS ENTER At the same time the dot matrix window is showing 1 and you can press numeric keypad 1 or 2 and then ENTER button Now message window is showing ADJUST TIME THEN PRESS ENTER with TIME window is blinking Use UP DOWN FAST SLOW keys or numeric keys to adjust After set ting time p...

Page 34: ...cause belt damage and premature bearing failure 21 Belt and Bed Your treadmill uses a very high efficient low friction bed Performance is maximized when the bed is kept as clean as possible Use a soft damp cloth or paper towel to wipe the edge of the belt and the area between the belt edge and frame Also reach as far as practical directly under the belt edge This should be done once a month to ext...

Page 35: ...r the tread belt Adjustments will become less of a maintenance concern as the belt is used Proper belt tracking is an owner responsibility common with all treadmills ATTENTION DAMAGE TO THE RUNNING BELT RESULTING FROM IMPROPER TRACKING TENSION ADJUSTMENTS IS NOT COVERED UNDER THE WARRANTY T TRACKING ADJUSTMENT ce of your treadmill is dependent on the frame running on a reasonably level rame is not...

Page 36: ...belt may be loose Motor is not responsive after pressing start 1 If the belt moves but stops after a short time and the display shows Low Speed run calibration See procedure on next page 2 If you press start and the belt never moves then the display shows Low Speed contact service Treadmill will only achieve approximately 7 mph but shows higher speed on display This indicates motor should be recei...

Page 37: ...djusting the speed sensor If the calibration does not pass you may need to check the speed sensor alignment 1 Release motor cover screws screws are not necessarily taken apart and remove the motor cover hood 2 The speed sensor is located on the left side of the frame right next to the front roller pulley the pulley will have a belt around it that also goes to the motor The speed sensor is small an...

Page 38: ...ction This function locks out the keypad until a pre determined key sequence is pressed When Child Lock is on at the time power is on and before idle mode MW will displays CONSOLE LOCKED you must press numeric key 0 and Enter at the same time to unlock console and return to idle mode 5 Press STOP key to exit and return idle mode Setting mileage lock 1 Remove the safety key press and hold numeric k...

Page 39: ...Belt 1 17 122 39 1390m m_Aluminum Step Rail 2 18 125 29 1390m m_Aluminum Step Rail 2 19 Hall Sensor Mounting Bracket 1 20 Transportation Wheel 4 21 Leveling Glide 2 22 Rubber Stop Incline 2 23 Emergency Switch 1 24 Front Cover 1 25 Motor Top Cover 1 26 Motor Base Cap L 1 27 Motor Base Cap R 1 28 Console Assembly 1 29 Console Top Cover 1 30 Console Bottom Cover 1 31 Beverage Holder L 1 32 Beverage ...

Page 40: ...47 Incline Interface Board 1 48 Filter 1 49 Choke 1 50 Motor Compartment Fan 1 51 O ring for eliminate magnet 2 52 A C Input Module 1 53 450m m_Connecting Wire White 1 54 450m m_Connecting Wire Black 1 55 300m m_Motor Compartment Fan Wire Black 1 56 300m m_Motor Compartment Fan wire White 1 57 300m m_Connecing Wire Inverter Power Cord White 1 58 300m m_Connecing Wire Inverter Power Cord Black 1 59...

Page 41: ...ad Bolt 1 106 M10 50LHex Head Bolt 1 107 Ø10 1 5T_Split Washer 6 108 Ø10 Ø19 1 5T_Flat Washer 8 109 M10 8 0T_Nylon Lock Nut 2 110 Ø10 Ø24 2T_Nylon Washer 2 111 3 8 16 1 1 2 _Socket Head Cap Bolt 4 112 3 8 2 1 2 _Hex Head Bolt 1 113 3 8 16 2 _Socket Head Cap Bolt 1 114 Ø10 Ø14 14L_Isolation Bushing 5 115 13 35 5T_Nylon Washer 9 116 Ø3 8 35 2T_Flat Washer 11 117 3 8 16 5 2 0T 4H_Lock Washer 17 118 3...

Page 42: ...w 18 135 M5_Nylon Lock Nut 2 136 3 5 12L_Tapping Screw 2 137 M5 1 5T_Tapping Screw 2 138 M5 1 5T_Split Washer 8 139 M5_Star Washer 4 140 3 20L_Tapping Screw 4 141 M5 12L_Tapping Screw 6 142 3 5 12L_Sheet Metal Screw 19 144 3 8 16 3 _Button Head Socket Bolt 6 145 3 8 16 3 4 _Button Head Socket Bolt 6 146 M8 1 25 12L_Socket Head Cap Bolt 6 147 Phillips Head Screw Driver 1 148 8m m_L Allen Wrench 1 1...

Page 43: ...Exploded View Diagram 43 ...

Page 44: ...andpatentpendingfeaturesanddesigns Allrightsreservedonalldesignpatentsandutilitypatents CustomerTechSupportHotline Toll Free 1 800 556 3113 Phone 1 708 427 3555 Fax 1 708 427 3556 Hours M F 8 30 5 00 CST E Mail service bodysolid com Serial Number is Located on the Frame Model Name T100A Purchase Date _______________________________ Serial Number 008410 _______________________ ...

Reviews: