background image

9

Adaptor and Battery Information

9-volt AC Adaptor 
Because  the current consumption is high for the IF unit, it is recommended to use the 
9-volt AC adaptor. Place the AC plug into the AC jack of the unit, and plug the adaptor into a 
110-volt wall outlet. Please be sure to use the correct polarity for the AC plug.
Battery 
A 9-volt disposable battery is also provided with your unit. When the low-battery indicator 
appears, the battery has become too weak to power the unit and will need to be changed. 
At this point, the unit will shut off until a new battery is inserted.
Note: Due to the high output of this device, the 9-volt battery will run out of power 
quickly. The 9-volt AC adaptor is the recommended power source.

Changing the Battery

When the low-battery indicator appears on the LCD panel, the battery should be replaced 
with a new battery.
1.  Remove the slide cover by pressing the top and sliding down until it is completely 

removed from the unit. This will reveal the battery compartment.

2.  Remove the old battery from the device.
3.  Place a new battery in the compartment. Note the proper polarity alignment 

indicated on the battery and the compartment.

4.  Make sure to safely dispose of the old battery.

Troubleshooting

If the device does not function properly:
1.  Make sure the battery is properly installed, or replace the battery. Be sure to 

observe proper polarity markings when replacing the battery. If the low-battery 
indicator appears  when the unit is turned on, replace the battery and recheck.

2.  If the intensity has been adjusted and there is no stimulation, check that the lead 

wires are properly connected and the electrodes are in place. If the unit appears to 
be functioning and no stimulation occurs, the lead wires or electrodes may need to 
be replaced.

3.  If the battery appears to be charged and the unit is not functioning, turn both 

Amplitude Control Knobs to the OFF position (counterclockwise) for about 5 
seconds. Next, gradually turn the Amplitude Control Knobs clockwise until 
stimulation is felt. If device is still is not working, turn the unit off and contact 
BodyMed.

Summary of Contents for ZZAIF400

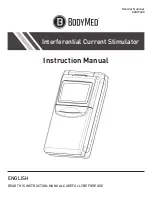
Page 1: ...ENGLISH READ THIS INSTRUCTION MANUAL CAREFULLY BEFORE USE Instruction Manual Interferential Current Stimulator Reorder Number ZZAIF400...

Page 2: ...y 3 Indications and Contraindications 4 Warnings Precautions 5 About the Device 6 Device Controls 6 Attaching the Lead Wires 7 Electrode Selection and Care 7 Connecting the Device 8 Cleaning the Devic...

Page 3: ...ctrical stimulation General Description Your BodyMed ZZAIF400 unit is warranted to be free from defects in materials and workmanship occurring within one year from date of purchase when used in strict...

Page 4: ...nt to flow trans cerebrally through the head Indications and Contraindications Limited Product Warranty continued BodyMed MAKES NO OTHER WARRANTY EXPRESS OR IMPLIED INCLUDING WITHOUT LIMITATION ANY IM...

Page 5: ...protective mechanism Interferential devices should be used only under the continued supervision of a physician or licensed practitioner Do not use on broken skin Effectiveness is highly dependent upo...

Page 6: ...for Mode Time Width and Rate Press the front of the cover and pull down to open the cover Amplitude Controls The Amplitude Control Knobs are located on the top of the unit under the cap The Amplitude...

Page 7: ...to maintain stimulation and prevent skin irritation The packaging will provide instructions for care maintenance and proper storage of the electrodes Be sure to use the electrodes provided by BodyMed...

Page 8: ...ad wire into the channel output receptacle to be used pushing plug in as far as it will go 5 Select treatment settings Check that the unit is set to the proper settings as recommended by your physicia...

Page 9: ...the unit This will reveal the battery compartment 2 Remove the old battery from the device 3 Place a new battery in the compartment Note the proper polarity alignment indicated on the battery and the...

Page 10: ...able 0 80mA peak into 500 load each channel constant current Carrier Frequency 4000 Hz fixed CH1 Modulating Frequency 4004 4160 Hz Adjustable CH2 IF Frequency Mode Constant Mode 4 160 bps Adjustable A...

Page 11: ...lse frequency varies from 30 to 60 of the set pulse frequency Six seconds at the lower frequency and six seconds at the higher frequency The transition is abrupt square wave function 3 6 6 ramped shif...

Page 12: ...Distributed by BodyMed Hudson Ohio 44236 1 866 528 2152 Made in Taiwan Reorder Number ZZAIF400...

Reviews: