background image

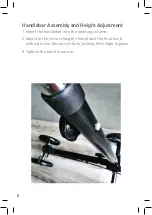
Handlebar Assembly and Height Adjustment

1. Insert the handlebar into the steering column.
2.  Adjust to the correct height, then attach the final knob 

with a pin into the correct hole, locking the height in place. 

3. Tighten the knob to secure.  

8

Summary of Contents for ZZRWAL03E

Page 1: ...Knee Walker ZZRWAL03E Instruction Manual...

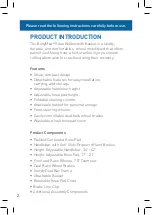
Page 2: ...knee pad height Foldable steering column Attachable basket for personal storage Front steering wheels Easily controllable dual back wheel brakes Washable plush knee pad cover Product Components Padde...

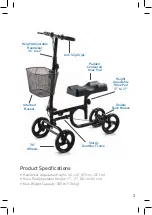
Page 3: ...Pad 17 to 21 Sturdy Dual Bar Frame Attached Basket 7 8 Wheels Height Adjustable Handlebar 34 to 42 Anti Slip Grips Product Specifications Handlebar Adjustable Height 34 42 87 cm 107 cm Knee Pad Adjus...

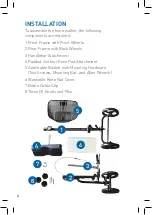
Page 4: ...Frame with Front Wheels 2 Rear Frame with Back Wheels 3 Handlebar Attachment 4 Padded Contour Knee Pad Attachment 5 Attachable Basket with Mounting Hardware Two Screws Mounting Bar and Allen Wrench 6...

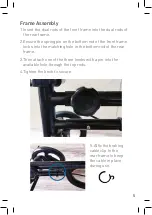
Page 5: ...in on the bottom rod of the front frame locks into the matching hole in the bottom rod of the rear frame 3 Then attach one of the three knobs with a pin into the available hole through the top rods 4...

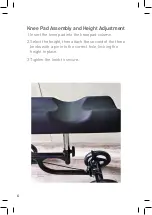
Page 6: ...d Height Adjustment 1 Insert the knee pad into the knee pad column 2 Select the height then attach the second of the three knobs with a pin into the correct hole locking the height in place 3 Tighten...

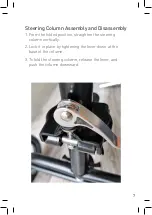
Page 7: ...sassembly 1 From the folded position straighten the steering column vertically 2 Lock it in place by tightening the lever down at the base of the column 3 To fold the steering column release the lever...

Page 8: ...and Height Adjustment 1 Insert the handlebar into the steering column 2 Adjust to the correct height then attach the final knob with a pin into the correct hole locking the height in place 3 Tighten t...

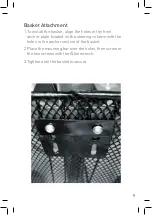
Page 9: ...the holes in the front anchor plate located on the steering column with the holes in the anchor section of the basket 2 Place the mounting bar over the holes then screw in the two screws with the Alle...

Page 10: ...ake levers on the handlebars tightly and test to ensure the brakes are working on the back wheels How To Use 1 Before use set the parking brake 2 Place your hands on the handlebars 3 Position the knee...

Page 11: ...se the knee walker to flip over 7 Ensure all connecting parts are not damaged before use 8 Do not operate near stairs 9 Do not operate when taking medication that may cause dizziness or unbalanced wal...

Page 12: ...TY OF MERCHANTABILITY OR FITNESS FOR A PARTICULAR PUPOSE ALL SUCH WARRANTIES BEING HEREBY EXPRESSLY EXCLUDED The warranty described above does not extend to the normal wear of the product or if the pr...

Reviews: