


Maintenance
Filter Replacement
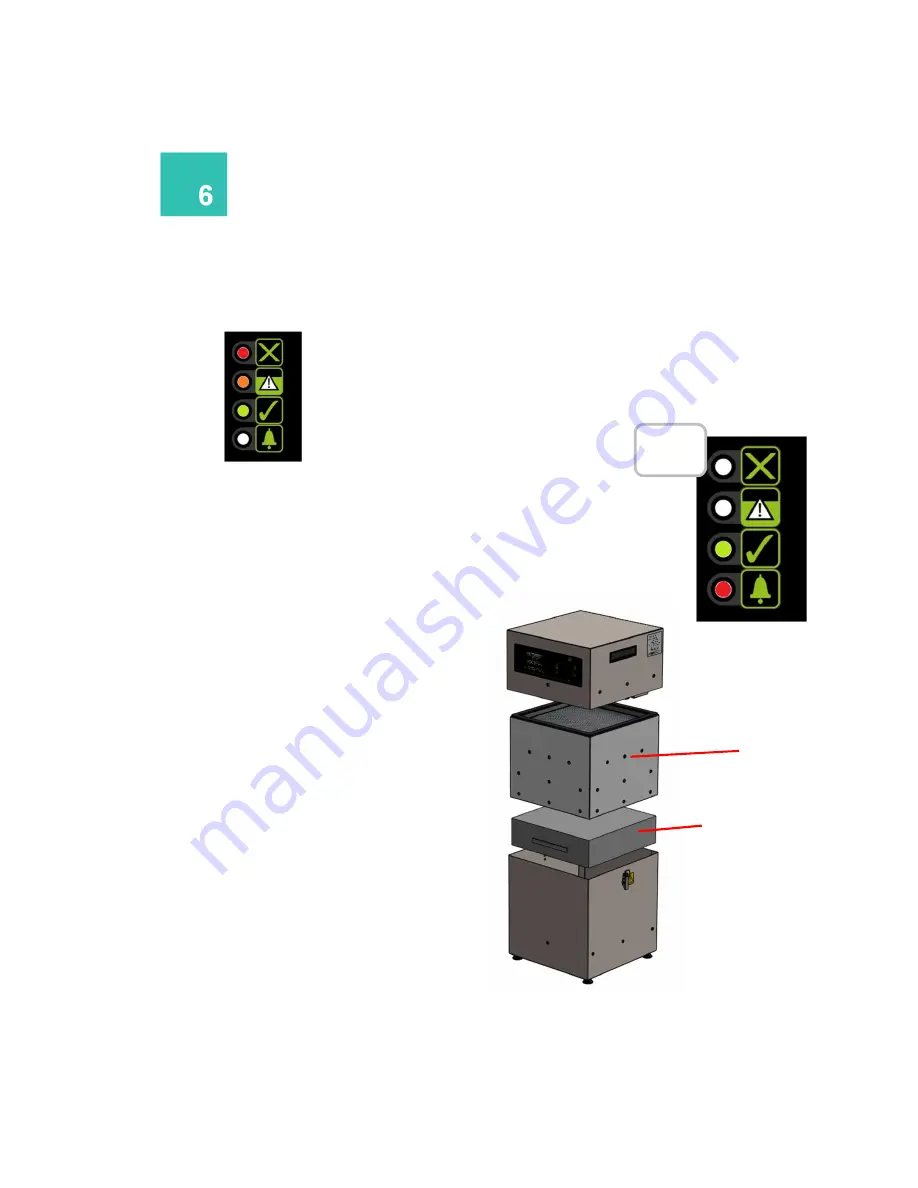
During use, the V600 will alert the user when its filter needs
replacing. When the filter needs to be changed, the LED to
the left of the bell symbol will glow red.
To remove and replace the pre filter follow the procedure
detailed below.
1.
Isolate the electrical supply to the unit.
2.
Undo the latches on either side of the unit and lift
the motor section off.
3.
Remove the filters from the base.
4.
Vacuum out any dust in the base.
5.
Remove the pre filter from inside the combined
filter and replace with a new pre filter.
6.
Locate the combined filter into the base.
7.
Replace the motor section and fasten the latches.
8.
Reconnect the power supply.
To remove and replace the combined filter follow the
procedure detailed below.
1.
Isolate the electrical supply to the extractor
2.
Undo the two clips on the sides of the unit and
remove the motor section using the two handles on
the sides of the lid.
3.
Lift the filter out of the unit. Once removed it is
recommend that the used filters are bagged and
sealed.
4.
Lower the new filter into position. If the current pre
filter is found to be serviceable place into the new
combined filter.
5.
Replace the motor section, and fasten the two clips.
If the VOC (Volatile Organic Compound) alarm option is
installed in your V600 unit, the extractor will monitor and
detect the level of VOC particles in the air. If the VOC level
rises above a pre-set level then the LED to the right of the
bell symbol will illuminate red. This requires the
replacement of the filter.
Note: The unit needs to be set at above 75% power for
the filter condition LEDs to function.
Note: The filter MUST be fitted when the extractor is in
use.
02
VOC
Alarm
Pre Filter
Combined Filter
Summary of Contents for V600
Page 1: ...V600 Issue 2 Jan 2017 ...
Page 2: ......


