background image

BOGE Operating instructions for C 15 series screw compressors

Page 1

General

1.1

General safety instructions

Part 1: General

1.1 General safety instructions

Safety instructions for 
operation

Compressor

1. Ensure that no commissioning and maintenance work on the compressor 

is undertaken until these operating instructions are understood.

2. Only use the compressor for its intended use, as described in these oper-

ating instructions.

3. The owner must ensure,

that only appropriately trained and authorized personnel work on this 
compressor,

that no persons work on this compressor, whose ability to react is re-
stricted due to misuse of e.g. drugs, alcohol, medication etc.,

that the operating, maintenance and repair personnel has been made 
fully familiar with all safety instructions, and that they are being ob-
served,

that the compressor is only operated in a safe operating condition.

4. Avoid any operating method which may impair the safety of the compres-

sor.

5. Always wear your compulsory personal protective quipment as a protec-

tion against injuries from sharp corners or edges when working on the 
compressor.

6. To avoid dangers from debris or parts lying around, the service area of the 

compressor has always to be kept tiedied up and clean.

7. Always squat when working on components mounted at low height, never 

stoop. When working on components mounted higher up always stand up-
right and erect.

8. Do not exceed the limit value for the final compression pressure specified 

on the type plate.

9. Do not operate the compressor without the attendant protection and safety 

devices.
Do not dismantle any built-in safety devices or put them out of operation. 


Ensure that all safety claddings and doors are closed prior to commission-
ing/starting up the compressor and that they are not opened during oper-
ation.

10. Place the compressor out of operation as described in these operating in-

structions, when dismantling the safety claddings or safety devices for re-
pair or maintenance work. Reattach and close all cladding and safety de-
vices immediately upon completion of the repair or maintenance work.

11. Only operate the compressor using the additional equipment (options) rec-

ommended or authorized by the manufacturer.

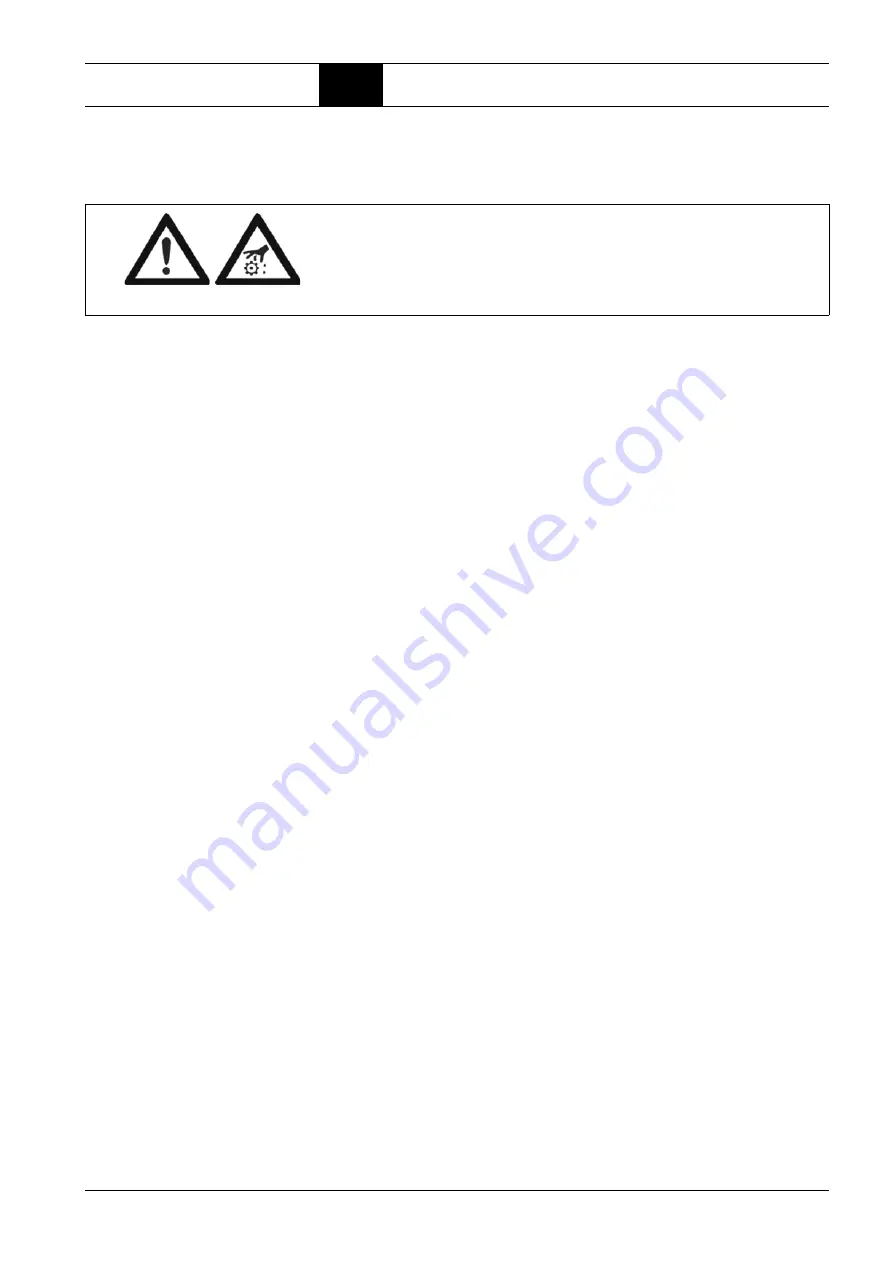
WARNING!

Nonobservance of the following safety instructions may lead to injuries and 
damage to the compressor.
Also observe the generally valid safety and accident prevention regulations 
in addition to the information in these operating instructions!

Summary of Contents for C 15

Page 1: ...www boge com Operating instructions Belt driven screw compressors C 15 C 15 F Separate manuals Compressor control Frequency converter C F ...

Page 2: ......

Page 3: ...rating instructions for belt driven screw compressors C 15 15 Hp C 15 F 15 Hp BOGE KOMPRESSOREN Postfach 10 07 13 D 33507 Bielefeld Otto Boge Straße 1 7 D 33739 Bielefeld Fon 49 5206 601 0 Fax 49 5206 601 200 Mail info boge com Net www boge com Issue 03 2012 No 596 1192 18 ...

Page 4: ......

Page 5: ... Introduction 6 Symbols used 7 Symbols on the compressor 8 Intended use 13 Foreseeable Misuse 13 Transport damage 14 Data on the type plate 14 Service 14 Part 2 Product description 2 1 Technical data compressor 15 2 2 Function description compressor 16 Function principle of the air end 16 Air circuit 17 Oil circuit 18 2 3 Compressor control 19 Network pressure 19 Operating states 19 Operating mode...

Page 6: ...tion 29 General 29 Checking the delivery scope 29 Installing the compressor 29 Connecting the compressor to the compressed air network 30 Remove cladding 30 Activating the belt tensioning device 31 Checking the oil level 32 3 4 Electrical connection 32 3 5 Commissioning 34 Checking installation requirements 34 Checking the rotational direction 34 Checking compressed air outlet for tightness 35 Ope...

Page 7: ...pply air filter mats 51 Drive motors with permanent lubrication 52 Changing the V belt 52 Setting of the GM drive system C 15 C 15 F 53 Checking the oil level topping up oil 54 Changing the oil filter Fig 6 6 55 Changing oil separators Fig 6 6 56 Oil change 57 Flushing the oil circuit 59 Cleaning the compressed air oil cooling unit 60 Checking the safety valve 60 Nozzle with dirt catch 61 6 4 Spar...

Page 8: ......

Page 9: ...rom debris or parts lying around the service area of the compressor has always to be kept tiedied up and clean 7 Always squat when working on components mounted at low height never stoop When working on components mounted higher up always stand up right and erect 8 Do not exceed the limit value for the final compression pressure specified on the type plate 9 Do not operate the compressor without t...

Page 10: ...l only Always wear your compulsory personal protective equipment when work ing on pressure pipes and connections A protective grid serves to prevent you from accidentally reaching into the impeller of the cooling fan During operation the compressor generates a high sound pressure level which may cause permanent hearing damage due to continuous noise stress As a rule the compressor may only be oper...

Page 11: ... compulsory personal protective equipment and to stipulate and check the wearing of said protective equipment on a regular basis assign the personnel responsible for various tasks and work on the ma chine instruct the personnel on a regular basis with respect to all obligations as to compressor related preservation of safety and tidiness DANGER Voltage There is danger of life when working on the e...

Page 12: ...mpulsory For special duties protective helmets for transport work with lifting gear and safety goggles when working on the compressed air system and or on the control pneumatics must be worn Before starting work using oils or greases a skin protection cream must be ap plied Having finished the work a skin care product must be applied Safety instructions for maintenance and repair Compressor 1 Ensu...

Page 13: ...ations 7 Prior to starting work on the electrical system the power supply has to be switched off and secured against unintentional switching on again Imme diately after having finished the work all dismantled claddings and safety devices must be refitted 8 The operator is responsible to check the compressor daily for externally visible damage and defects and to immediately report any changes in cl...

Page 14: ...e operating instructions contain important information on how to operate the compressor safely economically and according to its intented use Ob serving these operating instructions will assist in avoiding danger to reduce repair costs and down times and to increase the reliability and service life of the compressor It contains important information concerning the required maintenance and repair m...

Page 15: ...e com ponents is prohibited Symbols used In these operating instructions important safety instructions and tips are iden tified by the following symbols WARNING This symbol indicates information warning of dangers to life and limb of the operator or other persons or dangers which might destroy or damage the compressor WARNING Risk of injury This symbol indicates information warning of possible dan...

Page 16: ...wing symbols and warning signs are fitted on the compressor Symbols on the switch cabinet NOTICE All warning signs on the compressor and in its surrounding must always be kept in a legible condition Missing or damaged signs must be replaced at once NOTICE Refer to the Instruction Operators Manual before performing any maintenance ...

Page 17: ... instructions check electric connections check oil level not for oil free if applicable remove the transportation safety device check the direction of rotation of compressor operate only with a belt protective grating or a sound protection bonnet do not close the cooling air inlets and outlets during operation Regular maintenance Observe the operating instructions check suction filter monthly if n...

Page 18: ...General 1 2 Introduction Page 10 BOGE Operating instructions for C 15 series screw compressors Symbols on the outside cladding part 2 NOTICE Electrical power inlet ...

Page 19: ...s screw compressors Page 11 General 1 2 Introduction Symbols on the inside of the compressor part 1 High pressure air Can cause severe injury or death Relieve pressure before removing filter plugs caps fittings or covers WARNING NOTICE Rotation ...

Page 20: ...ge 12 BOGE Operating instructions for C 15 series screw compressors Symbols on the inside of the compressor part 2 Exposed fan blade Can cause severe injury Do not operate with covers removed Disconnect power Lock and tag WARNING ...

Page 21: ...l is injected into the pressure rooms of the compressor Only use the produced compressed air for breathing or let it come in contact with foods if it was treated beforehand This BOGE compressor is not explosion protected Do not operate in explosive areas or in a possibly explosive atmosphere Do not operate the compressor in rooms in which extreme dust toxic or flam mable vapours and gases may occu...

Page 22: ...er ar rival of the delivery Data on the type plate Enter the data of your compressor from the type plate or enclosed data sheet in the folllowing illustration 1 1 This will ensure that in the event of enquiries you will always have the most important data to hand Fig 1 1 Data on the type plate Service Please do not hesitate to contact BOGE service if you have any questions Please call Telephone 1 ...

Page 23: ... compression temperature F 230 230 Volume flow pmax 100 psig cfm 61 4 61 4 pmax 115 psig cfm 61 4 61 4 pmax 150 psig cfm 54 0 54 0 pmax 190 psig cfm 47 0 47 0 Drive motor Rated power Hp 15 15 Nominal speed 60 Hz rpm 3600 3600 Protection type TEFC TEFC ISO class F F Electrical connection Mains voltages compressor1 V 208 230 460 575 208 230 460 575 Frequency 1 Hz 60 60 Fuse protection for 208 V 2 3 ...

Page 24: ...e min F 41 41 max F 113 113 Air cooling Cooling air requirement free standing installation cfm 2180 2180 with supply and exhaust air duct cfm 1002 1002 free ventilator pressure Pa 60 60 free ventilator pressure inch Hg 0 203 0 203 Operating pressure values 1 factory settings pmax 100 psig switch off pressure pmax psig 100 100 switch on pressure pmin psig 85 94 pmax 115 psig switch off pressure pma...

Page 25: ... air end compresses the sucked in air 4 Compressed air oil vessel The compressed air separates from the oil under the force of gravity in the compressed air oil receiver 5 Oil separator The oil separator separates the residual oil contained in the compressed air 6 Minimum pressure check valve The minimum pressure check valve does not open until the system pres sure has increased to 51 psig This ca...

Page 26: ... it out of the receiver into the air end 2 Thermostatic oil control valve Depending on the oil temperature the thermostatic oil control valve either allows the oil to pass through the oil cooler or through a bypass e g in the starting phase Thus the oil constantly maintains its optimum operating temperature 3 Oil cooler air or water cooled The oil cooler cools down the hot oil to operating tempera...

Page 27: ...ve motor and reduces wear of the system 3 Standstill ready for operation The compressor is standing still but ready for operation When compressed air is required it switches automatically to load operation Operating modes The two most important operating modes are achieved by combining the three operating states 1 Intermittent operation In intermittent operation the energy balance is perfect The c...

Page 28: ...itched off A flashing fault number in the left field of the display indicates the cause of the fault The following monitoring devices are standard for BOGE control systems Safety temperature limiting device The safety temperature limiting device switches off the compressor once the maximum admissible final compression temperature has been reached In case the necessary minimum temperature to run th...

Page 29: ...e Monitoring the drive motor The drive motor is monitored by PTC resistors The safety valve 1 on the compressed air oil chamber prevents the maximum ad missible pressure being ex ceeded WARNING Risk of injury When the maximum pressure is exceeded e g incorrect setting of the oper ating pressure value the entire delivery volume of the compressor is eject ed ...

Page 30: ......

Page 31: ...onnel The capacity of the lifting gear lifting cart or forklift truck must correspond at least to that of the compressor see Technical Data Mind the position of the mass centre prior to lifting the compressor The posi tion of the mass centre is specified both in the attached dimensioned drawing and on the packing of the compressor Lifting lugs on certain component parts e g electric motor are excl...

Page 32: ... transport slings having a minimum length of approx 120 inches Position the slings at the ends underneath the base frame of the compressor Neither fasten the transport slings to the suction filter nor to the eyelet on the motor NOTICE In case of an intermediate storage please observe the specifications and di rections as to permissible environmental impacts see chapter 3 2 Com pressor room Install...

Page 33: ...mpressed air receiver and its equipment from a safe loca tion Adhere to safety areas and safety clearances Ensure that the compressed air receiver stands securely It must not shift or tilt due to external forces This also includes the additional weight dur ing a pressure test The compressed air receiver must not be bolted to the base Ensure that the compressed air receiver is easily accessible fro...

Page 34: ...nings close to the floor Arrange exhaust air openings in the ceiling or at the top of the wall The required cross sections for the supply openings as well as for the flaps and weather protection grids are indicated in the table WARNING Non observance of the admissible ambient temperature may lead to the fol lowing problems The compressor will switch off when the admissible final compression temper...

Page 35: ...ooling air requirement specified in the table corresponds to the required ventilator capacity Supply air filter The compressor is fitted with supply air filter mats Cooling air requirement Please refer to the following table for the cooling air requirement and size of the supply air openings for your compressor Ensure that flaps and weather protection grids have the necessary free cross section We...

Page 36: ...the winter the hot exhaust air is used for room heating In summer it is directed into the open Condensate disposal The air taken in contains water in form of vapour which turns into condensa tion during compression WARNING The condensate contains oil Never lead it into the public sewage system without prior treatment Strictly observe the effluent disposal laws of your local authorities Oil water s...

Page 37: ...pe The delivery scope depends on your order Prior to commissioning please check whether all required parts have been provided Please check the order confirmation for any possible accessory equipment The delivery scope includes the following component parts Operating instructions Electric circuit diagram in the compartment of the switch cabinet List of electrical equipment in the compartment of the...

Page 38: ... version only Loosen cabinet bolts 2 above lateral sheets and backwall and remove cladding Fig 3 4 Remove cladding illustration shows super silenced version NOTICE Do not install a check valve in the pressure line The compressor is already equipped with a check valve WARNING Risk of injury Make sure to always wear protective gloves to protect yourself against any sharp edges and corners on coverin...

Page 39: ...ansport The GM belt tensioning device must be activated prior to first commissioning by lowering the motor plate Turn the adjusting nut 1 down as far as possible using a spanner M NW 17 and counter The belt tensioning device is activated It adjusts automatically the correct belt tensioning in every operating status Fig 3 6 Activate belt tensioning sealed WARNING The sealed nuts for adjustment of t...

Page 40: ...s please contact the BOGE service or your supplier Please see Technical Data for layout of mains fuse Connecting the leads Check to ensure that all terminals in the switch cabinet are firmly tight ened If necessary retighten the screw connections Guide the lead cable through the PG screw connection Connect the leads L1 L2 L3 N Pe PEN firmly to the power supply ter minal A clockwise rotational fiel...

Page 41: ...oss section of 10 mm2 Cu along its total length 2 If the protective conductor has a minimum cross section of less than 10 mm2 Cu a second conductor with at least the same cross section has to be provided up to the point from where the protective conductor has a minimum cross section of more than 10 mm2 3 Automatic interruption of the supply if the continuity of the protective con ductor is lost Pl...

Page 42: ...sor is installed according to the installation re quirements Prior to starting the compressor for the first time check if the transport secur ing device was duly removed and the GM belt tensioning device activated see chapter 3 3 Installation List up the test results in the commissioning certificate WARNING Always check the rotational direction of the drive motor prior to commission ing initial st...

Page 43: ...jury Switch off the compressor using the OFF button Actuate emergency stop switch button Open mains disconnecting device Secure mains disconnecting device against unintentional switch on Check to ensure that all machine elements are definitely currentless Cover or block off adjacent energized parts WARNING Risk of injury Work on the compressed air system may only be carried out by experienced and ...

Page 44: ...r maximum load List up the test results in the commissioning certificate Commissioning following extended stoppages If an extended stoppage is scheduled you should contact BOGE Service be forehand Following an extended stoppage of more than two months fill a small amount of oil in the suction controller prior to starting the compressor WARNING Risk of injury In case of leakages in the oil circuit ...

Page 45: ...mpressor on and immediately off again After approx 10 sec the com pressor can be started NOTICE To avoid dangers when dismantling the compressor please consult your BOGE Service Telephone 1 770 874 1570 Telephone 49 5206 601 140 WARNING Dismantling of the compressor may only be carried out by experienced and authorized qualified personnel DANGER Voltage All work on the electrical installation may ...

Page 46: ......

Page 47: ...acilities The customer must provide the following components for installation Stop valves Stop valves in the water supply and discharge lines enable simple removal of the heat exchanger Expansion vessel and safety valve Separate installation The plate heat exchanger may also be separately installed or retrofitted by the customer Normally the plate heat exchanger is held in place by the pipelines H...

Page 48: ...ushing connections and drain the plate heat exchanger Flush the plate heat exchangers For this purpose pump one of the above mentioned cleaning agents through the plate heat exchangers for an extended period of time After flushing rinse the plate heat exchanger thoroughly with water e g using a high pressure hose Enhance the cleaning action by the following measures Use a larger mass flow rate tha...

Page 49: ... at the following telephone numbers if you have any questions Telephone 1 770 874 1570 Telephone 49 5206 601 140 DANGER Voltage Prior to any work required to rectify faults it is essential to take all necessary safety precautions as described on page 5 Fault Possible cause Rectification No quantity delivered no pressure build up max pressure 7 psig System components in the compressor are leaking C...

Page 50: ... valve and replace if necessary Suction controller is leaking Check the suction controller and replace if necessary Switch off performed by emer gency off switch button Cut out normally via O key Excessive oil consumption Drain line is blocked Dismantle and clean drain line Defective oil separator element Check oil separator and replace if necessary Excessive oil filling Drain off oil Safety valve...

Page 51: ...s stop the compressor as described in these operating instructions prior to removing any cladding or safety devices Refit the cladding or safety devices immediately upon completion of the maintenance work Heavy components may only be lifted up by various persons in due con sideration of the local industrial safety regulations Only use original spare parts compressor oils and operating materials re...

Page 52: ...ssor to 122 F 8 Separate the compressor from the compressed air network by closing the ball valve at the compressed air outlet 9 Vent the compressor To this effect open the safety valve on the combined compressed air oil receiver as follows Turn the knurled nut counterclockwise until you can feel a resilient resistance Turn the knurled nut a little further Any possibly existing air will escape The...

Page 53: ...n filter Clean replace filter insert 2 Check oil level top up oil 3 Change supply air filter 4 Check V belt 5 Change oil filter and oil separator 6 Clean compressed air oil cooler externally 7 Following extended stoppages Fill oil into the suction controller 8 Check adjust pressure Control NOTICE Maintenance agreement Enter into a maintenance agreement with BOGE BOGE service will carry out the pro...

Page 54: ...ient conditions Extreme conditions may require shorter maintenance intervals NOTICE Note down any maintenance work in the table on the last page This will facilitate trouble shooting for BOGE service WARNING Check monthly if all screw connections on the compressor are fully tight ened Oil change Prior to using mineral or food compatible oil make sure to change oil filter af ter the first 500 opera...

Page 55: ...Check safety valve X 60 Replace minimum pressure valve wearing parts set X Replace suction controller X Oil circuit Check oil level and top up as required 2 m 54 Change oil separator 2 X 56 Change oil filter 2 X 55 Change oil 2 X 57 Replace oil regulator wearing parts set 2 X Replace nozzle with dirt catch X 61 Drive Check replace V belt X 52 Lubricate drive motor bearings Drive motors with perman...

Page 56: ... Rotating bomb oxidation Test ASTM D 2272 higher than 2400 minutes Meets VDL requirements DIN 51 506 for lube oils including Pneurop test Or you use BOGE compressor oil Syprem 8000 S The stated mainte nance intervals refer to the use of Syprem 8000 S only Syprem 8000 S can be purchased from BOGE retailers Never mix different oil types and brands The additives may be incompatible It may lead to foa...

Page 57: ...arator cartridges require special waste treat ment and must be kept separate from normal waste WARNING Risk of injury and damage to compressor due to obsolete pressure hoses Never use pressure hoses beyond the prescribed service life Check hoses and connections regularly for leakages Check the service life of the hoses and replace them in due time As replacement only use original spare parts relea...

Page 58: ...e WARNING Risk of injury Prior to any maintenance and servicing work take all necessary safety pre cautions described on page 44 Removing the filter car tridge Open safety sound insu lation hood Unscrew lid 1 of filter housing in the direction of the arrow Take out filter insert WARNING Do not clean filter cartridges in liquids Do not use hard objects for cleaning in order that the filter paper is...

Page 59: ...ir taken in is heavily soiled Change When a crust of dirt has accumulated on the filter mat When the final compression temperature has exceeded its set point value by 39 to 41 F The crust of dirt on the filter mat prevents an adequate cooling air supply Switch off the compressor using the OFF button Fig 6 3 Changing the supply air filter mats Pull insert 1 out of the holder Fit new insert 1 into t...

Page 60: ... sound insulation hood Turn adusting nut 1 upwards The two bushings inside the spring must touch Pull slackened belts from the pulley Fit new V belts Turn adjusting screw 1 downwards as far as possible The V belts are tensioned automatically by means of the BOGE GM drive system Remount safety sound insulation hood WARNING Have BOGE service dismantle the bearings and install new bearings once the s...

Page 61: ... table is setted by the manufactu rer and must not be changed Slight modifications are permissible and compensated by the GM drive sys tem The current setting value is also mar ked on a lable on the GM drive sys tem In case of special constructions the setting values on the label may deviate from the standard value 1 adjusting nut Model Pressure psig Standard motor lbs Setting 0 0 04 inch C 15 C 1...

Page 62: ...minutes to permit the oil to settle Fig 6 5 Checking the oil level topping up with oil WARNING Always use the same oil type when topping up Never mix different oil types and brands WARNING Risk of injury Prior to any maintenance and servicing work take all necessary safety pre cautions described on page 44 WARNING Risk of injury Danger of burning due to hot oil Always wear safety gloves Remove plu...

Page 63: ...vice cover 3 and tighten screws see arrows in figure 6 6 Open the ball valve at the compressed air outlet Switch on the compressor and heat up to operating temperature Check tightness of service cover and re tighten screws Close sound insulation hood WARNING When using mineral oil or oil suitable for the foodstuff industry Change oil filter after the first 500 operating hours WARNING Risk of injur...

Page 64: ...the oil separators might become blocked In this case the differential pressure will increase until the safety valve blows WARNING Risk of injury Prior to any maintenance and servicing work take all necessary safety pre cautions described on page 44 Close ball valve at the compressed air outlet Open safety sound insulation hood Vent the compressor as described in the beginning of the chapter Wait a...

Page 65: ...to starting work let cool down all hot components of the compressor to 122 F Check tightness of service cover and re tighten screws Close sound insulation hood Oil change Change After 9000 operating hours however at the latest after two years For other types of oil the appropriate oil change intervals must be complied with Building up a pressure cushion To enable a quick draining of the oil from t...

Page 66: ...sor completely so that a pressure cushion is still availa ble Switch off compressor After ap prox 2 sec screw cap nut see ar row on the bleed aperture of the solenoid valve the nut is located in the storage compartment of the switch cabinet WARNING Risk of injury Danger of burning due to hot oil Always wear safety gloves Remove blind plu 1 at oil drain 3 with the tap closed Fit oil drainage hose 2...

Page 67: ...ibed above Top up oil losses if any Flushing the oil circuit Flushing the oil circuit with clean oil becomes necessary When the oil is excessively soiled Prior to changing the oil type WARNING Always fill with the same oil type as previously used Never mix different oil types and brands The oil circuit must be flushed prior to changing the oil type WARNING Risk of injury Prior to checking tightnes...

Page 68: ...l ing of the cooling unit leads to an increased temperature in the oil circuit WARNING Risk of injury Prior to any maintenance and servicing work take all necessary safety pre cautions described on page 44 WARNING Do not use any sharp objects for cleaning These could damage the cooling unit Blow down the dirt with compressed air in the opposite direction to the normal cooling air flow Vacuum out t...

Page 69: ... as described in the beginning of the chapter Wait approx 3 minutes to permit the oil to settle Unscrew nozzle with dirt catch see arrow 1 Screw in new nozzle with dirt catch Fig 6 11 Nozzle with dirt catch Open the threaded plug see arrow anticlock wise The air oil mixture escapes Tighten the threaded plug by turning clockwise WARNING If the prescribed maintenance interval is not observed the res...

Page 70: ...or oil Syprem 8000 S Set of V belts Maintenance kit consisting of oil filter oil separator suction filter cartridge gaskets nozzle with dirt catch Wearing part kits for oil regulator minimum pressure valve solenoid valve Intake regulator incl solenoid valve Designation Optional equipment for compressed air treatment Oil water separator Automatic condensate draining unit Bekomat WARNING When orderi...

Page 71: ...ing instructions for C 15 series screw compressors Page 63 Appendix 7 1 Flow chart Part 7 Appendix 7 1 Flow chart On the following pages you will find the individual flow charts for your compres sor and components ...

Page 72: ...ix 7 1 Flow chart Page 64 BOGE Operating instructions for C 15 series screw compressors Air cooled version standard C 15 C 15 F 1 3 7 8 18 21 16 17 22 29 9 10 11 27 24 4 5 28 12 23 6 19 M I I P P 20 1 10 102 ...

Page 73: ...US only 7 Drive motor 8 Air end 9 Final compression temperature display and switch 10 Combined compressed air oil receiver 11 Oil separator 12 Safety valve 16 Thermostatic oil control valve 17 Oil cooler 18 Oil filter 19 Oil filter monitoring FOCUS only 20 Pressure gauge reading in display 21 Minimum pressure check valve 22 Compressed air after cooler 23 Pressure transmitter system pressure FOCUS ...

Page 74: ...at exchanger 101 Compressed air OUTLET 102 Return 103 Flow 1 Suction filter 4 Suction controller 8 Compressor air end 10 Combined compressed air oil receiver 11 Oil separator 16 Thermostatic oil control valve 17 Oil cooler 18 Oil filter 21 Minimum pressure non return valve 22 Compressed air after cooler 50 Heat exchanger ...

Page 75: ...st of maintenance and service work Please note the completed maintenance work in the respective columns Remarks Motor servicing Cooling unit cleaning Oil separator Oil level Oil filter Supply air filter Suction filter Tempe rature System pressure Co Control Ch Change Supply pressure Oper ating hours Cl Cleaning Ch Change Date ...

Page 76: ...ew compressors Please note the completed maintenance work in the respective columns Remarks Motor servicing Cooling unit cleaning Oil separator Oil level Oil filter Supply air filter Suction filter Tempe rature System pressure Co Control Ch Change Supply pressure Oper ating hours Cl Cleaning Ch Change Date ...

Reviews: