background image

ITALIANO

Le batterie (WET) vengono normalmente fornite cariche con acido e pronte per l’impiego.
Nel caso in cui si vada ad utilizzare batterie a carica secca, prima di montarle a bordo è necessario attivarle con la seguente procedura:
Dopo aver tolto i tappi delle batterie, riempire tutti gli elementi con soluzione di acido solforico specifico, fino a quando le piastre sono interamente 
ricoperte (effettuare almeno un paio di passaggi su ciascun elemento), IN CASO DI DUBBI CONTATTARE IL VOSTRO RIVENDITORE.
Lasciare riposare per 4-5 ore, per dare tempo alle bolle d’aria di risalire alla superficie ed alle piastre di assorbire l’elettrolito.
Verificare che il livello dell’elettrolito sia ancora superiore alle piastre e, in caso contrario, ripristinare il livello rabboccando con la soluzione di acido 
solforico;
Richiudere i tappi.
Montare gli accumulatori sulla macchina (secondo la procedura indicata di seguito).
È opportuno ora effettuare una prima ricarica prima di mettere in esercizio la macchina: per questa operazione attenersi a quando scritto nel paragrafo 

Manutenzione e ricarica delle batterie

”. 

Batterie: installazione e collegamento

! INFORMAZIONE

L’operazione di installazione e collegamento delle batterie deve essere eseguita da personale tecnico qualificato.

! PERICOLO

Togliere la chiave elettronica dalla plancia prima di procedere all’installazione e collegamento delle batterie.

Fare attenzione a montare sui poli positivi solo morsetti contrassegnati con il simbolo “+”. Non controllate la carica delle batterie mediante 

scintillamenti.

Attenersi scrupolosamente alle indicazioni descritte nel seguito in quanto una eventuale cortocircuitazione delle batterie può provocare 

l’esplosione delle stesse.

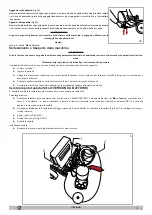
Ruotare all’indietro il serbatoio, quindi inserire nel vano le batterie, orientandole come indicato dal disegno sul serbatoio. 
Collegare i morsetti del cablaggio ai poli degli accumulatori, serrare i morsetti ai poli e ricoprirli con vaselina.
Chiudere il serbatoio nella posizione di lavoro.
Utilizzare la macchina conformemente alle istruzioni riportate di seguito.

! ATTENZIONE

Non lasciare mai scaricare in modo eccessivo la batteria, in quanto potrebbe danneggiarsi irreparabilmente.

Batteria: rimozione

! INFORMAZIONE

L’operazione di rimozione delle batterie deve essere eseguita da personale tecnico qualificato.

! PERICOLO

Durante la rimozione della batteria, l’operatore deve essere munito degli accessori (guanti, occhiali, tuta protettiva, scarpe antinfortunisti

-

che, ecc.) necessari a limitare i rischi di infortuni; togliere la chiave elettronica dalla plancia prima di procedere con la rimozione, allonta

-

narsi da eventuali fiamme libere, non cortocircuitare i poli delle batterie, non causare scintille e non fumare, procedere quindi in questo 

modo:


► Scollegare i morsetti del cablaggio batteria dai poli delle batteria.


► Togliere se previsti, i dispositivi di ancoraggio della batteria al basamento della macchina.


► Sollevare la batteria dal vano con mezzi di movimentazione adeguati.

Scelta del caricabatterie

Verificare che il caricabatterie sia compatibile con le batterie da caricare.
Batterie tubolari al piombo (WET): è consigliato un caricabatterie elettronico, consultare comunque il fabbricante ed il manuale del caricabatterie per 
confermare l’idoneità del caricabatterie esterno.
Batterie al gel o AGM: utilizzare un caricabatterie specifico per questo tipo di accumulatori.

! PERICOLO

Utilizzare caricabatteria con marcatura CE,  che sia conforme alla norma di prodotto (EN 60335-2-29), dotato di doppio isolamento o iso-
lamento rinforzato tra l’ingresso e l’uscita e con circuito di uscita tipo SELV, con tensione massima di uscita 24 V e corrente massima di 

ricarica 15 A

Preparazione del carica batterie 

Se si desidera utilizzare un caricabatterie non fornito con la macchina, è necessario montare su di esso il connettore spedito con la macchina.
Il connettore fornito per il caricabatterie esterno è idoneo a cavi di sezione massima 16mm

2.

.

Per l’installazione del connettore procedere nel seguente modo:
togliere circa 13 mm. di guaina protettiva dai cavi rosso e nero del caricabatteria;
inserire i cavi nei puntali del connettore e schiacciare con forza con pinze adatte;
inserire i cavi nel connettore rispettando le polarità (cavo rosso +, cavo nero –). 

12

Summary of Contents for 6 BT 70

Page 1: ...lsiasi intervento sulla macchina Read this manual carefully before carrying out any work on the machine P ed jakoukoli manipulac se strojem si nejd ve pozorn p e t te tento n vod IT MANUALE ISTRUZIONI...

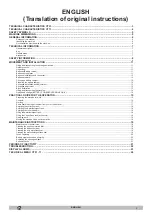
Page 2: ...eegee 13 Installazione spazzole 13 Sollevamento e trasporto della macchina 14 Cambio rapido testata SOLO VERSIONE A BATTERIE 14 GUIDA PRATICA PER L OPERATORE 15 Approntamento della macchina per il lav...

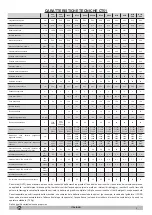
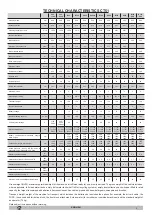
Page 3: ...3 X 1279 Y 1033 Z 653 X 1297 Y 1033 Z 735 X 1297 Y 1033 Z 735 X 1327 Y 1033 Z 563 X 1297 Y 1033 Z 735 Dimensione vano batterie lunghezza larghezza altezza mm 360 x344 x300 360 x344 x300 360 x344 x300...

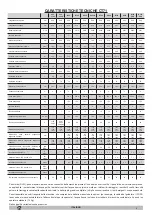
Page 4: ...5 5 5 Potenza motore aspirazione W 450 450 380 380 380 380 380 380 380 380 380 380 Serbatoio soluzione L 65 65 65 65 65 65 65 65 65 65 65 65 Serbatoio recupero L 70 70 70 70 70 70 70 70 70 70 70 70 D...

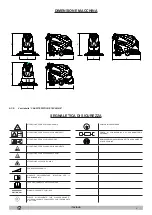
Page 5: ...ACIDI ATTENZIONE SUPERFICIE CALDA PENDENZA SUPERABILE MANUALE DELL OPERATORE ISTRUZIONI PER IL FUNZIONAMENTO LEGGERE IL MANUALE DELL OPERATORE SIMBOLO CORRENTE CONTINUA CLASSE DI ISOLAMENTO TALE CLAS...

Page 6: ...alute ATTENZIONE Indica che necessario prestare attenzione al fine di non incorrere in serie conseguenze che potrebbero comportare danni alla macchina all ambiente in cui si opera od a perdite economi...

Page 7: ...rtare la miscela di acqua pulita e del prodotto per pulizia e raccogliere l acqua sporca aspirata dal pavimento durante il lavaggio Pannello comandi Fig 1 Rif 2 Gruppo testata Fig 1 Rif 3 l elemento p...

Page 8: ...re conservata solo in ambienti chiusi Il campo di temperatura previsto per l utilizzo della macchina tra 4 C e 40 C in condizioni di non utilizzo della macchina il campo di temperatura invece tra 0 C...

Page 9: ...acchina utilizzare una presa adeguata alla spina della macchina nel caso si debba sostituire la presa richiedere l intervento di un elettricista qualificato E vietato l utilizzo di adattatore sulla sp...

Page 10: ...e scollegandola dalle batterie rete elettrica e non manometterla rivolgersi ad un centro di assistenza tecnica del Costruttore Tutte le operazioni di manutenzione devono essere eseguite in ambienti ad...

Page 11: ...laio della macchina al pallet Utilizzando un piano inclinato far scendere la macchina dal pallet spingendola in retromarcia La macchina non deve essere sollevata Liberare le spazzole dai relativi imba...

Page 12: ...formemente alle istruzioni riportate di seguito ATTENZIONE Non lasciare mai scaricare in modo eccessivo la batteria in quanto potrebbe danneggiarsi irreparabilmente Batteria rimozione INFORMAZIONE L o...

Page 13: ...di dischi abrasivi microfibra montare il disco abrasivo microfibra sul disco trascinatore ed effettuare quindi le manovre descritte per il montaggio della spazzola sulla lavasciuga Aggancio automatico...

Page 14: ...di trasporto deve essere eseguito nel modo seguente Vuotare i serbatoi Togliere le batterie Spingere la macchina sul pallet usando un piano inclinato fissando le ruote anteriori ed il telaio con le s...

Page 15: ...uso dei detergenti indicate al paragrafo Norme di sicurezza Approntamento della macchina per il lavoro Eseguire le seguenti operazioni prima di cominciare il lavoro Controllare attraverso il display...

Page 16: ...zione elettrica quando prevista con la possibilit di variare la velocit attraverso i pulsanti e E inoltre possibile premendo il pulsante SET eseguire i seguenti comandi premendo una volta il pulsante...

Page 17: ...lettrica quindi premere l interruttore generale fig 25 rif 1 Inserire la chiave elettronica nella sua sede Attraverso il selettore di funzionamento selezionare il programma di lavaggio Azionare la lev...

Page 18: ...cassetto testata rulli Estrarre il cassetto di raccolta spazzato Fig 24 smaltire il contenuto e risciacquare il cas setto con acqua pulita Riempimento serbatoio acqua detergente Riempire il serbatoio...

Page 19: ...icamente le parti in plastica Non impiegare idrocarburi o solventi si potrebbero danneggiare le cofanatu re e le parti in gomma Pulizia filtro aria aspiratore Aprire il coperchio serbatoio recupero sg...

Page 20: ...e mantenuto aperto per permettere la corretta aereazione del vano batterie ATTENZIONE Nel caso di batterie al gel usare solamente un caricabatterie specifico per accumulatori al gel ATTENZIONE Al fin...

Page 21: ...E IL SERBATOIO SOLUZIONE DETERGENTE X CONTROLLARE IL LIVELLO DELL ELETTROLITO DELLE BATTERIE X FAR CONTROLLARE DA PERSONALE QUALIFICATO DA IP CLEANING L IMPIANTO ELETTRICO X PERIODI DI INATTIVIT Quand...

Page 22: ...struzione Fusibile bruciato B BT C Sostituire Il flusso della soluzione non si interrompe Elettrovalvola danneggiata B BT C Sostituire Cablaggio elettrovalvola danneggiato B BT C Controllare Il motore...

Page 23: ...SCHEDA TRAZIONE Tensione batteria inferiore ai 18 3 V GEL AGM 18 V ACIDO Batterie degenerate Caricare o sostituire le batterie GUASTO RELE Rel difettoso Connessione rel difettosa Sostituire rel Contro...

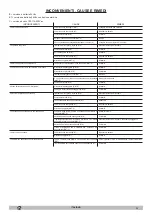
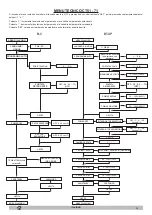
Page 24: ...OGRAMMA AUTO TIPO BATTERIA solo versione B AREA DI LAVORO LANGUAGE LINGUA 1 5 2 1 5 3 0 100 100 10 100 100 70 100 100 OFF 0 2 0 3 7 OFF OFF 1 2 30 secondi 3 OFF 1 2 30 secondi 3 GEL AGM LEAD ACID GEL...

Page 25: ...adjustment 13 Brush installation 13 Lifting and transporting the machine 14 Quick head change BATTERY POWERED VERSIONS ONLY 14 PRACTICAL GUIDE FOR THE OPERATOR 15 Preparing the machine for work 15 Co...

Page 26: ...0 380 380 Solution tank L 50 50 50 50 50 50 50 50 50 50 50 50 Dirty water tank L 50 50 50 50 50 50 50 50 50 50 50 50 Rear wheel diameter mm 200 200 200 200 200 200 200 200 200 200 200 200 Maximum slop...

Page 27: ...r W 450 450 380 380 380 380 380 380 380 380 380 380 Solution tank L 65 65 65 65 65 65 65 65 65 65 65 65 Dirty water tank L 70 70 70 70 70 70 70 70 70 70 70 70 Rear wheel diameter mm 200 200 200 200 20...

Page 28: ...URNS WARNING RISK OF BURNS MAXIMUM SLOPE OPERATOR S MANUAL OPERATING INSTRUCTIONS READ THE OPERATOR S MANUAL DIRECT CURRENT SYMBOL INSULATION CLASS THIS CLASSIFICATION ONLY APPLIES TO MACHINES POWERED...

Page 29: ...se death or serious injury to personnel WARNING Indicates the need for attention in order to avoid a series of consequences which could cause damage to the machine or work environment or financial los...

Page 30: ...n water and cleaning product and collects the dirty water picked up from the floor after washing Control panel fig 1 ref 2 Head assembly fig 1 ref 3 the main element comprises the brushes rollers whic...

Page 31: ...at all times The machine is designed for use at temperatures of between 4 C and 40 C When the machine is not being used the temperature range is 0 C and 50 C The machine is designed to operate at rela...

Page 32: ...plug If the plug needs to be replaced have the job done by a qualified electrician Use of adapters with the machine s mains power plug is strictly forbidden Battery charger check the power cable regul...

Page 33: ...faults and or malfunctions switch it off immediately disconnecting it from the batteries mains power supply do not try to repair it rather contact the manufacturer service centre All maintenance oper...

Page 34: ...hine s chassis to the pallet Using a sloping ramp push the machine backwards off the pallet The machine must not be raised Unpack the brushes from their packaging Clean the outside of the machine taki...

Page 35: ...them irreparably Batteries removal INFORMATION The batteries must be removed by qualified technical personnel DANGER When removing the batteries the operator must be equipped with suitable personal p...

Page 36: ...Use of abrasive microfibre disks fit the abrasive microfibre disk on the drive disk and perform the operations described for fitting the brush on the scrubber drier Automatic brush attachment version...

Page 37: ...achine onto a means of transport Empty the tanks Remove the batteries Push the machine onto the pallet using a sloping ramp securing the front wheels and the chassis using the brackets supplied The ma...

Page 38: ...e removed only Follow the safety regulations on use of detergents given in the section Safety regulations Preparing the machine for work Proceed as follows before starting work Check that the display...

Page 39: ...ured the speed can be adjusted using the and buttons Press the SET button to manage the following functions pressing the SET button once accesses the detergent delivery menu delivery can be adjusted u...

Page 40: ...rameter Working Mains powered versions plug the machine into the mains power socket and press the main switch fig 25 ref 1 Insert the electronic key Using the operation selector select the scrubbing p...

Page 41: ...er collection bin Fig 24 dispose of the contents and rinse out the bin with clean water Filling the water detergent tank Fill the tank through the opening provided fig 14 Ref 1 The machine is equipped...

Page 42: ...use solvents or hydrocarbon based products These can damage the cowling and rubber components Cleaning the suction motor air filter Open the lid of the dirty water tank by releasing the clamp lever t...

Page 43: ...ifted and kept open to allow correct ventilation of the battery compartment WARNING In the case of gel batteries use a specific charger for gel batteries only WARNING To avoid permanent damage to the...

Page 44: ...T TANK FILTER X CLEAN THE SUCTION MOTOR HOSE X CLEAN THE DIRTY WATER TANK AND THE SOLUTION TANK X CHECK THE BATTERY ELECTROLYTE LEVEL X HAVE THE ELECTRICAL CIRCUIT CHECKED BY QUALIFIED IP CLEANING PER...

Page 45: ...d B BT C Unblock Blown fuse B BT C Replace Detergent flow does not stop Solenoid valve damaged B BT C Replace Solenoid valve wiring damaged B BT C Check The suction motor does not start The dirty wate...

Page 46: ...than 18 3 V GEL AGM 18 V ACID Flat or degraded batteries Charge or replace the batteries RELAY FAULT Faulty relay Faulty relay connection Replace the relay Check relay connections ELECTRIC BRAKE FAUL...

Page 47: ...L AGM EXIT POWER OFF AUTO PROGRAM BATTERY TYPE version B only WORK AREA LANGUAGE 1 5 2 1 5 3 0 100 100 10 100 100 70 100 100 OFF 0 2 0 3 7 OFF OFF 1 2 30 seconds 3 OFF 1 2 30 seconds 3 GEL AGM ACID GE...

Page 48: ...e kart 13 Zved n a p eprava stroje 14 Rychl v m na hlavy POUZE MODELY NA BATERII 14 PRAKTICK POKYNY PRO PRACOVN KA OBSLUHY 15 P prava stroje k pr ci 15 Ovlada e 15 Pr ce 17 N kter u ite n rady pro opt...

Page 49: ...Z 640 X 1279 Y 1033 Z 653 X 1279 Y 1033 Z 653 X 1297 Y 1033 Z 735 X 1297 Y 1033 Z 735 X 1327 Y 1033 Z 563 X 1297 Y 1033 Z 735 Rozm ry prostoru pro baterie d lka ka v ka mm 360 x344 x300 360 x344 x300...

Page 50: ...450 380 380 380 380 380 380 380 380 380 380 N dr na roztok L 65 65 65 65 65 65 65 65 65 65 65 65 Rekupera n n dr L 70 70 70 70 70 70 70 70 70 70 70 70 Pr m r zadn ch kole ek mm 200 200 200 200 200 20...

Page 51: ...V SKYT KYSELIN POZOR HORK PLOCHA P EKONATELN SKLON U IVATELSK P RU KA N VOD K OBSLUZE P E T TE SI U IVATELSKOU P RU KU SYMBOL PRO STEJNOSM RN PROUD T DA KRYT TATO KLASIFIKACE PLAT POUZE PRO ZA ZEN KT...

Page 52: ...person lu nebo p padn kody na zdrav POZOR Ozna uje e je t eba v novat pozornost tomu aby nedo lo k situac m v jejich d sledku by mohlo doj t k po kozen stroje prostor v nich je stroj pou v n a ekonomi...

Page 53: ...roj se skl d z n sleduj c ch z kladn ch st N dr e obr 1 1 kter slou k ulo en a p eprav sm si ist vody a istic ho v robku a zachycen pinav vody nas t z podlahy b hem myt dic ho panelu obr 1 2 Jednotky...

Page 54: ...v n rozsah teplot in 0 C a 50 C Stroj mus b t za v ech okolnost pou v n ve vlhkostn m rozmez 30 95 Stroj sm b t pou v n do nadmo sk v ky 2000 m Kdy je t eba n dr zvednout za elem z sk n p stupu k pro...

Page 55: ...ze z str ky kter jsou vhodn pro s ovou z suvku stroje Pokud m b t z suvka vym n na nechte si tuto pr ci prov st kvalifikovan m elektrik em Pou it adapt ru u s ov z suvky je p sn zak z no Nab je ka pra...

Page 56: ...n stroje jej okam it vypn te odpojen m od bateri elektrick s t a nezasahujte do n j obra te se na st edisko technick ch slu eb v robce Ve kerou dr bu je t eba prov d t v dostate n osv tlen ch prostor...

Page 57: ...let S pou it m naklon n roviny sejm te stroj z palety a zatla te na n j ve sm ru zp tn ho chodu Stroj se nesm zvedat Uvoln te kart e z p slu n ch obal V souladu s bezpe nostn mi p edpisy stroj zvn j k...

Page 58: ...mohla nevratn po kodit Baterie odstra ov n INFORMACE Odstran n bateri mus prov st kvalifikovan techni t pracovn ci NEBEZPE B hem odstra ov n baterie mus b t pracovn k obsluhy vybaven osobn mi ochrann...

Page 59: ...brusn ch kotou kotou z mikrovl kna namontujte brusn kotou kotou z mikrovl kna na vle n kotou a pot pro ve te kony popsan u mont e kart e na myc a su ic stroj Automatick upevn n kart e verze BT obr 21...

Page 60: ...i nakl d n stroje na dopravn prost edek postupujte n sledovn Vypr zdn te n dr e Odstra te baterie Zatla te stroj na paletu s pou it m naklon n roviny a upevn te p edn kole ka a r m pomoc p ilo en ch...

Page 61: ...a odstra ov n dan ho druhu p ny Dodr ujte bezpe nostn p edpisy t kaj c se pou v n istic ch prost edk uveden v odstavci Bezpe nostn pokyny P prava stroje k pr ci P ed zah jen m pr ce prove te n sleduj...

Page 62: ...mo nost upravit rychlost pomoc tla tek a D le je mo n stisknut m tla tka SET prov st n sleduj c p kazy jedn m stisknut m tla tka SET se p ejde do nab dky pro p vod istic ho prost edku p vod lze uprav...

Page 63: ...zastr te z str ku stroje do s ov z suvky a stiskn te hlavn vyp na obr 25 odkaz 1 Vlo te elektronick kl na sv m sto Pomoc voli e chodu zvolte myc program Aktivujte p ku trakce spus te st ra a zahajte...

Page 64: ...dky hlavy v lc Vyjm te sb rnou p ihr dku na zameten odpad obr 24 zne kodn te jej obsah a vypl ch n te ji istou vodou Napln n n dr e na vodu istic prost edek Napl te n dr p slu n m otvorem obr 14 1 St...

Page 65: ...se tepeln nezdeformovaly plastov sou sti Nepou vejte uhlovod ky ani rozpou t dla mohlo by doj t k po kozen kryt a gumov ch sou st i t n vzduchov ch filtr ods va e Otev ete v ko rekupera n n dr e uvol...

Page 66: ...b t n dr zvednut a udr ovan v otev en m stavu aby bylo umo n no spr vn v tr n prostoru bateri POZOR V p pad gelov ch bateri pou ijte pouze nab je ku speci ln ur enou pro gelov akumul tory POZOR Aby ne...

Page 67: ...IST TE FILTR N DR E NA VODU ISTIC PROST EDEK X VY IST TE TRUBKU ODS VA E X VY IST TE REKUPERA N N DR A N DR NA ROZTOK ISTIC HO PROST EDKU X ZKONTROLUJTE STAV ELEKTROLYTU V BATERI CH X NECHTE PRACOVN...

Page 68: ...d roztok do kart e je ucpan B BT C Odstra te zanesen Vyho ela pojistka B BT C Prove te v m nu Proud roztoku se p eru uje Po kozen elektroventil B BT C Prove te v m nu Po kozen kabel elektroventilu B...

Page 69: ...te potenciometr DRIVE BOARD U V Nap t baterie pod 18 3 V GEL AGM 18 V KYSELINA Baterie opot eben Nabijte nebo vym te baterie RELAY FAULT Rel je vadn Vadn p ipojen rel Vym te rel Zkontrolujte p ipojen...

Page 70: ...ROGRAM BATTERY TYPE version B only WORK AREA LANGUAGE 1 5 2 1 5 3 0 100 100 10 100 100 70 100 100 OFF 0 2 0 3 7 OFF OFF 1 2 30 seconds 3 OFF 1 2 30 seconds 3 GEL AGM ACID GEL AGM 40 100 70 0 40 10 PAS...

Page 71: ......
Page 72: ...TPC Bohman s r o t da Tom e Bati 283 763 02 Zl n Czech Republic T 420 573 034 717 E www bohman cleaning W bohman bohman cz PLDC04300 Rev 00 10 2019 bohman cleaningmachinery...

Reviews: