16
•
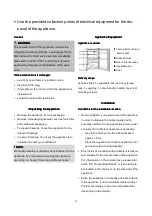
Avoid the installation:
Avoid the installation:
Avoid the installation:
Avoid the installation:
-
near heaters, next to a stove, direct sunlight or
any other heat sources;
-
at locations with high humidity (e.g. outdoors,
bathroom), as metal parts would be suscepti-
ble to corrosion under such circumstances;
-
near volatile or flammable materials (e.g. gas,
fuel, alcohol, paint, etc.), in rooms which may
have poor air circulation (e.g. garages).
-
Do not expose the appliance any weather.
Electrical connection
Electrical connection
Electrical connection
Electrical connection
WARNING:
WARNING:
WARNING:
WARNING:
•
The installation to the mains supply must conform
to the local standards and regulations.
•
Improper connection may cause to an electric
electric
electric
electric
shock
shock
shock
shock!
•
Do not modify the appliance plug. If the plug does
not fit properly to the outlet, let install a proper
outlet by an authorized specialist.
•
The accessibility of the power plug must be en-
sured to disconnect the appliance from the power
supply in case of emergency.
•
Make sure that the voltage supply matches the
specifications on the rating label before
connecting.
•
Connect the mains cable to a properly installed
and earthed wall outlet.
•
If the plug after installation is not accessible, a
corresponding disconnect device must be availa-
ble to meet the relevant safety regulations.
Assembling the door handle
Assembling the door handle
Assembling the door handle
Assembling the door handle
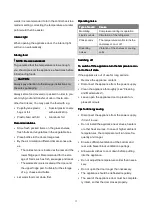
Position the handle and fix it with
three screws on the door.
Put on the handle cover.
Attach the cover with a screw.
Startup / Operation
Startup / Operation
Startup / Operation
Startup / Operation
Prior to first use
Prior to first use
Prior to first use
Prior to first use
CAUTION
CAUTION
CAUTION
CAUTION::::
After transport, the appliance should be left standing
upright for about 4 hours before connecting to the
power supply. Nonobservance could lead to malfunc-
tion of the cooling system and causes an appliance
breakdown.
Clean the appliance interior including all accessory
parts. Consider the instructions which we provide in
the chapter “Cleaning and Maintenance”.
Starting the appliance
Starting the appliance
Starting the appliance
Starting the appliance
•
Connect the appliance to the power supply.
•
Operate the temperature control. See also the
section "Settings".
Settings
Settings
Settings
Settings
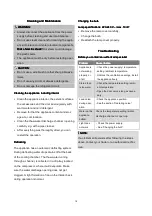
Setting [ 0 ] means that the appliance is in the off
state. Turn the temperature control clockwise, start-
ing from this setting; the appliance will turn on auto-
matically.
The power levels [ 1–5 ] regulate the different values
of the internal temperature.
Setting 0
Setting 0
Setting 0
Setting 0
Setting 1
Setting 1
Setting 1
Setting 1
Setting 5
Setting 5
Setting 5
Setting 5
Off state
Lowest setting
(warmest inside
temperature)
Highest setting
(coldest inside
temperature)
Note that the temperature will change depending on
the ambient temperature, frequency of door opening
and the amount of food in the appliance.
During initial operation, turn the temperature control
to the highest setting first, until the appliance has
reached the desired operating temperature. After-


