background image

POUR OVER MANUAL BREW COFFEE

Pour Over, or manual brew coffee preparation is a great way to create a quality 

cup of coffee. The preparation process is part of the pleasure of consuming a 

cup of pour over or manual brew coffee. 

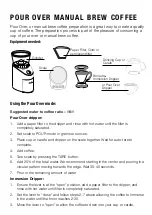
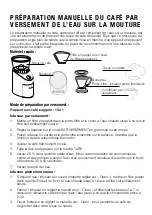
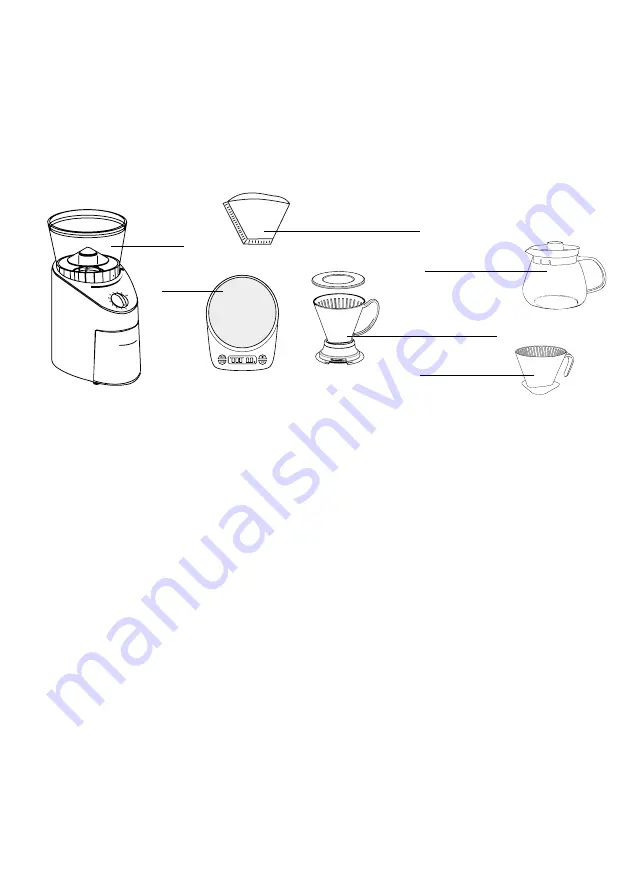
Equipment needed:

Using the Pour Over mode: 

Suggested water to coffee ratio – 16:1

Pour Over dripper:

1.  Add a paper filter to the dripper and rinse with hot water until the filter is 

completely saturated. 

2.  Set scale to POUR mode in grams or ounces.   
3.  Place cup or carafe and dripper on the scale together. Wait for auto-tare to 

complete.

4.  Add coffee. 
5.  Tare scale by pressing the TARE button. 
6.  Add 25% of the total water. We recommend starting in the center and pouring in a 

circular pattern moving towards the edge. Wait 30-40 seconds.  

7.  Pour in the remaining amount of water.

Immersion Dripper:

1.  Ensure the lever is at the “open” position, add a paper filter to the dripper, and 

rinse with hot water until filter is completely saturated. 

2.  Set the lever to “close” and follow steps 2-7 above allowing the coffee to immerse 

in the water until the timer reaches 2:30.  

3.  Move the lever to “open” to allow the coffee to drain into your cup or carafe.

MAX

Grinder

Scale

Drinking Cup or 

Carafe

Paper Filter, Cloth or 

permanent filter 

Bonavita

®


Immersion Dripper

or Pour Over  

Dripper

Summary of Contents for BV02001MU

Page 1: ...ranty bonavitaworld com Two modes for ease of use Water resistant coating to prevent water damage Programmable auto off settings Built in timer for brewing accuracy 2000 gram capacity and 0 1 gram acc...

Page 2: ...s such Set all items gently on the top of the platform Although this scale is designed to be quite durable make sure to avoid rough treatment as this may permanently damage the internal components Alw...

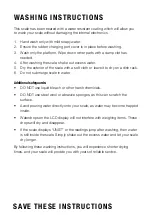
Page 3: ...on a dish rack 6 Do not submerge scale in water Additional safeguards DO NOT use liquid bleach or other harsh chemicals DO NOT use steel wool or abrasive sponges as this can scratch the surface Avoid...

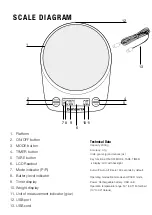
Page 4: ...es REG mode and POUR mode Power Rechargeable battery USB cord Operation temperature range 50 to 85 Fahrenheit 10 to 30 Celsius 1 Platform 2 ON OFF button 3 MODE button 4 TIMER button 5 TARE button 6 L...

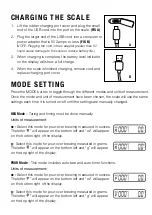
Page 5: ...w a full charge 4 When the scale is finished charging remove cord and replace charging port cover A B REG Mode Taring and timing must be done manually Units of measurement oz Select this mode for pour...

Page 6: ...e scale senses the weight beginning to change Since the display shows the weight and time this will allow you to customize how you brew your coffee REG Mode 1 Place item on scale the weight of the ite...

Page 7: ...will show PASS to confirm this setting 8 The scale will turn off automatically Note If 60 120 or 180 is chosen the scale will turn off after the designated number of seconds of inactivity If the auto...

Page 8: ...are to complete 4 Add coffee 5 Tare scale by pressing the TARE button 6 Add 25 of the total water We recommend starting in the center and pouring in a circular pattern moving towards the edge Wait 30...

Page 9: ...or repair attempts by non authorized persons are not covered by the warranty 3 Damages that are not the responsibility of the manufacturer are not covered by the warranty This is valid especially for...

Page 10: ...utilisation facile Rev tement r sistant l eau pour pr venir tout dommage d l eau ou l humidit Fonction d arr t automatique programmable Chronom tre incorpor pour assurer la pr cision de l infusion Cap...

Page 11: ...au Bien que la balance soit con ue pour tre tr s durable toujours la manipuler en douceur pour viter de causer des dommages permanents aux composantes internes Ne jamais secouer vigoureusement ou fair...

Page 12: ...as plonger la balance dans l eau Autres mesures de protection NE PAS utiliser d agent blanchissant liquide ou d autre produit chimique corrosif NE PAS utiliser de laine de verre ou d ponge abrasive po...

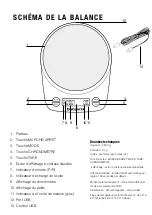
Page 13: ...REG et mode par versement POUR Alimentation pile rechargeable cordon USB Plage de temp rature de fonctionnement de 50 85 Fahrenheit de 10 30 Celsius 1 Plateau 2 Touche MARCHE ARR T 3 Touche MODE 4 Tou...

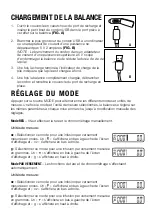
Page 14: ...pile indiquera que la pile est charg e fond 4 Une fois la balance compl tement charg e d brancher le cordon et remettre le couvercle du port de recharge en place A B Mode REG Il faut effectuer la tar...

Page 15: ...en marche d s que le poids se met changer L affichage du poids et du temps coul permet une infusion sur mesure Mode REG 1 Placer l article sur la balance Son poids s affiche du c t droit de l cran d a...

Page 16: ...iquera PASS pour confirmer le r glage 8 La balance s arr tera automatiquement Note Si un d lai de 60 120 ou 180 est s lectionn la balance s arr tera en fin du nombre pr vu de secondes de non activit S...

Page 17: ...nce Attendre que la fonction de tare automatique prenne fin 4 Ajouter le caf fra chement moulu 5 Faire la tare en appuyant sur la touche TARE 6 Verser 25 de la quantit totale d eau Nous recommandons d...

Page 18: ...tentative de r paration par une personne non autoris e 3 Les dommages ne tombant pas sous le coup de la responsabilit du fabricant ne sont pas couverts par la garantie C est tout particuli rement le...

Reviews: