background image

 
BONEX-SCOOTER 
Instruction for use 

Version: 2016_08 

Page 25


10. Transport and storage 

The battery should be disconnected from the scooter at the plug for storage 
and  transport.  This  also  prevents  the  scooter  from  being  accidentally 
switched on. 
This is absolutely essential for transport by courier or parcel service. 
Always  put  the  box  straight  up  if  stored  or  transport  it  in  a  transportation 
box. The label TOP must stay at the top or rather the scooter should stand 
inside the box on his shroud. 

A  transport  backpack  is  available  as  an  option  for  safe  transport.  The 
scooter  is  centred  at  the  front  and  rear  and  bedded  in  foam  padding.  It  is 
therefore optimally protected against knocks and bumps. 
If extreme external influences are to be feared, the battery and the charger 
should be removed and stored separately. 
A  carton  should  be  used  for  additional  outer  protection  if  the  scooter  is 
transported by a parcel service or courier. 
Please observe the valid regulations regarding the transport. 

You should dry the scooter thoroughly before opening after use. Open the 
scooter  after  every  dive  to  remove  dirt  and  any  moisture  which  may  have 
penetrated. Water can lead to corrosion spots on aluminium surfaces which 
can  be  avoided  if  they  are  removed  immediately.  Keep  your  scooter  in  a 
safe,  dry  place.  It  should  be  stood  on  the  jet.  The  silver  eccentric  lever 
should be left in the open position during longer periods of storage. 

The  battery  should  be  tested  after  long  breaks.  Pay  attention  to  formation 
of  corrosion  or  oxidation  on  the  power  pack.  A  white  coating  may  be  an 
indication of defective cells. If the power pack does not work perfectly after 
restarting, it must be sent to the manufacturer for inspection. 

Store the battery at a save place at approx. 15°C – 20°C. 

If  you  intend  to  store  the  scooter  for  a  prolonged time  (>  4    weeks),  store 
the  battery  in  partially  charged  conditions!  Recharge  battery  immediately 
before  intended  usage.  You  should  also  remove  the  Tube  O-rings  before 
prolonged storage. Store the O-rings in a bag inside of the scooter. 
Attention: Keep in mind to reinstate the O-rings before intended usage! 

Risk of damage due to inrush of water! 


Summary of Contents for BONEX-SCOOTER Series

Page 1: ...BONEX SCOOTER Instruction for use Version 2016_08 INSTRUCTION FOR USE BONEX SCOOTER ECOS REFERENCE DISCOVERY REFERENCE RS DISCOVERY RS...

Page 2: ...cedure of Bonex Scooters 14 8 2 Scoter Trim 17 8 3 Controls to perform before starting up 17 9 Use 20 9 1 Most important points to be mentioned 21 9 2 Average performance and range 22 9 2a UNIVERSAL M...

Page 3: ...refully The scooter is pre charged and ready to use However the battery only reaches its maximum capacity after being charged three or four times The scooter must be opened to charge the battery and f...

Page 4: ...arable battery damage The scooter must be locked according to the instructions prior to usage The scooter may only be operated closed and with the silver eccentric locking lever in the folded locked p...

Page 5: ...ing Only operate the scooter in perfect condition Defective cables switches plugs power packs drive motors or seals must be replaced immediately Ensure that persons who use the scooter are instructed...

Page 6: ...ctor Check the reliable fit of the battery inside the scooter Transport the scooter only in the original transport box or in the additional transport bag fitted in a carton with foam 4 Starting up Cha...

Page 7: ...nd wipe the scooter backend with silicon spray Check Tube O rings after 6 month and change them at least once a year long storage will cause deformation of the O rings Once a year grease the shaft of...

Page 8: ...d to damage or even destruction of the Bonex Scooter The Bonex Scooter is designed to pull a diver and his personal and auxiliary equipment The maximum performance values depend on the weight and the...

Page 9: ...d seals are wearable parts and are excluded as such from this guarantee Intervention in the housing and electronic connections by unauthorised persons or workshops will lead to voiding of the guarante...

Page 10: ...either for collisions which take place in restricted visibility conditions or due to failure to observe safety distances Liability for personal injury on exceeding the depth limits and failure to obse...

Page 11: ...g depth 120 200 m 200 m 200 m 200 m 150 200 m Operating temp 0 40 C 0 40 C 0 40 C 0 40 C 0 40 C Runtime Max 200 min 200 min 200 min 210 min 420 min Runtime Min 110 min 100 min 90 min 105 min 210 min R...

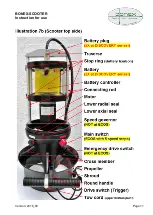
Page 12: ...stem handle Battery 2X at DISCOVERY series Stop ring Battery fixation Connecting rod Tube Motor Main switch ECOS with 5 speed steps Zinc anode Cross member Tow cord fixation point Emergency drive swit...

Page 13: ...BONEX SCOOTER Instruction for use Version 2016_08 Page 11...

Page 14: ...BONEX SCOOTER Instruction for use Version 2016_08 Page 12...

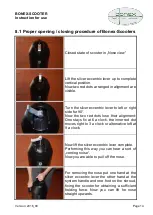
Page 15: ...or further usage return of scooter in case of maintenance repair Open the scooter at the silver eccentric lever To do this set down the scooter with the jet on a level surface and pull the lever up so...

Page 16: ...or 90 Now the two red dots lose their alignment One stays fix at 6 a clock the inner red dot moves right to 3 a clock or alternative left at 9 a clock Now lift the silver eccentric lever complete Perf...

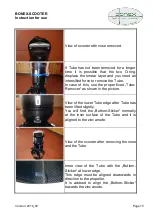
Page 17: ...proper fixed Tube Remover as shown in the picture View of the lower Tube edge after Tube has been lifted slightly You will find the Bottom Sticker normally at the inner surface of the Tube and it is...

Page 18: ...lock During this procedure the second red dot remains at 6 a clock Push the silver eccentric lever downwards until it gets in contact to the pressure plate During this procedure the lever is orientate...

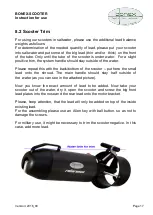
Page 19: ...e repeat this with the back bottom of the scooter put here the small lead onto the shroud The main handle should stay half outside of the water as you can see in the attached picture Now you know the...

Page 20: ...tube isn t assembled in the right direction While mounting the nose the System handle has to be on the opposite side of the zinc anode Hold the silver eccentric lever up when setting down the nose an...

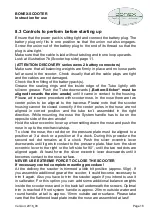
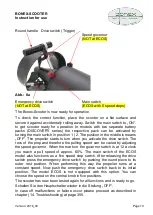
Page 21: ...revs of the prop and therefore the pulling speed can be varied by adjusting the speed governor When the mark on the governor switch is at 12 a clock you reach a pull speed of approx 60 The main switch...

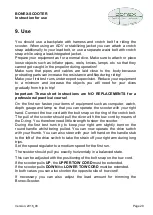
Page 22: ...st run fasten your items of equipment such as computer watch depth gauge and lamp so that you can operate the scooter with your right hand Connect the tow cord with the bolt snap on the ring of the cr...

Page 23: ...nd that while operating a scooter much greater distances can be covered This circumstance has to be taken into account in your range planning and gas logistics too Make sure you stay a safe distance f...

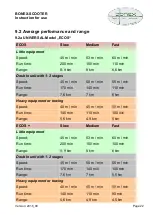
Page 24: ...in 140 min 110 min Range 7 6 km 7 km 6 km Heavy equipment or towing Speed 40 m min 45 m min 50 m min Run time 140 min 110 min 100 min Range 5 6 km 4 9 km 5 km ECOS Slow Medium Fast Little equipment Sp...

Page 25: ...Run time 200 min 150 min 90min Range 8 9 km 8 km 5 4 km Double unit with 1 2 stages Speed 45 m min 50 m min 55 m min Run time 170 min 140 min 90 min Range 7 6 km 7 km 5 km Heavy equipment or towing S...

Page 26: ...0 km 7 7 km 7 3 km Heavy equipment or towing Speed 40 m min 50 m min 55 m min Run time 160 min 125 min 95 min Range 6 4 km 6 2 km 5 2 km DISCOVERY RS Langsam Mittel Schnell Little equipment Speed 45...

Page 27: ...g the transport You should dry the scooter thoroughly before opening after use Open the scooter after every dive to remove dirt and any moisture which may have penetrated Water can lead to corrosion s...

Page 28: ...OS models 110 230V charger switches automatically The charger has 1 diode red green The diode lights RED when charging starts Afterwards the diode changes to GREEN Charging is complete QCS Quick Charg...

Page 29: ...th fresh water and spray with a silicone spray After longer use the spring of the sliding ring seal should be removed and its O rings greased 12 1 Maintenance intervals of Bonex Scooter Maintenance po...

Page 30: ...aks Check propeller for wear Check housing for wear Renew battery Performance upgrade Motor performance curve Pressure and performance test Notes __________________________________________ ___________...

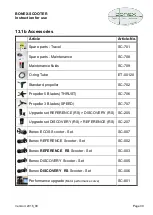
Page 31: ...em handle SC 501 Round handle extension Left Side SC 514 Standard Charger ECOS SC 504 QCS Charger REFERENCE DISCOVERY RS SC 506 Capacitance meter SC 513 Transport case Special order only Transport bag...

Page 32: ...dard propeller SC 702 Propeller 5 Blades THRUST SC 706 Propeller 3 Blades SPEED SC 707 Upgrade set REFERENCE RS DISCOVERY RS SC 205 Upgrade set DISCOVERY RS REFERENCE RS SC 207 Bonex ECOS Scooter Set...

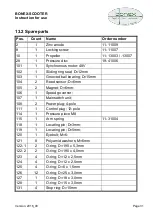
Page 33: ...ed sensor D 6mm 105 2 Magnet D 6mm 106 1 Speed governor 107 1 Mainswitch unit 108 2 Power plug 4 pole 111 1 Control plug 12 pole 114 1 Pressure piece M8 115 1 Arm spring 11 31004 118 1 Locating pin D...

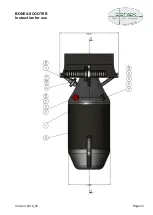
Page 34: ...BONEX SCOOTER Instruction for use Version 2016_08 Page 32 13 3 Blow up drawing Scooter...

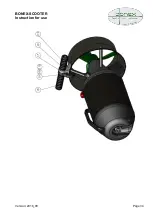
Page 35: ...BONEX SCOOTER Instruction for use Version 2016_08 Page 33...

Page 36: ...BONEX SCOOTER Instruction for use Version 2016_08 Page 34...

Page 37: ...it Emergency drive switch activated Deactivate emergency switch Emergency drive switch does not work Reed sensor defective Replace reed sensor Magnet removed from round piece Stick magnet in round pie...

Page 38: ...pressure disc Eccentric lever loose Pressure disc worn Replace pressure disc Eccentric lever worn Replace eccentric lever Pressure disc Eccentric lever greasy Clean and degrease Main switch does not t...

Page 39: ...BONEX SCOOTER Instruction for use Version 2016_08 Page 37...

Reviews: