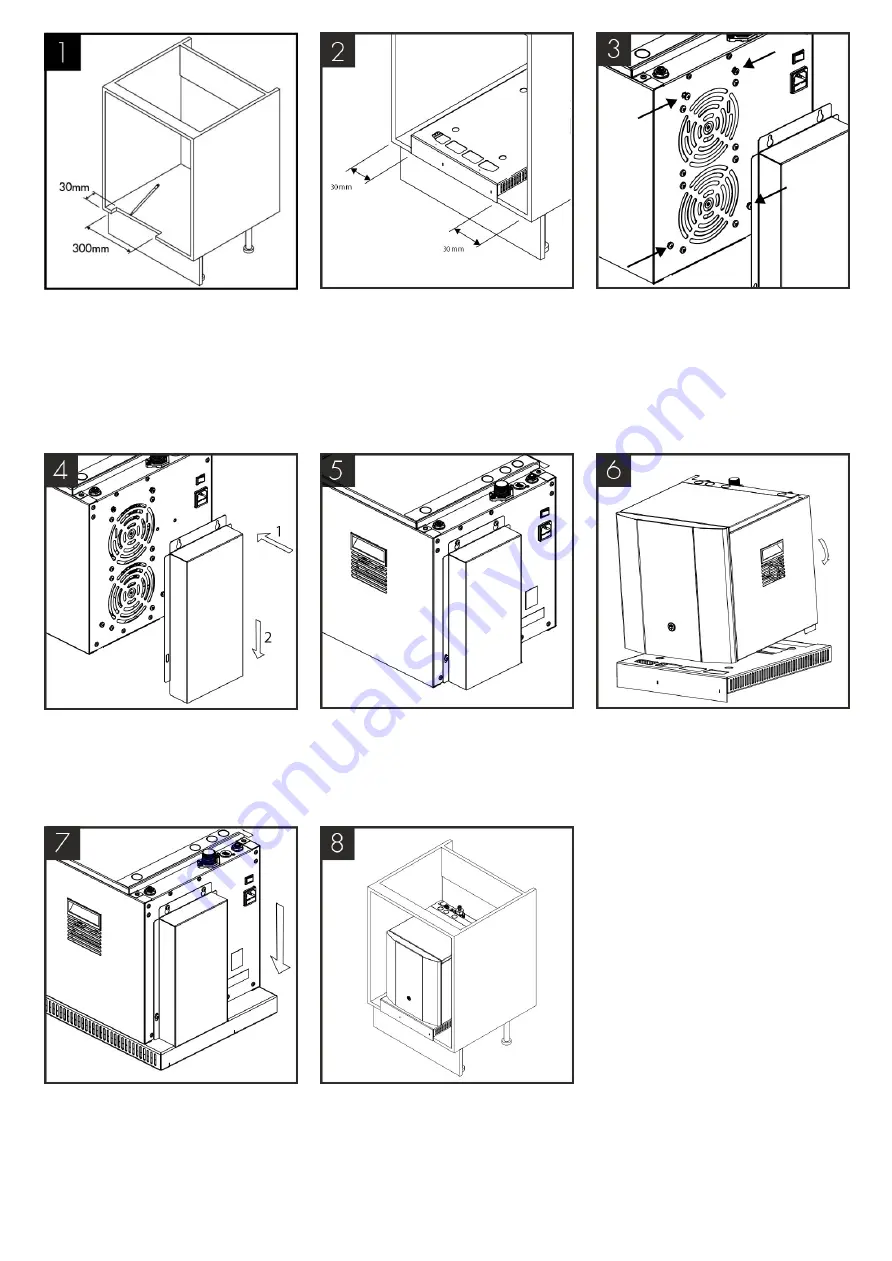
Using the template provided,
carefully mark and cut the
aperture to the edge of the
cabinet.
Situate the ProCore Simple-fit
ventilation base in place centrally
over the aperture. Ensuring that
there is a minimum of 30mm air
gap to each side.
Insert 4 screws into the holes
located. Do not overtighten at this
stage.
Place the rear vent chimney over
the 4 screws and slide
downwards into place.
Tighten all 4 fixing screws.
Lift and tilt the unit into position
ready to lower.
Lower the appliance carefully into
position on the ventilation base to
ensure the chimney is located
correctly in the chimney aperture
at the rear of the base.
After installation the vents at the
front of the cabinet and to the
sides of the ventilation base must
not be obstructed.
Summary of Contents for T2
Page 4: ...Specification ...
Page 6: ...AMBIENT ROOM OPERATING TEMPERATURE CLIMATIC CLASS N ...
Page 11: ......
Page 24: ...Fault Diagnostics Advanced Troubleshooting ...
Page 28: ...T2 T2 Chilled Ambient Sparkling Circuit Schematic ...
Page 29: ...Water Pathway Chilled Ambient ...
Page 30: ...Water Pathway Chilled Sparkling ...
Page 31: ...Water Pathway Chilled Ambient Sparkling ...
Page 32: ......
Page 33: ...ProCore ProCore Exploded Parts Diagram T2 T2 Exploded Parts Diagram Spares ...
Page 34: ......
Page 38: ......


