u1 Undercounter Systems
Install & Operation Guide | 15
GB
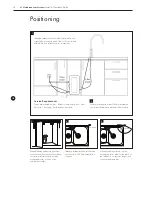
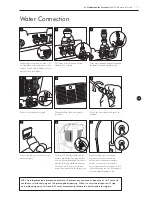
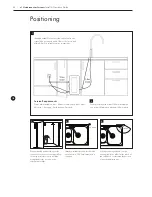
400mm
Allow sufficient space for fitting a back
nut to the faucet stem
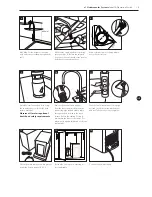
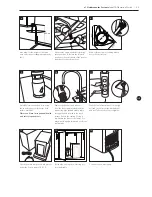
Connect to the water supply
With the faucet control panel in the right
position, carefully refit the back washer
and nut. Take care not to over-tighten.
Also allow for the height of the swan
neck under any overhanging cupboard/
shelf.
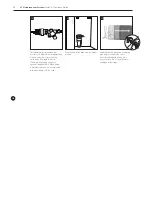
Check the main components are present
as per the lists on pages 12 & 13.
Carefully form the needed hole, using
the correct type of cutter for the work
surface material.
Observe all local occupational
health and safety requirements.
Allow for the space needed for forming
the required hole. Relate the selected
position to the underneath of the counter
and check for any obstructions.
Position the unit in place, ensuring it is
level and stable.
Remove the back nut and washer
from the faucet and carefully feed the
connecting pipe tail and ribbon cable
through the hole formed in the work
surface. Ensure the sealing O ring is
pre-fitted in the base of the faucet. You
may want to apply a thin bead of silicone
sealant also.
8
14
11
6
12
9
7
13
10
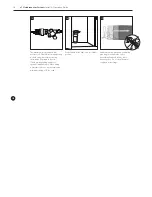
78mm
70mm
Summary of Contents for u1
Page 4: ...4 u1 Undercounter Systems Install Operation Guide GB ...
Page 10: ...10 u1 Undercounter Systems Install Operation Guide GB ...
Page 20: ...20 u1 Undercounter Systems Install Operation Guide GB ...
Page 32: ...32 u1 Undercounter Systems Install Operation Guide GB ...
Page 36: ...36 u1 Undercounter Systems Install Operation Guide GB ...
Page 44: ...44 u1 Undercounter Systems Install Operation Guide GB ...
Page 62: ...62 u1 Undercounter Systems Install Operation Guide GB ...
Page 63: ...u1 Undercounter Systems Install Operation Guide 63 GB ...


