background image

 
Base settings (regardless of internal shock setting): 


Please refer to the shock chart list available to download at bosmtb.com for specific pressure and setting 
suggestions for your bike and weight.  


3.5


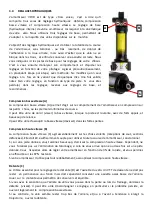
AJUSTING AIR VOLUME 

The progressivity adjustment featured on the VOID, allows you to adjust the air spring rate on the last third 
of stroke. Thus, if you have found satisfying settings (air pressure and hydraulic) on the first half of the 
stroke, you can adjust the feel of the last millimeters of travel. 

The most frequent and simplest cases are: 

The shock has an overall setup to single out comfort and grip, and the bike sits low: by increasing the end-
stroke rate you will get a better control of the chassis through the shock and avoid bottoming out. The rate 
curve should be more progressive (increasing at the end) by adding o-rings. 

The overall setup of the shock is more responsive, with a high chassis balance. By decreasing the end 
stroke rate by removing o-rings, you can make sure that you use all the travel. 

This setting is adjusted by adding or removing O-rings placed inside the air can. 

We suggest you to go about the set-up step by step. First add or remove two O-rings, then fine-tune the 
setting with one O-ring at a time. Adding one O-ring in the chamber increases the end of stroke spring rate 
by 2%. 

Usually, the correct setting is between 0 and 4 O-rings. However, the range can go up to 10 O-rings 
depending on the bike 


Important : 

To start your adjustment, turn the knob clockwise until it stops (clicks = 0). Then count the clicks 
while turning the knob counterclockwise.  

Low-speed compression: 12 clicks from fully closed position 
High-speed compression: 17 clicks from fully closed position   
Rebound: 12 clicks from the fully closed position 

Important : 

With a significant hydraulic compression support, the VOID shock allows the bike to maintain a high 
dynamic balance, as well as giving good response, and improved handling. BOS recommends setting up 
the bike with a fast rebound to keep the chassis balanced, and avoid the bike sitting low in its travel.  

The  feeling  of  «fast»  or  «slow»  rebound  will  differ  from  one  rider  to  another.  Thus  it’s  difficult  to 
define it precisely. We advise you to define your own range of correct rebound - the range of settings 
between «too fast» and «too slow». Then, always choose a setting in the faster part of that range, for 
example the three last clicks (counterclockwise) on a range of nine. 

Summary of Contents for VOID2

Page 1: ...VOID Notice D utilisation ...

Page 2: ...e conformité à la législation locale Exclusion La garantie ne s applique pas dans les cas suivants Non respect des instructions de montage telles que décrites dans le manuel d installation et de réglages Modifications apportées au produit à l initiative du propriétaire ou d un tiers Utilisation non appropriée Dommages résultant d un accident choc violent chute dans quelque circonstance que ce soit...

Page 3: ...ité disponible dans la zone téléchargements du site web BOS Référez vous à la notice constructeur Pour suivre les procédures de montage et démontage de l amortisseur spécifiques à votre vélo 1 Préambule KIT de montage standard MKP2 XX YY Exemple MKP2 30 08 Il est nécessaire de préciser une référence pour chaque côté de l amortisseur 2 Assemblage XX XX YY YY Attention Ne jamais tenter de démonter v...

Page 4: ...liqué la pression d air recommandée il convient d équilibrer les chambres positives et négatives afin de garantir un fonctionnement optimal de votre amortisseur VOID Pour ce faire l amortisseur doit être monté sur le vélo Placez le joint torique repère à 11 mm du joint racleur asseyez vous sur le vélo et appuyez lentement sur la suspension afin de comprimer l amortisseur jusqu au joint torique Lai...

Page 5: ...yez vous sur votre vélo si possible en tenue de roulage posez les deux pieds sur les pédales en position horizontale et laissez la suspension arrière se comprimer sous l effet de votre poids Descendez de votre vélo décomprimez totalement la suspension en tirant sur la selle et mesurez la distance entre le joint torique repère et le joint racleur Cette distance en mm va vous permettre de vérifier v...

Page 6: ...l peut être utile de durcir visser la base vitesse lorsque la piste est roulante avec de forts appuis et beaucoup de relance Il peut être utile d assouplir la basse vitesse dévisser dans les fortes pentes Compression haute vitesse B La compression haute vitesse C agit essentiellement sur les chocs violents réceptions de saut sections défoncées Elle doit être suffisamment souple pour utiliser toute...

Page 7: ...ectuer un premier test en faisant varier le nombre de joints toriques deux par deux et d affiner ensuite votre réglage en ajoutant ou enlevant un joint torique Un joint torique supplémentaire augmente la raideur en fin de course de 2 Le réglage se fait sur une amplitude de 0 à 10 joints Mais dans la plupart des cas la bonne valeur est comprise entre 0 et 4 joints Important Pour commencer votre rég...

Page 8: ...chambre positive image 2 Retirer la chambre positive image 3 Positionner ou soustraire le nombre de joints désiré à l intérieur du cylindre de la chambre d air en les plaçant au fond du cylindre image 4 Assurez vous que la molette de détente et l autocollant collé sur la chambre positive a soient bien alignés image 5 Replacer le cylindre sur l amortisseur et revisser jusqu à alignement des autocol...

Page 9: ...a valve d air ou pour positionner en rotation la valve sur le cylindre suivez les instructions ci dessous Positionner la tête d amortisseur dans un étau muni de mors doux 1 Serrer faiblement pour ne pas en dégrader la surface Noter la pression de gonflage de votre amortisseur en tenant compte de la perte de pression relative au branchement de votre pompe Dégonfler complètement l amortisseur Le cor...

Page 10: ...les joints que la boue séchée L opération est cependant fort simple il suffit de nettoyer le plongeur avec un chiffon doux propre Vous pouvez occasionnellement lubrifier les joints avec quelques gouttes d huile de fourche A proscrire absolument tout produit agressif tel que les dégraissants ou abrasifs Si vous utilisez un laveur haute pression n orientez jamais le jet directement sur les joints Ne...

Page 11: ... est ce normal Le ressort pneumatique Bos est conçu de manière à abaisser au maximum le seuil de déclenchement de l amortisseur Il est donc possible que sur certains vélos il y ait un peu de débattement négatif Où puis je me procurer les autocollants d origine VOID ou le bouchon de valve Ces articles sont en vente sur la boutique en ligne du site web BOS Où bien prenez contact avec notre service c...

Page 12: ...ssible d adapter l ensemble de ces paramètres pour s adapter à votre poids votre pratique et votre style de pilotage en prenant contact avec votre centre de service agrée BOS Pour tout autre renseignement veuillez consulter la page dédiée à la FAQ sur notre site web ou envoyez nous un message à customerservice bosmtb com Date Lieu Pression Psi Compression HV Compression BV Détente Commentaires ...

Page 13: ...VOID User Manual l ...

Page 14: ...uential resulting from the use of its products local legislation prevailing Warranty exclusions This warranty does not cover the following cases Damage to products resulting from improper assembly other than listed below Products that have been modified by the owner or a third party Improper use Damages resulting from an accident or a crash under any circumstances Invalid servicing procedures and ...

Page 15: ...e compatibility table available on the BOS MTB website download page Refer to the bike s user manual To follow your bike specific shock mounting procedure 1 Introduction Standard mounting kit MKP2 XX YY Example MKP2 30 08 It s necessary to measure precise dimensions for each side of the shock 2 Assembly Caution Never try to disassemble your shock Limit yourself to the instructions given in this ma...

Page 16: ...e 3 2 EQUALIZING AIR CHAMBERS In order for your shock to function correctly you must equalize the air chambers after setting your pressure To equalize the chambers the shock must be fitted on the bike Place the travel checker O ring at 11 mm from the shock seal sit on your bike and slowly compress the suspension until the seal comes to the O ring Let the suspension slowly extend to its full travel...

Page 17: ...t seal Sit on your bike if possible dressed with your riding outfit feet on the pedals horizontal position and let the suspension compress under your weight Get off the bike without pushing on the suspension any more extend the rear suspension to its full travel by pulling up the saddle and measure the distance between the O ring and the seal This distance allows you to check the percentage of SAG...

Page 18: ...urning the knob clockwise on rolling terrain with big compressions and kickers It might be useful to soften the low speed compression by turning the knob counter clockwise on steep gradients High speed compression B The high speed compression acts mainly on harsh hits jump landings rough sections It should be soft enough to get all the travel without bottoming out If on a given track you bottom ou...

Page 19: ...u to go about the set up step by step First add or remove two O rings then fine tune the setting with one O ring at a time Adding one O ring in the chamber increases the end of stroke spring rate by 2 Usually the correct setting is between 0 and 4 O rings However the range can go up to 10 O rings depending on the bike Important To start your adjustment turn the knob clockwise until it stops clicks...

Page 20: ...ition figure 2 Remove the air can figure 3 Insert or remove O ring s from the body side of the shock and put them in position figure 4 Make sure that O ring s do not block the hole in the shock Make sure you have aligned the air can a sticker with the rebound knob figure 5 Replace the air can by screwing back by hand until the stickers align to ensure the proper torque figure 6 If the stickers do ...

Page 21: ... direction of your valve or rotate it around the air can follow the instructions below Place the head of the shock in a soft jawed vice figure 1 Lightly tighten the vice jaws to prevent damaging the shock Note your shock pressure taking into account the loss of pressure when connecting your pump Slowly deflate the shock The shock body will retract slightly Unscrew the air can while keeping the bod...

Page 22: ...aiting Nothing is worse for the life of your seals than dirt and dust The cleaning process is also extremely simple wipe off the body and the seal with a clean soft rag You can occasionally lubricate the exterior of the seal with fork oil Do not under any circumstances use degreaser solvent or any abrasive material On the same note do not ever power wash the seals Cleaning Oil service Full service...

Page 23: ... as much as possible Therefore it is possible on some bikes that there will be a small negative travel Where can I purchase replacement stickers and valve cap You can purchase these items through your approved BOS center or on the BOS store on bosmtb com I noticed some play between my shock and the frame what can I do Check that your mounting hardware is torqued to your manufacturer s specificatio...

Page 24: ... to match with your weight your use and your style even so to optimize your set up please contact your BOS service center For any other questions please visit our FAQ page on the BOS website or send us a message to customerservice bosmtb com Date Location Air pressure Psi HS Compression LS Compression Rebound Remarks 5 Notes 4 impasse Léonce Couture F31200 Toulouse tel 33 0 534 25 33 66 fax 33 0 5...

Reviews: