6
Tool Tips
Following a few simple tips will reduce wear
on the tool and it will reduce the chance of
injury to the operator. However, these instruc-
tions are not intended to teach a novice how to
Blade Installation
The 1575A will cut foam rubber, urethane
foam and other synthetic foams. Its cutting
capacity depends on the length of blades and
guide used.
CAUTION!
The foam cutter blades are sharp
and susceptible to bending and must be handled
carefully to avoid injury to user or bending of
the blades.
CAUTION!
In order to avoid accidents, al-
ways match the blade and blade guide length to
the material to be cut. Never expose any exces-
sive blade length above or below the material.
Installing and changing
the blades:
Remove
screws
4
, knurled nuts
3
,
lockwashers
9
and face
plate
2
from the tool. In-
stall the blade guide
5
with the slot towards the
front of the tool, being
sure to align the locating pins in the corre-
sponding holes. Install screws
4
and securely
tighten. Insert the lightly lubricated blades
6
into the blades guide
5
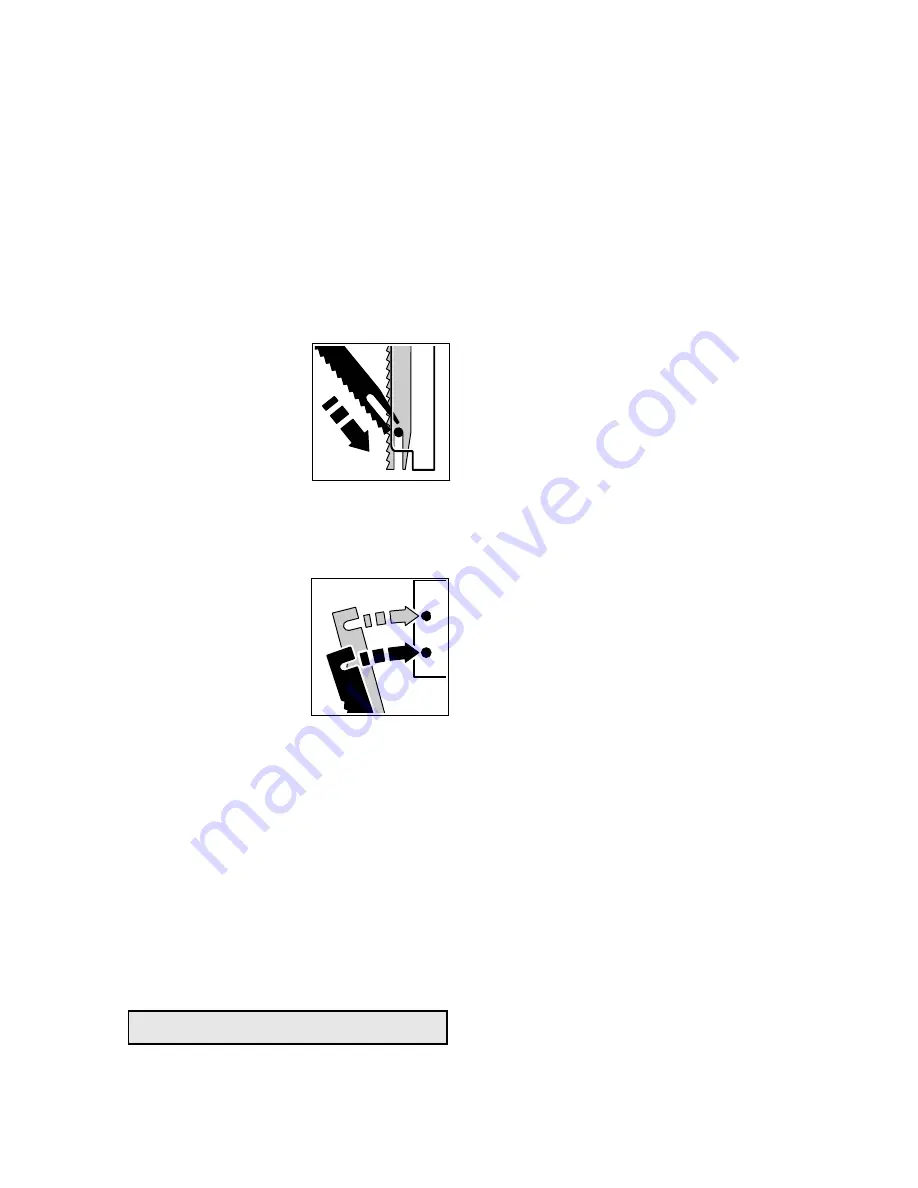
so that the vertical slots
in the bottom of the
blades drop over the pin
in the bottom of the blade
guide
5
. Align the hori-
zontal slots at the top of
the blades with the drive
pins in the bottom of the
gear box and slide the
blades in until recessed slightly. Install face
plate
2
, lockwashers
9
, and securely tighten
knurled nuts
3
.
Footplate Installation
The 1575A may be used with or without the
foot plate
8,
which facilitates guiding the saw
and enables sharp corners to be cut. The foot
plate may be removed when cutting random
shapes.
Installing the footplate:
Press the foot plate
8
into the blades guide
5
. Tighten foot plate onto
blade guide using locking screw
7
.
operate this tool. If you are not familiar with
the operation of this tool, it is best to obtain
instruction from a skilled user, or take a class
at a local junior or community college.
With the tool unplugged from the power sup-
ply and the on/off switch
1
in the "OFF"
position, please become familiar with han-
dling the foam cutter and learning the location
of the foam cutter's component parts that are
listed on page three of this manual.
Before running the foam cutter, inspect the
blades for excessive wear, and replace if nec-
essary.
For clean and fast cuts, hold the tool so that the
cutting head is at a right angle (90º) to the
material being cut. Feeding the tool into the
work with a minimum of pressure reduces
output considerably as well as the cutting life
of the blades.
When making cut-outs, remove the footplate
and pierce a hole through the material for the
blades with a knife or scissors.
If the foam cutter does not cut correctly, check
for dull blades. Denser materials will dull the
blades faster than less dense materials. Dulling
will be apparent as more pressure is required to
feed and cut into the material.
Blades can be easily re-sharpened by means of
the blades sharpener with whetstone available
as an optional accessory.
When cutting precise blanks, and especially
when cutting soft foam and similar materials,
feed the foam cutter slowly. Don't stretch or
press materials excessively when cutting.
The blades and blade guide must be cleaned at
regular intervals (approx. every 8-10 operat-
ing hours). It is advisable to clean them using
benzine. Before installing new or sharpened
blades, lightly oil the blade guide
5
.
Summary of Contents for 1575A
Page 2: ...2 1 2 3 4 9 5 6 7 8 10 ...
Page 23: ...Notes ...


