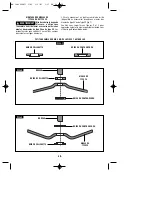
"TRI-CONTROL" PADDLE SWITCH
The “Tri-Control” Paddle Switch enables the
operator to control the switch functions of
"Lock-OFF", "ON/OFF" and "Lock-ON".
TO UNLOCK SWITCH
AND TURN TOOL "ON":
Push paddle lever
FORWARD (toward the
spindle) then squeeze
the paddle lever.
TO SWITCH TOOL "OFF": Release pressure
on paddle lever. The switch is spring loaded
and will return to "OFF" position
automatically.
The "Lock-ON" feature, incorporated into the
paddle switch, is a convenience for long
operations.
TO LOCK SWITCH "ON": After paddle switch
has been activated push paddle lever
completely FORWARD and release paddle
lever.
TO SWITCH TOOL "OFF": Squeeze and
then release paddle lever. The switch is
spring loaded and will return to "OFF"
position automatically.
Hold the tool with both
hands while starting the tool,
since torque from the motor can cause the
tool to twist.
Start the tool before applying to work and let
the tool come to full speed before contacting
the workpiece. Lift the tool from the work
before releasing the switch. DO NOT turn the
switch “ON” and “OFF” while the tool is
under load; this will greatly decrease the
switch life.
-10-
Operating Instructions
!
WARNING
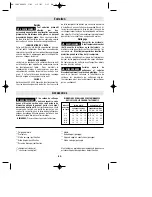
SELECTING SANDING DISC
Sanding discs are made of extremely hard
and sharp aluminum oxide grits, phenol-resin
bonded to a sturdy fiber backing for fast
heavy-duty service and long life. The discs
vary as to size and spacing of the abrasive
grits. OPEN COAT (type H) — used for soft
materials and on paint or varnish. CLOSED
COAT (type K) —used for metal, hardwood,
stone, marble and other materials.
Sanding discs range in grit from 16 (very
coarse) to 180 (very fine). To obtain best
results, select sanding discs carefully. Many
jobs require the use of several grit sizes and
at times both “open coat and closed coat”
discs are required to get the job done faster.
See chart for application examples.
Operation:
Refinishing painted wood or metal surfaces.
REMARKS
GRIT
To remove paint and to smooth
Coarse
surface irregularities.
16-24-30
To smooth
Medium
the rough sanding.
36-50-80
To remove scratches left by
Fine
previous discs.
100-120
To smooth surfaces for painting,
Very Fine
polishing or waxing.
150-180
Sanding Operations
SANDING TIPS
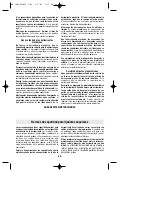
For best results, tilt the Disc Sander at a 10°
to 15° angle while sanding so that only about
1" of the surface around the edge of the disc
contacts the work.
If the disc (accessory) is held flat or the back
edge of the disc comes in contact with the
work, a violent thrust to the side may result.
If sander is tilted too much, sanding action
will be too great and a rough cut surface or
gouging and snagging will result.
Guide the Disc Sander with crosswise
strokes. Be careful not to hold the sander in
one spot too long. Do not use a circular
motion, as this makes swirl marks. Test
before use on scrap stock.
Do not force or apply pressure when
sanding. Use only the weight of the tool for
pressure. Excess pressure actually slows the
tool down. If faster stock removal is desired,
change to a coarser grit disc.
Remove gummy paint from metal with an
“open coat” disc. Sand until sparks start to
appear, then stop and change to a “closed
coat” disc to remove any remaining paint.
BM 1609929H55 1-05 1/5/05 3:17 AM Page 10


