background image

Installation Manual

Microwave 

300 SERIES

HMV3053U, HMV3063U, HMV3023U

Summary of Contents for 300 Series

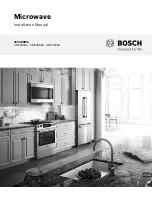
Page 1: ...Installation Manual Microwave 300 SERIES HMV3053U HMV3063U HMV3023U ...

Page 2: ...taching the mounting plate to the wall 9 Adapting microwave blower 9 Preparing cabinet 11 Mounting the microwave oven 11 Hood exhaust 12 Testing Operation 13 Bosch Support 14 Before Calling Service 14 Data Plate 14 Service 14 Parts and Accessories 14 Safety Definitions 9 WARNING This indicates that death or serious injuries may occur as a result of non observance of this warning 9 CAUTION This ind...

Page 3: ...rd and plug do not cut or remove the ground prong It must be plugged into a matching grounding type receptacle to avoid electrical shock If there is any doubt as to whether the wall receptacle is properly grounded the customer should have it checked by a qualified electrician If required by the National Electrical Code or Canadian Electrical Code this appliance must be installed on a separate bran...

Page 4: ...r supply cord is too short have a qualified electrician install an outlet near the appliance Related Equipment Safety Remove all tape and packaging before using the appliance Destroy the packaging after unpacking the appliance Never allow children to play with packaging material Never modify or alter the construction of the appliance For example do not remove leveling legs panels wire covers or an...

Page 5: ...Appliance Preparing cabinet 9 At least two persons are needed to lift the appliance tilt and hook the appliance to the holding plate Section Install Appliance Mounting the microwave oven 10 Push the appliance all the way into place and fasten the holding screws through top cabinet holes Section Install Appliance Mounting the microwave oven 11 Use correct hood exhaust Section Install Appliance Hood...

Page 6: ...g bolts Self aligning machine screws 28x3 B Toggle bolts 3 16 x3 C Wall mounting hardware Toggle wings D Wood screws x2 E Nylon grommet for metal cabinets F Exhaust adaptor G Mounting plate attached to the back of the microwave oven ê URXQGHG 9 RXWOHW ORFDWHG LQVLGH WKH FDELQHW DERYH WKH RYHQ PP PLQ ULJKW VLGH VKRZQ DV H DPSOH PLQ PP FDELQHW RSHQLQJ ZLGWK PLQ PP PD ʎ ʚ PP PP PLQ RU RSWLPDO SHUIRUP...

Page 7: ...quirements of the National Electric Code or the prevailing local code for this rating The power supply cord and plug should be brought to a separate 20 amp branch circuit single grounded outlet The outlet box should be located in the area behind the appliance see section Cabinet Dimensions The outlet box and supply circuit should be installed by a qualified electrician and conform to the National ...

Page 8: ...abinet opening do not install the microwave oven 1 Locate the edges of the wall studs within the cabinet opening by using a stud finder or a hammer tapping lightly across the mounting surface to find a solid sound 2 Place a mark halfway between the edges and draw a line down the center of the studs See possible wall studs configuration Possible wall stud configurations These depictions show exampl...

Page 9: ...ded area F on the REAR WALL TEMPLATE using a saber or keyhole saw 9 CAUTION If exhaust adaptor is positioned outside consider recommended dimensions otherwise grease laden air will discharge into house structure 7 Remove REAR WALL TEMPLATE Attaching the mounting plate 1 Remove the toggle wings from the bolts 2 Insert the bolts into the mounting plate through the holes designated to go into drywall...

Page 10: ... blower motor and the blower plate Lift up the blower plate and put it aside 2 Carefully pull out the blower unit and rotate 90º so that fan blade openings are facing out the top of the microwave 3 Rotate the blower unit counterclockwise 180º 4 Gently remove the wires from the grooves Reroute the wires through the grooves on other side of the blower unit Rotate blower unit 90º so that fan blade op...

Page 11: ...keyhole saw 7 Remove templates from back wall and cabinet Mounting the microwave oven Notes If the bottom of the upper cabinet is recessed or has front overhang you will need to prepare 2 x 2 51 mm x 51 mm depth equivalent to cabinet recess or overhang filler blocks to provide additional support for the bolts mark the center of each filler block and drill a 3 8 10 mm diameter hole align filler blo...

Page 12: ...blocking the ducts The hood exhaust has been designed to mate with a standard 3 x 10 82 x 254 mm rectangular duct If a round duct is required a rectangular to round transition adaptor must be used Do not use less than a 6 152 mm diameter duct For satisfactory air movement the total duct length of 3 x 10 82 x 254 mm rectangular or 6 152 mm diameter round should not exceed 120 equivalent feet 36 5 m...

Page 13: ... 2 Test the microwave Place a cup of water into the oven cavity Follow the instructions in the Use and Care Manual on how to heat a beverage 3 Verify that the oven light comes on and the water is heated 4 If any of the tests do not result as explained above contact Service for assistance Otherwise the installation is complete at this time 90 Elbow 10 ft 3 m x 45 Elbow 5 ft 1 5 m x 90 Elbow 25 ft 7...

Page 14: ...items needed in the spaces provided below Keep your invoice or escrow papers for warranty validation if service is needed Service We realize that you have made a considerable investment in your kitchen We are dedicated to supporting you and your appliance so that you have many years of creative cooking Please don t hesitate to contact our Customer Support Department if you have any questions or in...

Page 15: ...bles configuraciones de los pasadores de pared 21 Acoplamiento de la placa de fijación a la pared 22 Adaptación del ventilador del microondas 23 Preparación del gabinete 24 Montaje del horno microondas 24 Escape de la campana 25 Prueba del funcionamiento 27 Soporte de Bosch 28 Antes de llamar al servicio 28 Placa de datos 28 Servicio técnico 28 Piezas y accesorios 28 Definiciones de Seguridad 9 AD...

Page 16: ... cocinar y para servir alimentos eléctricos de uso doméstico Electric Household Cooking and Food Serving Appliances Es responsabilidad del propietario y el instalador determinar si se aplican otros requisitos y o normas en instalaciones específicas Seguridad con la electricidad ADVERTENCIA Antes de enchufar un cable eléctrico o apagar la fuente de alimentación eléctrica asegúrese de que todos los ...

Page 17: ...y conectada a tierra en forma adecuada ADVERTENCIA La incorrecta conexión a tierra puede provocar un riesgo de descarga eléctrica Consulte a un electricista calificado si no comprende la totalidad de las instrucciones de conexión a tierra o si tiene alguna duda respecto de si el aparato está correctamente conectado a tierra No use un cable de extensión Si el cable de alimentación eléctrica es dema...

Page 18: ...ed 7 Adapte el ventilador del microondas Sección Montaje del electrodoméstico Adaptación del ventilador del microondas 8 Prepare el gabinete para la installación del aparato Sección Montaje del electrodoméstico Preparación del gabinete 9 Con ayuda levante el aparato inclínelo hacia adelante y enganche los slots en la placa de fijación Sección Montaje del electrodoméstico Montaje del horno microond...

Page 19: ...lación se encuentra en el paquete junto con la unidad Asegurarse de que todas estas partes están incluidas No mostrados Plantilla para armario superior Plantilla para pared trasera Filtros antigrasa de aluminio Filtro de carbón activo instalado de fábrica en el horno de microondas Requisitos de ubicación Medidas para la instalación A Pernos de montaje superiores Tornillos autoalineables para metal...

Page 20: ...ta especificación El cable de alimentación y el conector deberán conectarse a un tomacorriente individual separado con conexión a tierra con circuito de derivación de 20 amperios La caja del tomacorriente debe estar ubicada en la zona detrás del aparato ver sección Dimensiones del gabinete La caja del tomacorriente y el circuito de alimentación deben ser instalados por un electricista calificado y...

Page 21: ... los pasadores de pared dentro de la abertura del gabinete utilizando lo siguiente un buscapasadores o bien un martillo golpeando levemente la superficie de montaje para encontrar un sonido sólido 2 Coloque una marca en la mitad entre los bordes y dibuje una línea por el centro de los pasadores consulte la posible configuración de los pasadores de pared Posibles configuraciones de los pasadores de...

Page 22: ...ta Si ni A ni B se encuentran en un pasador encuentre un pasador en alguna parte de la sección de la placa de fijación y taladre un orificio de 3 16 pulg 5 mm Es importante utilizar como mínimo un tornillo para madera montado firmemente en un pasador para sostener el peso del microondas 6 Únicamente para la instalación de ventilación de pared Corte la sección sombreada F en la PLANTILLA DE LA PARE...

Page 23: ...ador con cuidado y rótela 90º de modo que las aberturas de los álabes del ventilador miren hacia la parte superior del microondas 3 Vuelva a colocar la unidad del ventilador en la abertura 9 ATENCION No tire del cableado de la unidad del ventilador ni lo estire Asegúrese de que los cables no queden pinzados y de que estén asegurados en forma adecuada 4 Vuelva a colocar la placa del ventilador y as...

Page 24: ...te superior 3 Pegue la PLANTILLA DEL GABINETE SUPERIOR con cinta en la superficie inferior Asegúrese de que la línea central de la plantilla esté alineada con la línea vertical en la pared Las flechas de la pared trasera deben ubicarse contra la pared trasera Nota Para una parte inferior del gabinete empotrada recorte los bordes de la plantilla de modo que esta calce dentro de la sección empotrada...

Page 25: ...dos tornillos autoalineables restantes en los agujeros exteriores del armario superior Girar cada tornillo dos vueltas completas 5 Apretar el tornillo central por completo 6 Apretar los dos tornillos exteriores por completo a la parte superior del horno de microondas Nota Mientras se aprietan los tornillos sujetar el horno de microondas en el lugar en el que se colocará contra la pared y el armari...

Page 26: ...adicional al flujo de aire y son equivalentes a una sección de conducto recto de mayor longitud que su tamaño físico real Al calcular la longitud total del conducto sume las longitudes equivalentes de todas las transiciones y de todos los adaptadores más la longitud de todas las secciones de conducto recto El cuadro que se encuentra a continuación muestra cómo calcular la longitud total equivalent...

Page 27: ... Encienda la alimentación eléctrica desde el disyuntor 2 Pruebe el microondas Coloque una taza de agua en la cavidad del horno Siga las instrucciones que se indican en el Manual de uso y cuidado sobre cómo calentar una bebida 3 Verifique que la luz del horno se encienda y que el agua se caliente 4 Si alguna de las pruebas no funciona según se explicó anteriormente comuníquese con el Servicio técni...

Page 28: ...l Servicio de atención al cliente Conserve su factura o los papeles de depósito para la validación de la garantía si necesita solicitar servicio técnico Servicio técnico Sabemos que usted ha realizado una inversión considerable en su cocina Nos dedicamos a brindar asistencia a usted y a su aparato de manera que tenga muchos años de cocina creativa No dude en comunicarse con nuestro Departamento de...

Page 29: ......

Page 30: ......

Page 31: ......

Page 32: ...1901 Main Street Suite 600 Irvine CA 92614 800 944 2904 www bosch home com 2016 BSH Home Appliances 960301 9001152497 9001152497 ...

Reviews: