background image

AUTODOME IP 4000i/AUTODOME IP 5000i/
AUTODOME IP 5000i IR

Browser connection | en

7

Bosch Security Systems

User Manual

2018.05 | 1.1 |

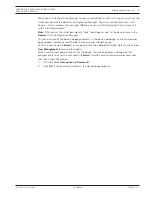
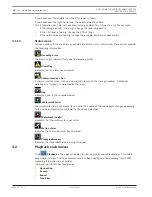
When you use Configuration Manager to access your device for the first time, you must set the
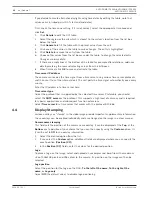
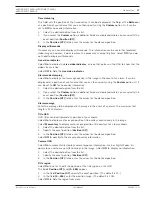
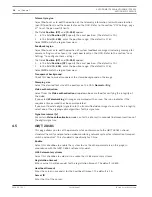
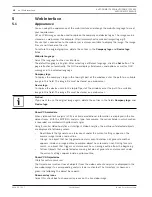
initial password of the device in Configuration Manager. The Users section (General > Unit
Access > Users) displays the message, "Before you can use this device you have to secure it
with an initial password."

Note

: After you set the initial password, a "lock" icon appears next to the device name in the

Devices

 list in Configuration Manager.

You can also launch the device webpage directly. In the device webpage, an initial password
page appears, displaying input fields and a password strength gauge.
Enter the user name (“

service

”) and a password in the appropriate fields. Refer to the section

User Management

 for more information.

After a service-level password is set for the device, the device displays a dialog box that
prompts users to enter the user name (“

service

”) and the service-level password every time

that they access the device.
1.

Fill in the fields 

User name

 and 

Password

.

2.

Click 

OK

. If the password is correct, the desired page appears.

Summary of Contents for AUTODOME IP 5000i

Page 1: ...AUTODOME IP 4000i AUTODOME IP 5000i AUTODOME IP 5000i IR NDP 4502 Z12 NDP 4502 Z12C NDP 5502 Z30 NDP 5502 Z30C NDP 5502 Z30L en User Manual ...

Page 2: ......

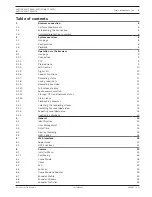
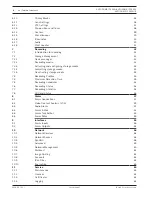
Page 3: ... 8 Saving snapshots 11 3 1 9 Recording live video 11 3 1 10 Full screen display 11 3 1 11 Audio communication 11 3 1 12 Storage CPU and network status 11 3 1 13 Status icons 12 3 2 Playback via browser 12 3 2 1 Selecting the recording stream 13 3 2 2 Searching for recorded video 13 3 2 3 Exporting recorded video 13 3 2 4 Controlling playback 13 4 General 14 4 1 Identification 14 4 2 User Managemen...

Page 4: ...media 43 7 2 5 Deactivating storage media 43 7 3 Recording Profiles 43 7 4 Maximum Retention Time 45 7 5 Recording Scheduler 45 7 6 Recording Status 46 7 7 Recording Statistics 46 7 8 SD Card Status 46 8 Alarm 47 8 1 Alarm Connections 47 8 2 Video Content Analysis VCA 49 8 3 Audio Alarm 51 8 4 Alarm E Mail 52 8 5 Alarm Task Editor 53 8 6 Alarm Rules 53 9 Interfaces 55 9 1 Alarm Inputs 55 9 2 Alarm...

Page 5: ...AUTODOME IP 4000i AUTODOME IP 5000i AUTODOME IP 5000i IR Table of contents en 5 Bosch Security Systems User Manual 2018 05 1 1 11 5 Diagnostics 65 11 6 System Overview 65 12 AUX Commands 66 ...

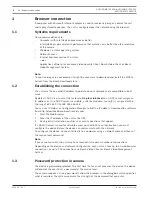
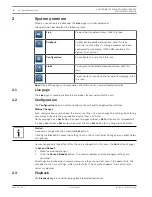
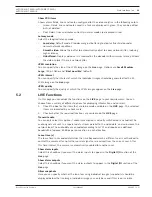
Page 6: ... DHCP server is available a link local address auto IP is assigned within the range 169 254 1 0 to 169 254 254 255 You can use IP Helper or Configuration Manager to find the IP address Download the software from http downloadstore boschsecurity com 1 Start the Web browser 2 Enter the IP address of the unit as the URL 3 During initial installation confirm any security questions that appear If a RAD...

Page 7: ...appears next to the device name in the Devices list in Configuration Manager You can also launch the device webpage directly In the device webpage an initial password page appears displaying input fields and a password strength gauge Enter the user name service and a password in the appropriate fields Refer to the section User Management for more information After a service level password is set f...

Page 8: ...age is used to configure the unit and the application interface Making Changes Each configuration screen shows the current settings You can change the settings by entering new values or by selecting a predefined value from a list field Not every page has a Set button Changes to pages without a Set button are set immediately If a page does show a Set button you must click the Set button for a chang...

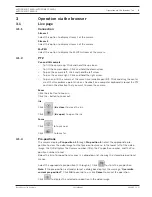
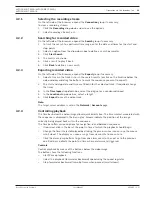
Page 9: ...ter keyboard around the PTZ control in the direction that you want to move the camera Zoom Click the button to zoom in Click the button to zoom out Iris Click Iris close to close the iris Click Iris open to open the iris Focus Click to focus near Click to focus far 3 1 3 Pre positions The camera displays Pre position 1 through Pre position 6 Select the appropriate pre position to view the video im...

Page 10: ...es the status of an alarm input The symbol lights when the input alarm is active The alarm output allows the operation of an external device for example a light or a door opener To activate the output click the checkmark symbol The symbol lights when the output is activated Input 1 This parameter identifies the first alarm input Input 2 This parameter identifies the second alarm input Output 1 Cli...

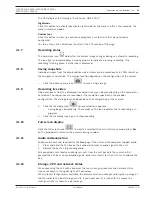
Page 11: ... sequences are recorded at the resolution specified in the encoder configuration The storage location depends on the configuration of the camera 1 Click the recording icon to record video sequences Saving begins immediately The red dot on the icon indicates that a recording is in progress 2 Click the recording icon again to stop recording 3 1 10 Full screen display Click the full screen icon to vi...

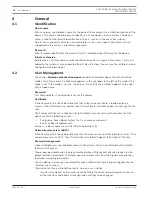
Page 12: ...due to decoding errors Alarm flag Indicates that an alarm has occurred Communication error A communication error such as a connection failure to the storage medium a protocol violation or a timeout is indicated by this icon Gap Indicates a gap in the recorded video Watermark valid The watermark set on the media item is valid The color of the check mark changes according to the video authentication...

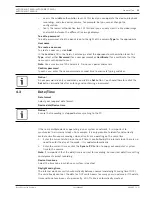
Page 13: ...the selected track If required change the times 3 In the Time lapse drop down box select the original or a condensed speed 4 In the Location drop down box select a target 5 Click Export to save the video track Note The target server address is set on the Network Accounts page 3 2 4 Controlling playback The time bar below the video image allows quick orientation The time interval associated with th...

Page 14: ...d indicates if a password is set for the camera Certificate A check mark in this check box indicates that at least one certificate is loaded onto the camera If no certificates are loaded then No certificate installed appears to the right of the text The Escrypt certificate is a root certificate for Bosch Security Systems that proves that the device meets the following criteria It originates from a...

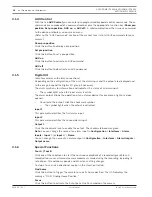
Page 15: ... button You should therefore click the Set button immediately after entering and confirming a password 4 3 Date Time Date format Select your required date format Device date Device time Notice Ensure that recording is stopped before synching to the PC If there are multiple devices operating in your system or network it is important to synchronize their internal clocks For example it is only possib...

Page 16: ... every minute Enter the IP address of a time server here Time server type Select the protocol that is supported by the selected time server Preferably you should select the SNTP server as the protocol This supports a high level of accuracy and is required for special applications and subsequent function extensions Select Time server for a time server that works with the protocol RFC 868 4 4 Displa...

Page 17: ...tion 1 Select the desired option from the list 2 If you select the Custom option additional fields are displayed where you can specify the exact position Position XY 3 In the Position XY fields enter the values for the desired position Alarm message Enter the message to be displayed in the image in the event of an alarm The maximum text length is 31 characters Title OSD OSD titles can be displayed...

Page 18: ...t the desired font size of the overlays on the OSD Normal or Big Video authentication Select from the Video authentication drop down box a method for verifying the integrity of the video If you select Watermarking all images are marked with an icon The icon indicates if the sequence live or saved has been manipulated If you want to add a digital signature to the transmitted video images to ensure ...

Page 19: ...ecurity Systems User Manual 2018 05 1 1 Server IP address Enter the server IP address Device ID Enter the ID of the device Device port Enter the number of the device port The default is 5060 Password Enter the appropriate password Alarm device ID Enter the ID of the alarm device ...

Page 20: ...this field The image file must be stored on a web server Notice If you want to use the original image again delete the entries in the fields Company logo and Device logo Show VCA metadata When video content analysis VCA is activated additional information is displayed in the live video stream With the MOTION analysis type for example the sensor fields in which motion is recorded are marked with ye...

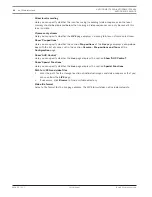
Page 21: ... adapt the functions on the LIVE page to your requirements You can choose from a variety of different options for displaying information and controls 1 Check the box for the items that are to be made available on the LIVE page The selected items are indicated by a check mark 2 Check whether the required functions are available on the LIVE page Transmit audio You can only select this option if audi...

Page 22: ...y whether the section Pre positions of the Live page displays a drop down box with the list of scenes set in the section Camera Pre positions and Tours of the Configuration page Show AUX Control Here you can specify whether the Live page displays the section Show AUX Control Show Special Functions Here you can specify whether the Live page displays the section Special Functions Path for JPEG and v...

Page 23: ... the camera A confirmation screen appears Allow several seconds for the camera to optimize the picture after a reset Note Clicking this button also clears the service level password Operators must reset the password before doing anything else 6 1 1 Positioning The Positioning feature describes the location of the camera and the perspective in the camera s field of view Perspective information is e...

Page 24: ...ll AUTODOME and MIC cameras Alternatively clear the Global check box to obtain a local calibration and overwrite the global calibration for the selected profile To do this select the VCA profile before Notice The Sketch functionality is only available for configured and assigned pre positions For AUTODOME and MIC cameras configure the pre positions of the camera and assign the pre positions to one...

Page 25: ...the ground plane such as a road marking Click to place an angle on the ground in the image The angle on ground represents an angle lying on the horizontal ground plane such as the corner of a carpet or parking bay markings 3 Adjust the calibration elements to the situation Enter the real size of a line or angle To do this select the line or angle then enter the size in the corresponding box Exampl...

Page 26: ...ocation of the camera on the ground on the X axis Y m The location of the camera on the ground on the Y axis Z m The elevation of the ground plane To determine the elevation of the camera add the Z m value and the Height m value of the camera WGS 84 The WGS 84 coordinate system is a spherical coordinate system description of the world and used in many standards including GPS Latitude Latitude is t...

Page 27: ...ust the color saturation with the slider from 0 to 255 White balance Select the appropriate white balance mode from the drop down list Basic auto mode allows the camera to continually adjust for optimal color reproduction using an average reflectance method This is useful for indoor light sources and for colored LED light illumination Standard auto mode allows the camera to continually adjust for ...

Page 28: ...n can be made with the R G and B weight sliders R weight When White balance is in an auto mode and RGB weight white balance is On this field appears Adjust the slide for red gain weight from 5 0 to 50 with 0 as the default Reducing red introduces more cyan G weight When White balance is in an auto mode and RGB weight white balance is On this field appears Adjust the slide for green gain weight fro...

Page 29: ...he camera automatically set the optimum shutter speed The camera tries to maintain the selected shutter speed as long as the light level of the scene permits 4 Select the minimum frame rate for automatic exposure The values available depend on the value set for the Base frame rate in the Installer Menu Fixed exposure Select to set a fixed shutter speed 4 Select the shutter speed for fixed exposure...

Page 30: ...tly when viewing foggy or other low contrast scenes Select Auto to activate the Intelligent Defog feature automatically as needed Select Off to disable the feature Note When the camera is in an indoor room that often has smoke or has low contrast and the camera monitors an area facing the outdoors such as large windows Bosch recommends to select option Auto 6 6 Scene Mode Scheduler The scene mode ...

Page 31: ...djusted to a median profile for everyday use Profile 3 HD Bit Rate Optimized For an HD image the video bit rate and frame quality are adjusted to ensure that the bit rate is the priority Profile 4 SD Image Optimized For an SD image the video bit rate and frame quality are adjusted to ensure that the picture quality is the priority Profile 5 SD Balanced For an SD image the video bit rate and frame ...

Page 32: ...ts The setting is based on the H 264 quantization parameter QP GOP structure Select the structure that you require for the group of pictures depending on whether you place greater priority on having the lowest possible delay IP frames only or using as little bandwidth as possible Options are IP IBP and IBBP I frame distance This parameter allows you to set the intervals in which the I frames will ...

Page 33: ...ality is retained even in the case of increased movement since the bandwidth is then filled up to the value that is entered under Maximum bit rate Background delta QP Select the appropriate encoding quality level for a background region defined in Encoder Regions The lower the QP value the higher the encoding quality Object delta QP Select the appropriate encoding quality level for an object regio...

Page 34: ...mage Optimized For an HD image the video bit rate and frame quality are adjusted to ensure that the picture quality is the priority Profile 2 HD Balanced For an HD image the video bit rate and frame quality are adjusted to a median profile for everyday use Profile 3 HD Bit Rate Optimized For an HD image the video bit rate and frame quality are adjusted to ensure that the bit rate is the priority P...

Page 35: ... a more logical functional sequence identifying the sequence to create a new privacy mask and then to update a privacy mask Privacy Masks block specific areas of a scene from being seen in the camera s field of view This can be useful when public spaces are in the coverage area or monitoring will be limited to a particular zone The areas covered are indicated by a colored pattern Black White or Gr...

Page 36: ...hreshold Click this check box to select the current zoom position at which the mask will appear as the camera zooms in or be hidden as the camera zooms out 6 11 Lens Settings Autofocus Continuously adjusts the lens automatically to the correct focus for the sharpest picture One Push default commonly called Spot Focus activates the Auto Focus feature after the camera stops moving Once focused Auto ...

Page 37: ... this feature click Off Freeze frame Select On to freeze the image while the camera moves to a predetermined scene position Turbo mode Select On to set the camera in Turbo mode when an operator pans or tilts the camera manually In this mode the camera can pan at a maximum of 400 per second and tilt at a maximum of 300 per second Azimuth Select On to display azimuth elevation readings Select Off to...

Page 38: ...he camera displays accurate compass headings The camera uses this calibration usually set to magnetic North as the zero degree pan position and as the North compass heading The camera then displays the compass heading based on the number of degrees from the North calibration point To set the North calibration point 1 Determine the North compass heading then move the camera to that position 2 Selec...

Page 39: ...ly the new pre position to the existing pre position To change the name of the pre position double click the pre position in the list Then change the name in the dialog box Edit Pre position and click OK 10 To view a pre position in the preview window select the pre position in the list and click the button Show pre position eye icon 11 To view a pre position from the Live page Click a pre positio...

Page 40: ...the IR light 1X 30X default 5X 30X 10X 30X 20X 30X Spotlight mode Select On to set the camera in spotlight mode which increases the IR intensity values at the zoom at which the camera is set Use this mode to see objects at far distances when the camera is zoomed to a wide angle Note that an IR beam will be visible in the field of view By default this option is Off 6 17 Audio Audio You can set the ...

Page 41: ...Counter The number of horizontal and vertical pixels covered by the highlighted area is displayed below the picture With these values you can check whether the requirements for specific functions for example identification tasks are fulfilled 1 Click Freeze to freeze the camera image if the object that you want to measure is moving 2 To reposition a zone place the cursor over the zone hold down th...

Page 42: ...n Manager The Managed by Video Recording Manager software box is only an indicator it cannot be changed here If the Managed by Video Recording Manager software box is checked you are not able to configure any further recording settings on this page 7 2 2 Recording media Select a media tab to connect to the available storage media iSCSI Media To use an iSCSI system as the storage medium a connectio...

Page 43: ...d on the target selected 7 2 4 Formatting storage media All recordings on a storage medium can be deleted at any time Check the recordings before deleting and back up important sequences on the computer s hard drive 1 Click a storage medium in the Managed storage media list to select it 2 Click Edit below the list 3 Click Format in the new window to delete all recordings in the storage medium 4 Cl...

Page 44: ...ard recordings Continuous the recording proceeds continuously If the maximum recording capacity is reached older recordings are overwritten automatically Pre alarm recording takes place in the pre alarm time during the alarm and during the post alarm time only Off no automatic recording takes place Stream Select the stream to be used for standard recordings Stream 1 Stream 2 I frames only Alarm re...

Page 45: ...eriods to be assigned to the selected profile 3 Use the right mouse button to deselect any of the intervals 4 Click the Select All button to link all time intervals to the selected profile 5 Click the Clear All button to deselect all of the intervals 6 When you are finished click the Set button to save the settings in the unit Holidays You can define holidays that are not in the standard weekly sc...

Page 46: ...duler Running recordings are interrupted and the configuration can be changed Recording status The graphic indicates the recording activity of the camera You will see an animated graphic while recording is taking place 7 6 Recording Status Details of the recording status are displayed here for information These settings cannot be changed 7 7 Recording Statistics Recording Identifies the current re...

Page 47: ...ddress For each number enter the corresponding IP address for the desired remote station Destination password If the remote station is password protected enter the password here Only ten passwords can be defined here Define a general password if more than ten connections are required The unit connects to all remote stations protected by the same general password To define a general password 1 Sele...

Page 48: ...in the split image SSL encryption SSL encryption protects data used for establishing a connection such as the password By selecting On only encrypted ports are available for the Remote port parameter SSL encryption must be activated and configured on both sides of a connection The appropriate certificates must also have been uploaded Certificates can be uploaded on the Maintenance page Configure a...

Page 49: ...sch is installed on your computer MPEG ActiveX software is available from the Bosch Security Systems DownloadStore https downloadstore boschsecurity com To open the VCA Help in the web browser 1 Select Configuration Alarm VCA 2 Click Configuration The VCA Settings window appears 3 Ensure that the VCA Settings window is on top and active If not click the Settings window 4 Press F1 VCA configuration...

Page 50: ...f Reference check is selected Reference check Save a reference image that can be continuously compared with the current video image If the current video image in the marked areas differs from the reference image an alarm is triggered This detects tampering that would otherwise not be detected for example if the camera is turned 1 Click Reference to save the currently visible video image as a refer...

Page 51: ... a camera resulting from turning the camera mount bracket for example Scene too bright Activate this function if tampering associated with exposure to extreme light for instance shining a flashlight directly on the lens should trigger an alarm Use the slider to set the threshold of the alarm trigger Scene too dark Activate this function if tampering associated with covering the lens for instance b...

Page 52: ...t to the mail server via the address you entered Otherwise leave the box blank 0 0 0 0 SMTP port Select the appropriate SMTP port SMTP user name Enter a registered user name for the chosen mailserver here SMTP password Enter the required password for the registered user name here Format You can select the data format of the alarm message Standard with JPEG E mail with attached JPEG image file SMS ...

Page 53: ...uirements 3 When finished click Set to transmit the scripts to the device If the transfer was successful the message Script successfully parsed is displayed over the text field If it was not successful an error message is displayed with further information 8 6 Alarm Rules An alarm rule can define which input s activate which output s Basically an alarm rule allows you to customize the camera to re...

Page 54: ... 1 256 Note This option is not available for the input Time range The table below identifies the Input and Output options and the additional fields that appear depending on the options selected Field Value Additional Input field Additional Output field NOTES Input Alarm input Day night IVA MOTION Connection Time Time range 1 Input 1 2 Input 2 00 00 00 00 00 00 Output 1 Output 2 None Alarm output A...

Page 55: ... functions are configured accordingly this name is displayed below the icon for the alarm input You can also use the name in the Forensic Search program function as a filter option for quick search in recordings Enter a unique and clear name here Caution Do not use any special characters for example in the name Special characters are not supported by the system s internal management Note This name...

Page 56: ...yed in the network for the dynamic assignment of IP addresses you can activate acceptance of IP addresses automatically assigned to the camera Certain applications Bosch Video Management System Archive Player Configuration Manager use the IP address for the unique assignment of the unit If you use these applications the DHCP server must support the fixed assignment between IP address and MAC addre...

Page 57: ... you wish for example to establish an Internet connection to the camera it is sufficient to enter the name given to the unit on the DNS server as a URL in the browser Enter the IP address of the DNS server here Servers are supported for secure and dynamic DNS Video transmission If the unit is operated behind a firewall select TCP HTTP port as the transfer protocol For use in a local network select...

Page 58: ...HD half duplex 10 Mbps FD full duplex 100 Mbps HD half duplex 100 Mbps FD full duplex Network MSS Byte You can set the maximum segment size for the IP packet s user data This gives you the option to adjust the size of the data packets to the network environment and to optimize data transmission Please comply with the MTU value of 1 514 bytes in UDP mode iSCSI MSS Byte You can specify a higher MSS ...

Page 59: ...ettings for the network Operation The operation mode determines how the camera communicates with Cloud based Security and Services Select Auto to allow the camera to poll the server a few times if no contact is made it stops polling Select On to constantly poll the server Select Off to block polling Cloud state This field identifies any cloud based services with which the camera communicates If yo...

Page 60: ...aps to IP addresses The unit supports SNMP MIB II in the unified code If you wish to send SNMP traps enter the IP addresses of one or two required target devices here If you select On for the SNMP parameter and do not enter an SNMP host address the camera does not send them automatically but only replies to SNMP requests If you enter one or two SNMP host addresses SNMP traps are sent automatically...

Page 61: ...ngle data stream to the network where the data stream is simultaneously distributed to multiple receivers in a defined group Multicast You can enter a dedicated multicast address and port for each stream You can switch between the streams by clicking the appropriate tabs Notice Multicast operation requires a multicast enabled network that uses the UDP and the Internet Group Management IGMP protoco...

Page 62: ...count Configure accounts Click the link to access the Accounts page Image size Select the appropriate image size Small Medium Large 720p 1080p Best possible File name You can select how file names will be created for the individual images that are transmitted Overwrite The same file name is always used and any existing file will be overwritten with the current file Increment A number from 000 to 2...

Page 63: ...n as the target name IP address Enter the IP address of the server on which you wish to save the JPEG images Login Enter the login ID for the server Password Enter the password that gives you access to the server To verify the password click the Check button to the right Path Enter the exact path on which you wish to post the images on the server To browse for the correct path click the Browse but...

Page 64: ...be replaced Progress The progress bar displays the progress of the firmware upload Note Once the progress bar reaches 100 a reset page may appear If this page appears allow the reset page to complete its action Upload history Click Show to view the firmware upload history Configuration Click Browse to navigate to the required firmware file fw Note Ensure that the file to be loaded comes from the s...

Page 65: ...es Select the number of entries to display Enable software sealing Select this check box to enable software protection that prevents users from adjusting camera settings This function also protects the camera from unauthorized access 11 5 Diagnostics Accesses the Built in Self Test BIST The BIST displays a Pass or Fail status on the most recent homing event not a counter For the other items a coun...

Page 66: ...s IR to Auto AUX OFF sets IR to OFF Available for AUTODOME IP 5000i IR only 57 On Off Night mode IR Filter In Out 60 On Off On Screen Display OSD 67 On Off Focus adjust for external IR Illuminators 80 On Off Digital Zoom lock 88 On Off Proportional Speed 94 On Recalibrate Azimuth Compass 95 On Off Azimuth Elevation Display 96 On Off Compass Points Display 100 On Off Record Tour A 101 On Off Record...

Page 67: ......

Page 68: ...Bosch Security Systems B V Torenallee 49 5617 BA Eindhoven Netherlands www boschsecurity com Bosch Security Systems B V 2018 ...

Reviews: