8
9
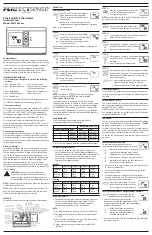
Step 8
Insert Each wire into the corresponding
terminal and close each terminal using a
flat head screw driver
Use the image you took with your smartphone of your old
thermostat wiring or the wire labels as a reference for
where to place each wire. Be sure that you
insert each wire, one by one, and then
immediately close the terminal and
confirm that the wire is secure inside the
terminal before moving to the next wire.
Repeat this process for each wire to be
installed. If you are unsure of the
terminal names on the BCC50 Wall
Plate, refer to BCC50 Terminal Key
on next page:
Step 9
Pull Thermostat Wires Through The Hole in the
Center of the BCC50 Wall Plate and Mark the
Location of the Mounting Screws
It is recommended to use the BCC50 Wall Plate as a
reference guide to mark the mounting holes and ensure
that all holes and unpainted surfaces are covered.
If the new Wall Plate does
not cover up any holes
or unpainted spaces
left by your old
thermostat, use this
opportunity to patch
any holes or paint.
LEVEL
Make sure your new BCC50
wall plate is level and insert
the included screws from the
package and mount your new
wall plate to the wall using a
philps head screw driver.
Note: The color of your wires may not be the same as shown in this User
Guide (1)Emergency heat activated at W/E, (2) Single-stage Auxiliary heat
activated at W2/AUX, (3)Only to be used with Bosch WSHP
BCC50 Terminal
Alarm Input
3
Common
1st Stage Heating
1
1st Stage Compressor
Heating Appliance Power
Cooling Appliance Power
BCC50 Terminal Key
Not Used
Fan
2nd Stage Compressor
Reversing Valve
Humidifier/Dehumidifier
After all Wires are Securely Connected, Gently
Push any Excess Wires Back Into the Hole in the
Wall.
Step 10
What hook
up are we
doing?
Need help with KEY above
Image Area
(PLACEHOLDER)
Attach the BCC50 Thermostat to the
BCC50 Wall Plate.
Step 11
PUSH
HOOK
CLICK
SMALL FLAT
HEAD SCREW
DRIVER
NEEDED
Thermostat Install
PHILPS HEAD SCREW
DRIVER NEEDED


