background image

en 

Installation instructions

10

12  Installation instructions

Observe this information when installing the appliance.

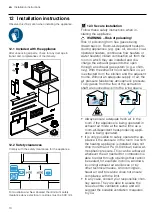
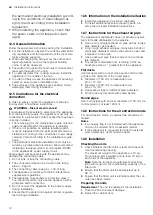
12.1 Included with the appliance

After unpacking all parts, check for any damage in
transit and completeness of the delivery.

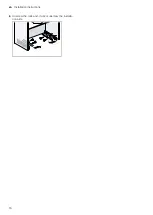
12.2 Safety clearances

Comply with the safety clearances for the appliance.

For Australia and New Zealand the minimum safety
clearance above electrical cooktops must be 600 mm.

 12.3 Secure installation

Follow these safety instructions when in-
stalling the appliance.

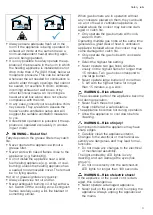
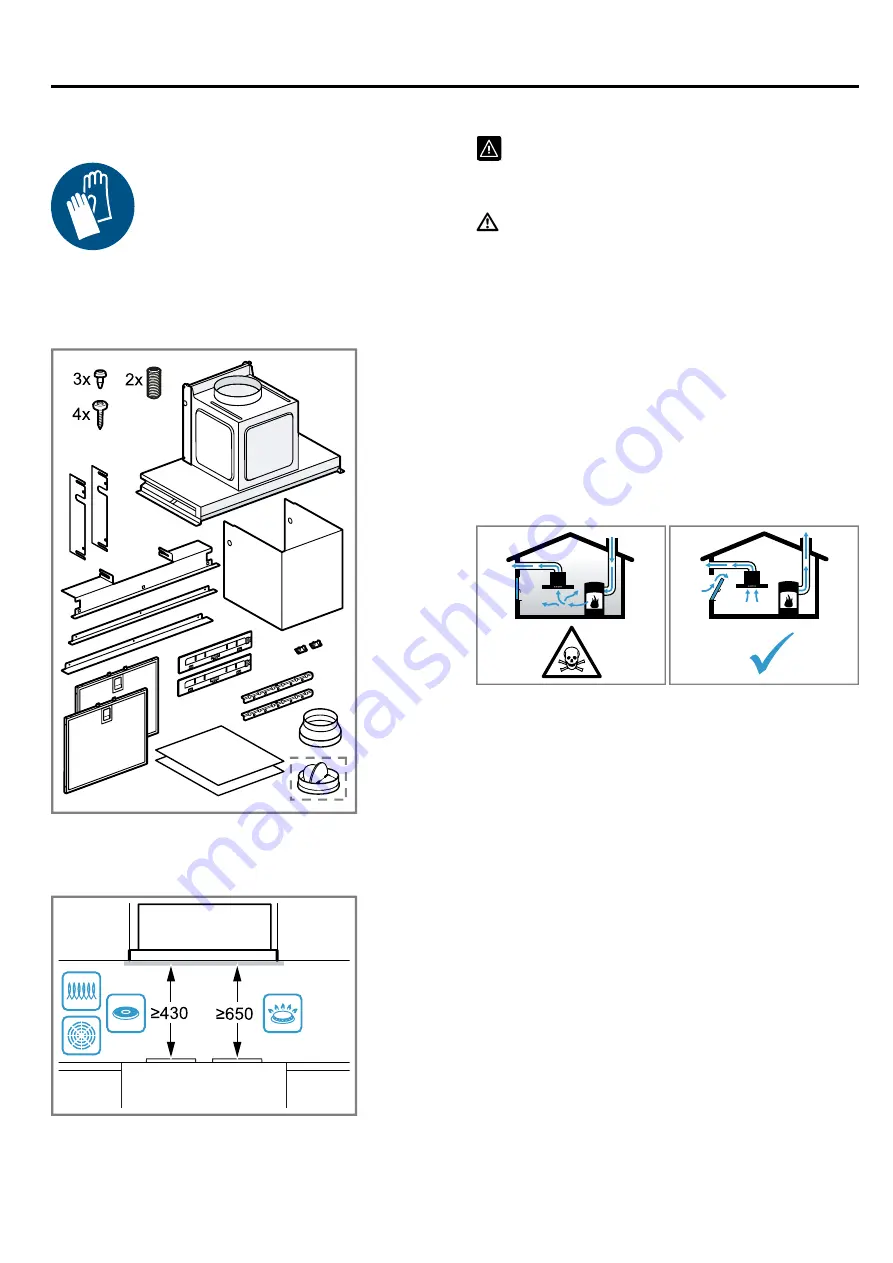
WARNING ‒ Risk of poisoning!

Risk of poisoning from flue gases being
drawn back in. Room-air-dependent heat-pro-
ducing appliances (e.g. gas, oil, wood or coal-
operated heaters, continuous flow heaters or
water heaters) obtain combustion air from the
room in which they are installed and dis-
charge the exhaust gases into the open
through an exhaust gas system (e.g. a chim-
ney). With the extractor hood switched on, air
is extracted from the kitchen and the adjacent
rooms. Without an adequate supply of air, the
air pressure falls below atmospheric pressure.
Toxic gases from the flue or the extraction
shaft are sucked back into the living space. 

Always ensure adequate fresh air in the
room if the appliance is being operated in
exhaust air mode at the same time as a
room-air-dependent heat-producing appli-
ance is being operated.

It is only possible to safely operate the ap-
pliance if the pressure in the room in which
the heating appliance is installed does not
drop more than 4 Pa (0.04 mbar) below at-
mospheric pressure. This can be achieved
whenever the air needed for combustion is
able to enter through openings that cannot
be sealed, for example in doors, windows,
incoming/exhaust air wall boxes or by
other technical means. An incoming/ex-
haust air wall box alone does not ensure
compliance with the limit.

In any case, consult your responsible chim-
ney sweep. They are able to assess the
house's entire ventilation setup and will
suggest the suitable ventilation measures
to you.

Summary of Contents for DBB67AM60

Page 1: ...ister your new device on MyBosch now and get free benefits bosch home com welcome Extractor hood DBB67AM60 DBB67AM60B DBB67AM60A DBB97AM60 DBB97AM60B DBB97AM60A en User manual and installation instructions ...

Page 2: ...r and by people who have reduced physical sensory or mental abilities or inad equate experience and or knowledge provided that they are supervised or have been instructed on how to use the appliance safely and have understood the resulting dangers Children must not play with the appliance Children must not perform cleaning or user maintenance unless they are at least 15 years old and are being sup...

Page 3: ...mes carefully using a lid fire blanket or something similar When gas burners are in operation without any cookware placed on them they can build up a lot of heat A ventilation appliance in stalled above the cooker may become dam aged or catch fire Only operate the gas burners with cook ware on them Operating multiple gas hobs at the same time generates a great deal of heat A ventilation appliance ...

Page 4: ...clean controls with stainless steel cleaners Condensation that flows back in may damage the ap pliance The air extraction duct must be installed with a gradient of at least 1 from the appliance If you put incorrect stress on the design elements they may break off Do not pull design elements Do not place objects on the design elements or hang objects from them There is a risk of surface damage if y...

Page 5: ...veyed into a non functioning smoke or ex haust gas flue you must obtain the consent of the heating engineer re sponsible If the exhaust air is conveyed through the external wall a tele scopic duct should be used 4 2 Air recirculation mode The air which is drawn in is cleaned by the grease fil ters and an odour filter and conveyed back into the room To bind odours in circulating air mode you must i...

Page 6: ...liance Fold in the glass panel as far as it will go or press a The ventilation system switches off and the lighting switches off 6 3 Selecting a fan setting Press or to adjust the fan setting 6 4 Switching on intensive mode Press a After approx 6 minutes the appliance automatically switches to fan setting 3 6 5 Switching off intensive mode Press or a Intensive mode is ended early 6 6 Switching on ...

Page 7: ...side the appliance may have sharp edges Carefully clean the appliance interior 1 Observe the information regarding the cleaning agents 2 Clean as follows depending on the surface Clean stainless steel surfaces in the direction of the finish using a sponge cloth and hot soapy water Clean painted surfaces using a damp sponge cloth and hot soapy water Clean aluminium using a soft cloth and glass clea...

Page 8: ...than 70 C 4 Allow the grease filters to drain 7 7 Installing the grease filters ATTENTION Falling grease filters may damage the hob below Grip below the grease filter with one hand 1 Open the glass flap as far as it will go 2 Switch off the appliance 3 Insert the grease filter on the lower edge 4 Fold the grease filters upwards and engage the locks 5 Ensure that the grease filters are inserted cor...

Page 9: ...free of charge Detailed information on the warranty period and terms of warranty in your country is available from our after sales service your retailer or on our website If you contact Customer Service you will require the product number E Nr and the production number FD of your appliance The contact details for Customer Service can be found in the enclosed Customer Service directory or on our we...

Page 10: ...ctor hood switched on air is extracted from the kitchen and the adjacent rooms Without an adequate supply of air the air pressure falls below atmospheric pressure Toxic gases from the flue or the extraction shaft are sucked back into the living space Always ensure adequate fresh air in the room if the appliance is being operated in exhaust air mode at the same time as a room air dependent heat pro...

Page 11: ... non remov able cover is available There must be no flying sparks WARNING Risk of injury Components inside the appliance may have sharp edges Wear protective gloves The appliance may fall down if it has not been properly fastened in place All fastening components must be fixed firmly and securely in place Changes to the electrical or mechanical as sembly are dangerous and may lead to mal functions...

Page 12: ...ion regulations The appliance corresponds to protection class 1 You should therefore only use the appliance with a protective earth connection Do not connect the appliance to the power supply during installation Ensure that the protection against contact is guaran teed during installation 12 6 Information on the installation situation Install this appliance in a kitchen cupboard To install additio...

Page 13: ...rk the fixing points 8 For a wall thickness of 16 mm Place the installation aids on the rails and screw the rails into the side walls of the cabinet PZ2 9 For a wall thickness of 18 mm and 19 mm Screw in the rails without the installation aid Preparing the appliance 1 Note Avoid damaging sensitive surfaces when in stalling the appliance For a cabinet depth outer dimension between 320 mm and 340 mm...

Page 14: ...pliance up to at least halfway into the rails and guide the mains plug through the cut out 3 Slide the appliance as far as it will go into the cab inet 4 Fit the ducting 5 Note Carefully position the channel in order to pro tect the appliance against scratches Gently push the channel against the fan box using both hands and slide it back until the channel clicks into place 6 Gently push against th...

Page 15: ...2 Note Ensure that the safety mat does not protrude over the front of the appliance Measure the flat surface and trim the safety mats to size 13 Insert the safety mats Removing the appliance 1 Unplug the mains plug 2 Detach the cabinet door 3 Note Before removing the appliance remove any objects from the shelf Carefully remove the covers 4 Open the glass panel and unscrew the threaded pins in the ...

Page 16: ...en Installation instructions 16 9 Unscrew the rails and if used unscrew the installa tion aids ...

Page 17: ......

Page 18: ......

Page 19: ......

Page 20: ...ing for help You ll find it here Expert advice for your Bosch home appliances help with problems or a repair from Bosch experts Find out everything about the many ways Bosch can support you www bosch home com service Contact data of all countries are listed in the attached service directory 9001619907 9001619907 020119 en BSH Hausgeräte GmbH Carl Wery Straße 34 81739 München GERMANY www bosch home...

Reviews: