


8
Cleaning the metal mesh grease filters
Notes
■
Do not use any aggressive, acidic or alkaline cleaning
agents.
■
When cleaning the metal mesh grease filters, also clean the
holder for the metal mesh grease filters in the appliance
using a damp cloth.
■
The metal mesh grease filters can be cleaned in the
dishwasher or by hand.
By hand:
Note:
You can use a special grease solvent for stubborn dirt. It
can be ordered via the Online Shop.
■
Soak the metal mesh grease filters in a hot soapy solution.
■
Clean the filters with a brush and then rinse them thoroughly.
■
Leave the metal mesh grease filters to drain.
In the dishwasher:
Note:
If the metal mesh grease filters are cleaned in the
dishwasher, slight discolouration may occur. This has no effect
on the function of the metal mesh grease filters.
■
Do not clean heavily soiled metal mesh grease filters together
with utensils.
■
Place the metal mesh grease filters loosely in the dishwasher.
The metal mesh grease filters must not be wedged in.
Installing the metal mesh grease filter
1.
Insert metal grease filter.
2.
Fold the metal grease filter up and click it into place.
3.
Fold the filter cover upwards.
Note:
Make sure that the filter cover closes properly.
Resetting the saturation displays
Once you have cleaned or replaced the relevant filters, reset
the saturation indicator to stop symbol F from flashing or
remaining lit continuously.
Make sure that the extractor hood and the lighting have been
switched off.
Press and hold the
#
button on the extractor hood's control
panel until button F flashes three times.
This resets the saturation indicators.
Trouble shooting
Malfunctions often have simple explanations. Please read the
following notes before calling the after-sales service.
:
Risk of electric shock!
Incorrect repairs are dangerous. Repairs may only be carried
out and damaged power cables replaced by one of our trained
after-sales technicians. If the appliance is defective, unplug the
appliance from the mains or switch off the circuit breaker in the
fuse box. Contact the after-sales service.
LED lights
Defective LED lights may be replaced by the manufacturer, their
after-sales service or a qualified technician (electrician) only.
Malfunction table
--------
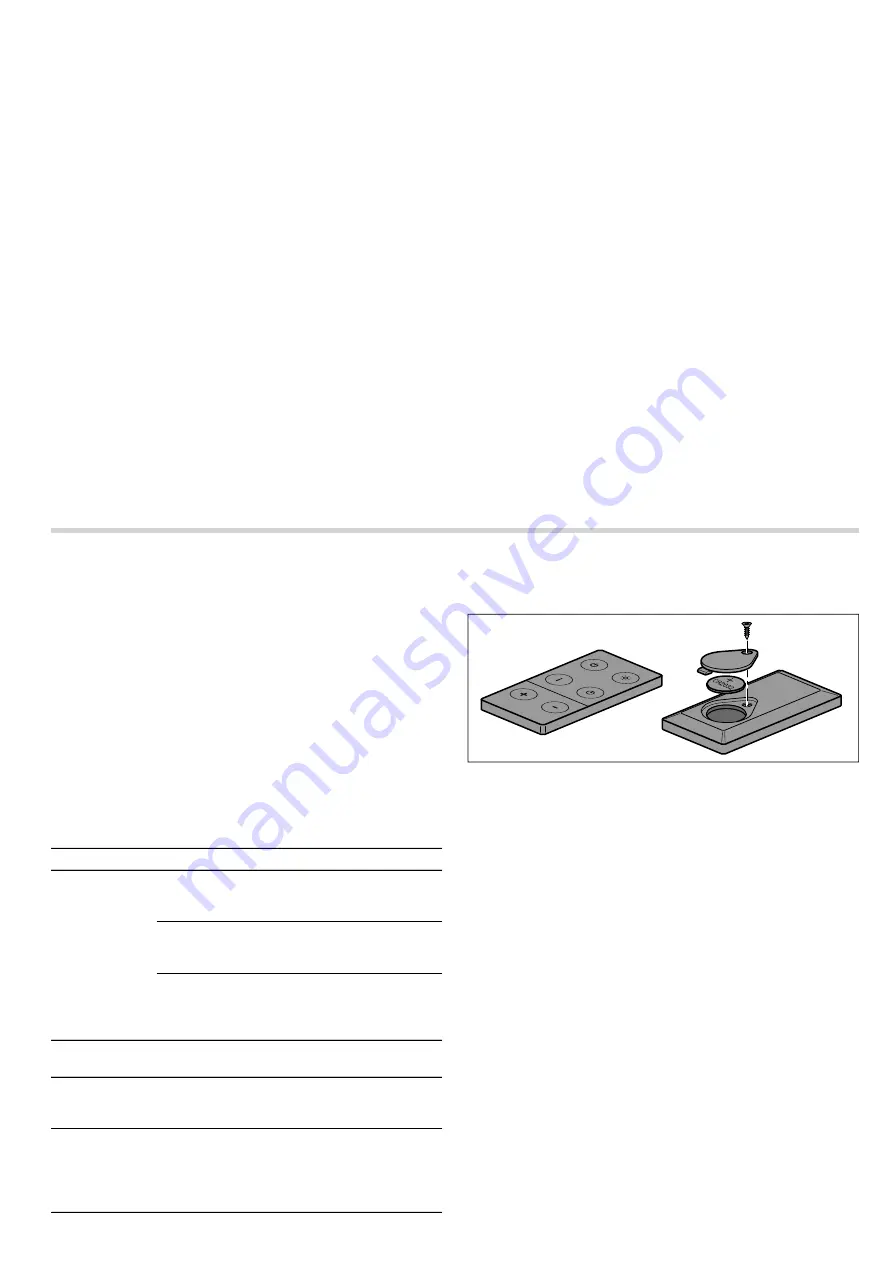
Replacing the batteries in the remote control
1.
Unscrew the screw.
2.
Remove the cover.
3.
Remove the battery.
4.
Insert the new battery (CR2032/3 V) correctly.
Note:
Dispose of flat or faulty batteries in accordance with local
regulations.
Note:
Do not dispose of batteries along with general household
waste.
Problem
Possible cause Solution
The appliance
does not work
The plug is not
plugged into the
mains
Connect the appliance to
the power supply
Power cut
Check whether other
kitchen appliances are
working
The fuse is
faulty
Check in the fuse box to
make sure that the fuse for
the appliance is in working
order
The lighting
does not work.
The LED lights
are defective.
Call the after-sales service.
The button illu-
mination does
not work.
The control unit
is faulty.
Call the after
sales service.
The F indicator
and button 1 or
the F indicator
and button 3/
G
light up.
The grease filter
or the activated
charcoal filter is
saturated.
Clean the filter or regener-
ate or replace the activated
charcoal filter; see the
Cleaning and maintenance
section.
Summary of Contents for DID106T50
Page 1: ... en Instruction manual Extractor hood DID106T50 ...
Page 2: ......
Page 10: ......
Page 11: ......


