DIVAR IP all-in-one 7000 (2U)
Maintenance | en
39
Bosch Security Systems B.V.
Installation manual
2019.08 | V1 | DOC
9.6.2
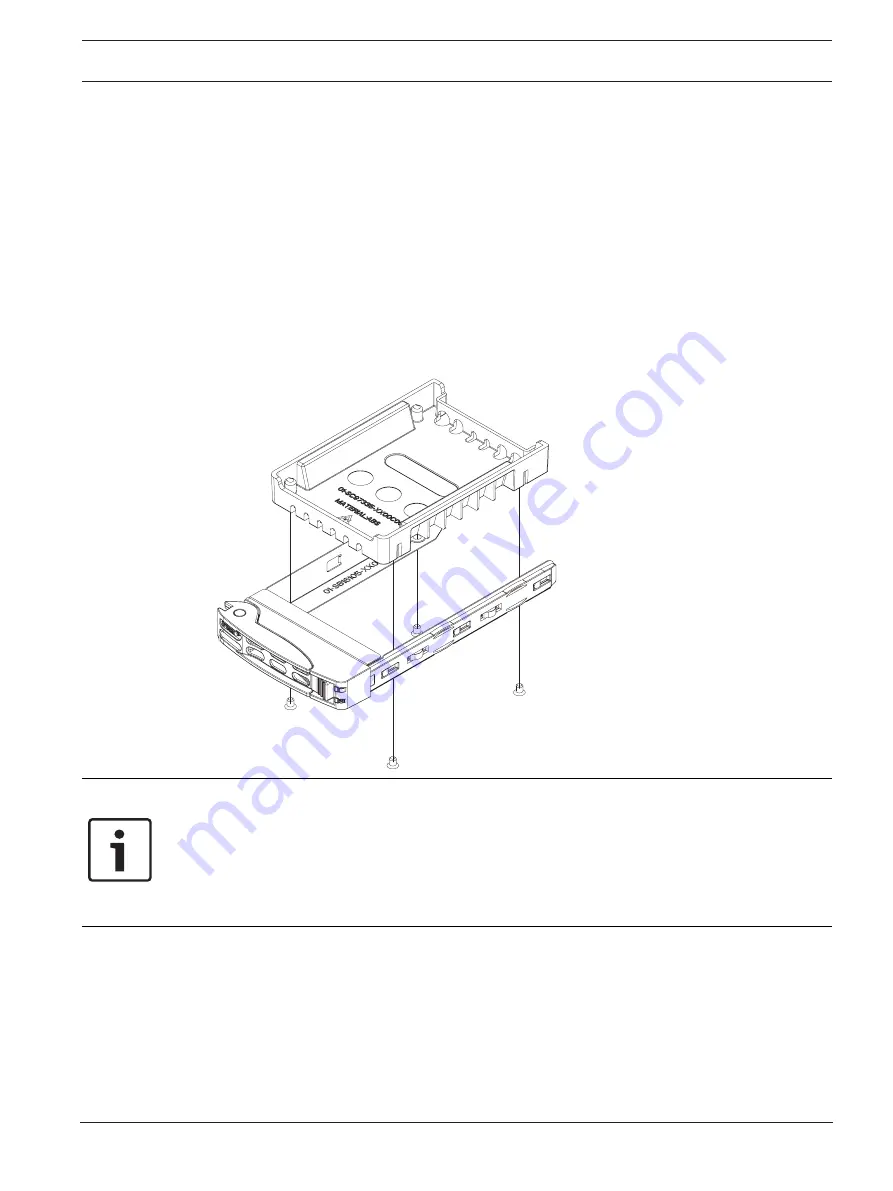
Installing a hard drive into a rear hard drive carrier
To install a hard drive into the rear hard drive carrier:
1.
Remove the screws securing the dummy drive to the hard drive carrier.
2.
Remove the dummy drive from the hard drive carrier.
3.
Insert a hard drive into the hard drive carrier with the printed circuit board side facing
down and the connector end toward the rear of the carrier.
4.
Align the mounting holes in both, the hard drive carrier and the hard drive.
Note:
There are mounting holes in the hard drive carrier marked "SAS" or “SATA” to aid in
correct installation.
5.
Secure the hard drive to the hard drive carrier with four screws. Use the four M3 flat-head
screws included in the hard disk bag of your accessory box.
Note:
To secure the hard drive, you cannot reuse the screws that are used to secure the
dummy drive to the tray.
Notice!
Bosch recommends using the respective Bosch hard disk drives. The hard disk drives as one
of the critical component are carefully selected by Bosch based on available failure rates.
Hard disk drives not delivered from Bosch are not supported.
For more information about supported hard disk drives, see the datasheet in the Bosch
Online Product Catalog at:
www.boschsecurity.com
9.6.3
Installing a hard drive carrier into a rear hard drive bay
To install a hard drive carrier into a hard drive bay:
1.
Insert the hard drive carrier horizontally into the hard drive bay, orienting the hard drive
carrier so that the release button is on the right.
2.
Push the hard drive carrier into the bay until the handle retracts and the hard drive clicks
into the locked position.


