background image

Home Connect 

 en

11

9.3 Connecting the appliance to the Home
Connect app

Requirements

¡

The Home Connect app is installed on your mobile
device.

¡

The Home Connect app is opened.

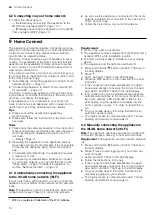
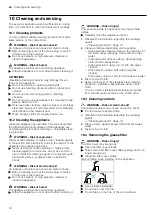
1.

Press and hold the 

 button until LED 3 and LED 7

flash in the LED display.

2.

Follow the instructions for the Home Connect app
on the mobile device.

a

The login process is complete when LED 7 stops
flashing and remains continuously lit.

9.4 Software update

Your appliance's software can be updated using the
software update function, e.g. for the purposes of op-
timisation, troubleshooting or security updates.
To do this, you must be a registered Home Con-
nect user, have installed the app on your mobile device
and be connected to the Home Connect server.
As soon as a software update is available, you will be
informed via the Home Connect app and will be able to
start the software update via the app. Once the update
has been successfully downloaded, you can start in-
stalling it via the Home Connect app if you are in your
local area network. The Home Connect app will inform
you once installation is successful.

Notes

¡

You can continue to use your appliance as normal
while updates are downloading. Depending on your
personal settings in the app, software updates can
also be set to download automatically.

¡

We recommend that you install security updates as
soon as possible.

9.5 Resetting the connection

Saved connections to the home network and to
Home Connect can be reset.

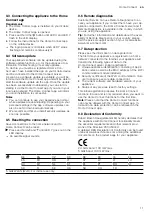
Press and hold   and   until LED 7 goes out in the
LED display.

a

An audible signal sounds.

9.6 Remote diagnostics

Customer Service can use Remote Diagnostics to ac-
cess your appliance if you contact them, have your ap-
pliance connected to the Home Connect server and if
Remote Diagnostics is available in the country in which
you are using the appliance.

Tip: 

For further information and details about the avail-

ability of Remote Diagnostics in your country, please
visit the service/support section of your local website:
www.home-connect.com

9.7 Data protection

Please see the information on data protection.
The first time your appliance is registered on a home
network connected to the Internet, your appliance will
transmit the following types of data to the
Home Connect server (initial registration):

¡

Unique appliance identification (consisting of appli-
ance codes as well as the MAC address of the Wi-Fi
communication module installed).

¡

Security certificate of the Wi-Fi communication mod-
ule (to ensure a secure data connection).

¡

The current software and hardware version of your
appliance.

¡

Status of any previous reset to factory settings.

This initial registration prepares the Home Connect
functions for use and is only required when you want to
use the Home Connect functions for the first time.

Note: 

Please note that the Home Connect functions

can only be utilised with the Home Connect app. In-
formation on data protection can be retrieved in the
Home Connect app.

9.8 Declaration of Conformity

Robert Bosch Hausgeräte GmbH hereby declares that
the appliance with Home Connect functionality meets
the essential requirements and other relevant provi-
sions of the Directive 2014/53/EU.
A detailed RED Declaration of Conformity can be found
online at www.bosch-home.com among the additional
documents on the product page for your appliance.

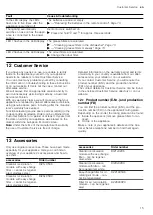
2.4 GHz band: 100 mW max.
5 GHz band: 100 mW max.

BE

BG

CZ

DK

DE

EE

IE

EL

ES

FR

HR

IT

CY

LV

LT

LU

HU

MT

NL

AT

PL

PT

RO

SI

SK

FI

SE

UK

NO

CH

TR

5 GHz WLAN (Wi-Fi): For indoor use only.

Summary of Contents for DRC97AQ50

Page 1: ...Register your new device on MyBosch now and get free benefits bosch home com welcome Ceiling mounted ventilation system DRC97AQ50 DRC97AQ50B en User manual and assembly instructions ...

Page 2: ...its Read the special installation instructions The appliance can only be used safely if it is correctly installed according to the safety in structions The installer is responsible for en suring that the appliance works perfectly at its installation location Only use this appliance In accordance with these instructions for in stallation and use For extracting cooking vapour In private households a...

Page 3: ...g air mode WARNING Risk of fire Fatty deposits in the grease filters may catch fire Never operate the appliance without a grease filter Clean the grease filters regularly Never work with naked flames close to the appliance e g flambéing Do not install the appliance near a solid fuel heating appliance e g wood or coal burning unless the heating appliance has a sealed non removable cover There must ...

Page 4: ...leaning disconnect the appliance from the Home Connect app WARNING Risk of electric shock If the appliance or the power cord is dam aged this is dangerous Never operate a damaged appliance Never pull on the power cord to unplug the appliance Always unplug the appliance at the mains If the appliance or the power cord is dam aged immediately unplug the power cord or switch off the fuse in the fuse b...

Page 5: ...otective film from all parts of the ap pliance before using for the first time 3 Environmental protection and saving energy Help protect the environment by using your appliance in a way that conserves resources and by disposing of reusable materials properly 3 1 Disposing of packaging The packaging materials are environmentally compat ible and can be recycled Sort the individual components by type...

Page 6: ... gas flue you must obtain the consent of the heating engineer re sponsible If the exhaust air is conveyed through the external wall a tele scopic duct should be used 4 2 Air recirculation mode The air which is drawn in is cleaned by the grease fil ters and an odour filter and conveyed back into the room To bind odours in circulating air mode you must install an odour filter The dif ferent options ...

Page 7: ...tensive mode 1 5 Intensive mode 2 6 Automatic mode 1 fan run on time interval vent ilation 7 Home Connect 8 Infrared receiver 1 Depending on the appliance specifications 6 Before using for the first time Configure the settings for initial start up Clean the ap pliance and accessories 6 1 Setting an operating mode Your appliance is set to air extraction mode by default To use it in circulating air ...

Page 8: ...sly set a The ventilation is automatically ended when the sensor detects no further change in the room air quality a Automatic mode runs for a maximum of four hours 7 10 Intermittent ventilation With interval ventilation the ventilation system switches on and off in the selected setting for the selected time Note This function is only available via a mobile device with the Home Connect app If the ...

Page 9: ...al tones for the appliance are always switched on and cannot be switched off Requirement The appliance is switched off 1 Press and hold and for approx three seconds a In the LED display the LED for the setting that is currently selected lights up 2 Press or until LED 2 lights up in the LED dis play To cancel the setting press 3 To save the setting press and hold and for ap prox three seconds Or wa...

Page 10: ...ome network you can find this next to the rating plate Page 15 inside the appliance To do this Remove the filter Page 12 9 1 Automatically connecting the appliance to the WLAN home network Wi Fi If your router has a WPS function you can connect the appliance to your WLAN home network Wi Fi automat ically Note The appliance cannot be switched on during the connection process Press to cancel the pro...

Page 11: ...you contact them have your ap pliance connected to the Home Connect server and if Remote Diagnostics is available in the country in which you are using the appliance Tip For further information and details about the avail ability of Remote Diagnostics in your country please visit the service support section of your local website www home connect com 9 7 Data protection Please see the information o...

Page 12: ...minium parts e g grease filter on extractor hoods WARNING Risk of electric shock An ingress of moisture can cause an electric shock Before cleaning pull out the mains plug or switch off the fuse in the fuse box Do not use steam or high pressure cleaners to clean the appliance WARNING Risk of burns The appliance will become hot during operation Allow the appliance to cool down before cleaning it WA...

Page 13: ...sils Use special grease solvent for stubborn dirt You can obtain grease solvents from after sales service or the online shop 3 Start the dishwasher Select a temperature of no more than 70 C 4 Allow the grease filters to drain 10 6 Cleaning grease filters manually The grease filters filter the grease from the cooking va pour Regularly cleaned grease filters guarantee a high level of grease removal ...

Page 14: ...Improper repairs are dangerous Repairs to the appliance should only be carried out by trained specialist staff If the appliance is defective call Customer Service WARNING Risk of electric shock Incorrect repairs are dangerous Repairs to the appliance should only be carried out by trained specialist staff Only use genuine spare parts when repairing the appliance If the power cord of this appliance ...

Page 15: ... appliance was placed on the market within the European Economic Area Note Under the terms of the manufacturer s warranty the use of Customer Service is free of charge Detailed information on the warranty period and terms of warranty in your country is available from our after sales service your retailer or on our website If you contact Customer Service you will require the product number E Nr and...

Page 16: ...d appliances as applicable throughout the EU 14 2 Disposing of batteries Batteries should be recycled in an environmentally friendly manner Do not dispose of the batteries in the household rubbish Dispose of batteries in an environmentally friendly manner Only for EU countries According to the European Guideline 2006 66 EC defective or used bat tery packs batteries must be collec ted separately an...

Page 17: ...ing exhaust air wall boxes or by other technical means An incoming ex haust air wall box alone does not ensure compliance with the limit In any case consult your responsible chim ney sweep They are able to assess the house s entire ventilation setup and will suggest the suitable ventilation measures to you Unrestricted operation is possible if the ap pliance is operated exclusively in circulat ing...

Page 18: ... be carried out by trained specialist staff Incorrect repairs are dangerous Repairs to the appliance should only be carried out by trained specialist staff Only use genuine spare parts when repair ing the appliance If the power cord of this appliance is dam aged it must be replaced by trained spe cialist staff Improper installation is dangerous Connect and operate the appliance only in accordance ...

Page 19: ... The connection data can be found on the rating plate Page 15 The connecting cable is approx 1 30 m long This appliance complies with the EC interference suppression regulations The appliance corresponds to protection class 1 You should therefore only use the appliance with a protective earth connection Do not connect the appliance to the power supply during installation Only a licensed profession...

Page 20: ... is not wedged in the cut out 3 Note To ensure that the appliance is not damaged do not overtighten the screws Carefully tighten screws in succession until the ap pliance is flush mounted on the ceiling Connecting the appliance 1 Press together the cable duct at the sides and re move it 2 Disconnect the cable at the appropriate point 3 Undo the opposite screws to loosen the fan box T 20 4 Turn the...

Page 21: ...ective gloves Risk of injury when opening and closing the hinges Keep your hands away from the hinges 1 Open the hinges on the filter cover 25 2 Mount the filter cover on the designated screws and push it backwards forwards depending on the key hole opening into the narrow section 3 Tighten the fastening screws on the hinges 4 Check whether the appliance frame is lying flush 5 Retighten the screws...

Page 22: ...nd without pulling on it 3 Remove the grease filters To avoid causing damage do not bend the grease filters 4 Press together the cable duct at the sides and re move it 5 Disconnect the cable at the appropriate point 6 Undo the screws on the hinges up to approx 7 mm 5 Do not loosen them fully 7 Unhook and remove the filter cover 8 Undo the opposite screws to loosen the fan box T 20 9 Push the fan b...

Page 23: ......

Page 24: ...rvice Free and easy registration also on mobile phones www bosch home com welcome Looking for help You ll find it here Expert advice for your Bosch home appliances help with problems or a repair from Bosch experts Find out everything about the many ways Bosch can support you www bosch home com service Contact data of all countries are listed in the attached service directory Robert Bosch Hausgerät...

Reviews: