18
Intended Use
This tool is intended for
t h e
t i g h t e n i n g
a n d
l o o s e n i n g o f b o l t s , n u t s a n d v a r i o u s
t h r e a d e d f a s t e n e r s .
T h i s t o o l i s n o t
intended for use as a drill.
Variable Speed Controlled
Trigger Switch
Your tool is equipped with a variable speed
trigger switch. The tool can be turned "ON"
or "OFF" by squeezing or releasing the
trigger. The speed can be adjusted from the
minimum to maximum nameplate RPM by
the pressure you apply to the trigger. Apply
more pressure to increase the speed and
release pressure to decrease speed (Fig. 1).
Brake
When the trigger switch is released it
a c t i v a t e s t h e b r a k e t o s t o p t h e c h u c k
quickly. This is especially useful in the
repetitive driving and removal of screws.
Forward/Reversing Lever
and Trigger Lock
A f t e r t o o l u s e , l o c k
t r i g g e r
i n
“ O F F ”
position to help prevent accidental starts
and accidental discharge.
Do not change direction
of rotation until the tool
comes to a complete stop.
Shifting during
rotation of the chuck can cause damage to
the tool.
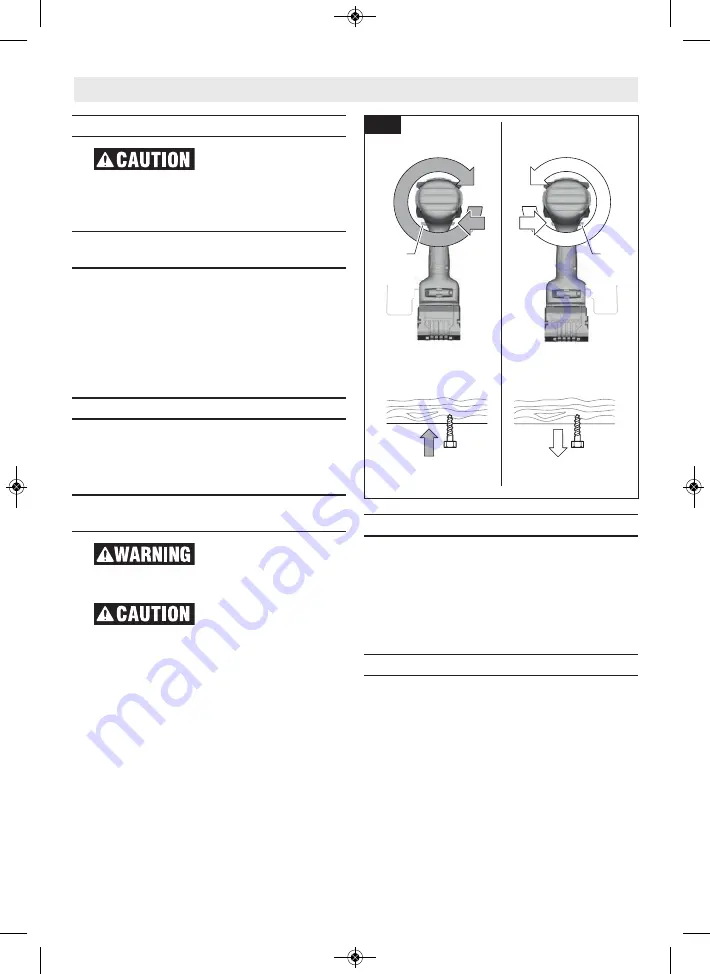
Your tool is equipped with a forward/
reversing lever and trigger lock
(3)
located
above the trigger (Fig. 10). This lever was
d e s i g n e d f o r c h a n g i n g r o t a t i o n o f t h e
socket, and for locking the trigger in an
“OFF” position.
To lock the trigger, move the lever to the
center.
For forward rotation, (with chuck pointed
away from you) move the lever to the far
left.
For reverse rotation move the lever to the
far right. To activate trigger lock move lever
to the center off position.
Built-in work light
Your tool is equipped with an LED light
(13)
for better visibility when using the
tool.
After the trigger
(8)
is activated, the LED
will then stay on for 10 seconds. The length
of time for afterglow can be changed in
‘Bosch ToolBox’ app setting (if connected).
Operating tips
You will extend the life of your bits and do
neater work if you always put the bit in
contact with the work before pulling the
trigger. During the oper a tion, hold the tool
firmly and exert light, steady pressure. Too
much pressure at low speed will stall the
tool. This can be damaging to both tool
and bit.
Driving with variable speed
The technique is to start slowly, increasing
the speed as the screw runs down. Set the
screw snug ly by slowing to a stop. Prior to
driving screws, pilot and clearance holes
should be drilled.
Operating Instructions
(3)
(3)
Fig. 10
2610067376 08-21 GDS18V-740C.qxp_GDS18V-770 8/18/21 7:00 AM Page 18


