background image

[en] Instruction manual

Free standing cooker 

HSB737355Z

Summary of Contents for HSB737355Z

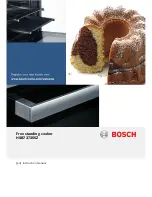
Page 1: ... en Instruction manual Free standing cooker HSB737355Z ...

Page 2: ......

Page 3: ...rating modes 12 Operating the oven 12 Setting the time setting options 12 Timer 12 Cooking time 13 End time 13 Clock 14 Childproof lock 14 Changing the basic settings 14 Care and cleaning 14 Cleaning agents 15 Catalytic cooking compartment panels 15 Removing and fitting the appliance door 16 Removing and inserting the hook in racks 16 Troubleshooting 17 Error messages 17 Replacing the oven light b...

Page 4: ...The appliance is adjusted to operate on specific details that are indicated in the rating label Do Not tamper with the appliance as this may cause permant damage If there is any visable or functional damage please contact you local call centre Close the safety valve on the gas supply line if the cooker will not be used for a prolonged period Please refer to the rating label attached to the stove f...

Page 5: ...the hot cooking compartment Never prepare food containing large quantities of drinks with a high alcohol content Only use small quantities of drinks with a high alcohol content Open the appliance door with care Risk of burns The hotplates and surrounding area particularly the hob surround if fitted become very hot Never touch the hot surfaces Keep children at a safe distance Risk of burns The acce...

Page 6: ...be installed Important Information for the user This appliance may only be installed by a registered LP Gas installer All registered installers are issued with a card carrying their registration number Ask to be shown the card before allowing the installation work to commence and make a note of the Installer QCC number Upon completion of the installation the installer is required to explain the op...

Page 7: ...e cooking compartment as far as they will go Water in a hot cooking compartment do not pour water into the cooking compartment when it is hot This will cause steam The temperature change can cause damage to the enamel Moist food do not store moist food in the cooking compartment when it is closed for prolonged periods This will damage the enamel Fruit juice when baking particularly juicy fruit pie...

Page 8: ...ven types of heating and accessories Depending on the appliance model individual details may differ The control panel Explanation 1 Splatter guard 2 Hob 3 Control panel 4 Oven 5 Storage compartment Explanation 1 Control knob for oven temperature 2 Control panel 3 Control knob for oven functions 4 Control knob for hotplates ...

Page 9: ...n selector Temperature selector Set the temperature using the temperature selector There is a limit stop between settings 260 and Û Do not turn the knob beyond this point Cooling fan The cooling fan switches on and off as required The hot air escapes above the door Caution Do not cover the ventilation slots Otherwise the oven will overheat So that the cooking compartment cools down more quickly af...

Page 10: ...ot As soon as they have cooled down the deformation disappears with no effect on the function You can buy accessories from the after sales service from specialist retailers or online Optional accessories You can buy accessories from the after sales service from specialist retailers or online Accessories Description Baking and roasting shelf For ovenware cake tins joints grilled items frozen meals ...

Page 11: ...er cap A exactly on the burner cup B Cleaning the accessories Before using the accessories clean them thoroughly using a cloth and warm soapy water Operating the hob Notes Appliances with a hob cover must only be switched on if the hob cover is open The burner caps must always be positioned exactly on top of the burner cups The slots on the burner cup must be free from obstruction All parts must b...

Page 12: ...ght up in the display and the brackets are around U 2 Use the or A button to set the timer duration Default value for button 10 minutes Default value for Abutton 5 minutes After a few seconds the time setting is adopted The timer starts The U symbol lights up in the display and the timer duration counts down The other time symbols go out The timer duration has elapsed A signal sounds 00 00 is show...

Page 13: ...on repeatedly until the brackets are around the relevant symbol The display shows the value for a few seconds End time You can change the time at which you wish your dish to be ready The oven starts automatically and finishes at the desired time You can for example put your dish in the cooking compartment in the morning and set the cooking time so that it is ready at lunch time Ensure that food is...

Page 14: ...dproof lock is deactivated Changing the basic settings Your oven has various basic settings These settings can be customised to suit your requirements No other time setting option should have been set 1 Press and hold the 0 button for approx 4 seconds The current basic setting for the clock display is shown in the display e g c1 1 for selection 1 2 Use the or A button to change the basic setting 3...

Page 15: ...ft cloth Aluminium and plastic Glass cleaner Clean with a soft cloth Gas hob and pan supports Hot soapy water Use very little water Water must not be allowed to enter the appliance through the base of the burners Clean boiled over liquids and spilt food immediately You can remove the pan supports Do not clean the pan supports in the dish washer Gas burners hot plate Remove the burner cups and caps...

Page 16: ...fully close the oven door The hinges may become bent and the enamel may be damaged Fitting the appliance door 1 Grip the oven door on either side with both hands 2 Slide the hinges into the slots in the oven a Note The notch below the hinges must engage into the frame of the oven b 3 Lower the door downwards 4 Remove the locking pins Risk of injury If the oven door falls out accidentally or a hing...

Page 17: ...3 Place a tea towel in the cold cooking compartment to prevent damage 4 Unscrew the glass cover from the defective oven light bulb inside the cooking compartment 5 Replace the oven light bulb with a bulb of the same type Voltage 230 V Power 25 W Thread E14 Temperature resistance 300 C 6 Screw the glass cover for the oven light back on 7 Remove the tea towel and switch the circuit breaker back on o...

Page 18: ...ly Saving energy with your oven Only preheat the oven if this is specified in the recipe or in the operating instruction tables Use dark black lacquered or enamelled baking tins They absorb the heat particularly well Open the oven door as infrequently as possible while cooking baking or roasting It is best to bake more than one cake one after the other The oven is still warm This reduces the bakin...

Page 19: ......

Page 20: ...914775326 950623 9000892053 9000892053 Robert Bosch Hausgeräte GmbH Carl Wery Straße 34 81739 München Germany www bosch home com ...

Reviews: