Installation instructions
en
49
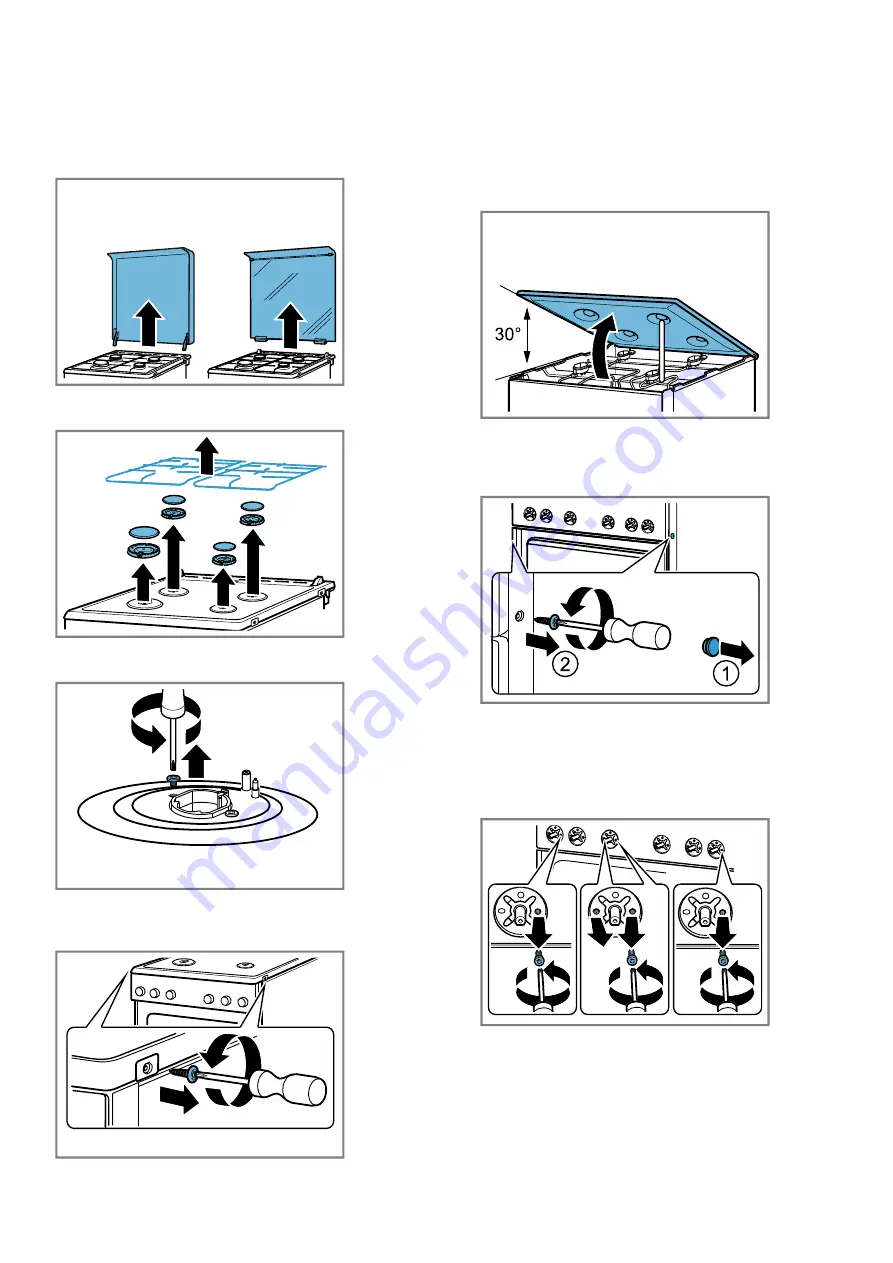
Removing the control panel
1.
If the appliance has an upper cover, remove this.
‒
To do this, open the hob cover, grip the sides
with both hands and pull it upwards. Ensure that
you do not lose the hinges.
2.
Remove the pan support grids or the pan support
racks and the burner parts.
3.
If burner connection screws are present on the hob,
remove all of these.
4.
Remove the two screws (T20) at the front right and
left of the hob panel. Do not remove the plastic
parts that are located below these.
5. Note:
To ensure that no scratches are formed on
the matte glass plate, do not allow the underside of
the hob to come into contact with objects.
Hold the front section of the hob and tilt it upwards
at a maximum angle of 30°. Secure the hob with
the profile bar by placing it vertically on the front
burner mount.
6.
Remove the plastic covers from the front profiles on
the right and left. Ensure that the covers are not
damaged or scratched. Unscrew the screws (T20)
below these.
7. Note:
Remove the screws that are mentioned below
so that the switch and the electronic parts are not
damaged.
Remove the four screws (M4) that are uncovered
when you remove the control knobs (T15) from the
control panel.


