en | 8 | User guide |
OBD 2220
Info Scan
580000 | REV. A | 04.2017
Bosch Automotive Service Solutions Inc.
3
Getting Started
3.1 Introduction
The scan tool was developed by experts in the automo-
tive service industry to help diagnose vehicles and assist
in troubleshooting procedures.
The scan tool monitors vehicle events and retrieves
codes from the vehicle’s control modules to help pin-
point problem areas.
All information, illustrations and specifications contained
in this manual are based on the latest information avail-
able from industry sources at the time of publication.
No warranty (expressed or implied) can be made for its
accuracy or completeness, nor is any responsibility
assumed by the manufacturer or anyone connected with
it for loss or damages suffered through reliance on any
information contained in this manual or misuse of
accompanying product. The manufacturer reserves the
right to make changes at any time to this manual or
accompanying product without obligation to notify any
person or organization of such changes.
3.2
Download Scanning Suite
1. Go to www.boschdiytools.com.au to download the
Scanning Suite PC application. Scanning Suite is
NOT required to operate the scan tool.
2. Install the downloaded Scanning Suite application
before connecting the scan tool to the PC.
To be able to use Scanning Suite the PC must meet
the following minimum requirements:
•
Microsoft Windows 7, 8, and 10
•
Adobe Acrobat Reader
•
Screen Resolution of 800 x 600
–
If screen resolution is 800 x 600, in Display
Properties, Settings Tab, set Font Size to
Small Fonts.
3. Use Scanning Suite to determine if any updates are avail-
able for your tool by clicking Check for Update button.
4. Check for updates to Use Scanning Suite by clicking
on the Check For Scanning Suite Update button. This
should be done before checking for Tool Updates.
You can also configure the Scanning Suite Frequency (SS
Frequency) to automatically check every xx minutes. The
default frequency is 7 days.
Refer to instructions provided on www.boschdiytools.
com.au for how to install Scanning Suite and Tool
updates.
3.3 OBDII
On-board diagnostics version II (OBDII) is a system that
the Society of Automotive Engineers (SAE) developed to
standardize automotive electronic diagnosis.
Beginning in 1996, most new vehicles sold in the United
States were fully OBDII compliant.
Technicians can now use the same tool to test any OBDII
compliant vehicle without special adapters. SAE estab-
lished guidelines that provide:
•
A universal OBDII data link connector, called the
DLC, with dedicated pin assignments.
•
A standard location for the DLC, visible under the
dash on driver’s side.
•
A standard list of diagnostic trouble codes (DTCs)
used by all manufacturers.
•
A standard list of parameter identification (PID) data
used by all manufacturers.
•
Ability for vehicle systems to record operating condi-
tions when a fault occurs.
•
Expanded diagnostic capabilities that records a
code whenever a condition occurs that affects
vehicle emissions.
•
Ability to clear stored codes from the vehicle’s
memory with a scan tool.
3.4
SAE Publications
SAE has published hundreds of pages of text defining a
standard communication protocol that establishes hard-
ware, software, and circuit parameters of OBDII sys-
tems. Unfortunately, vehicle manufacturers have differ-
ent interpretations of this standard communications
protocol. As a result, the generic OBDII communications
scheme varies, depending on the vehicle.
3.5
OBDII Data Link Connector (DLC)
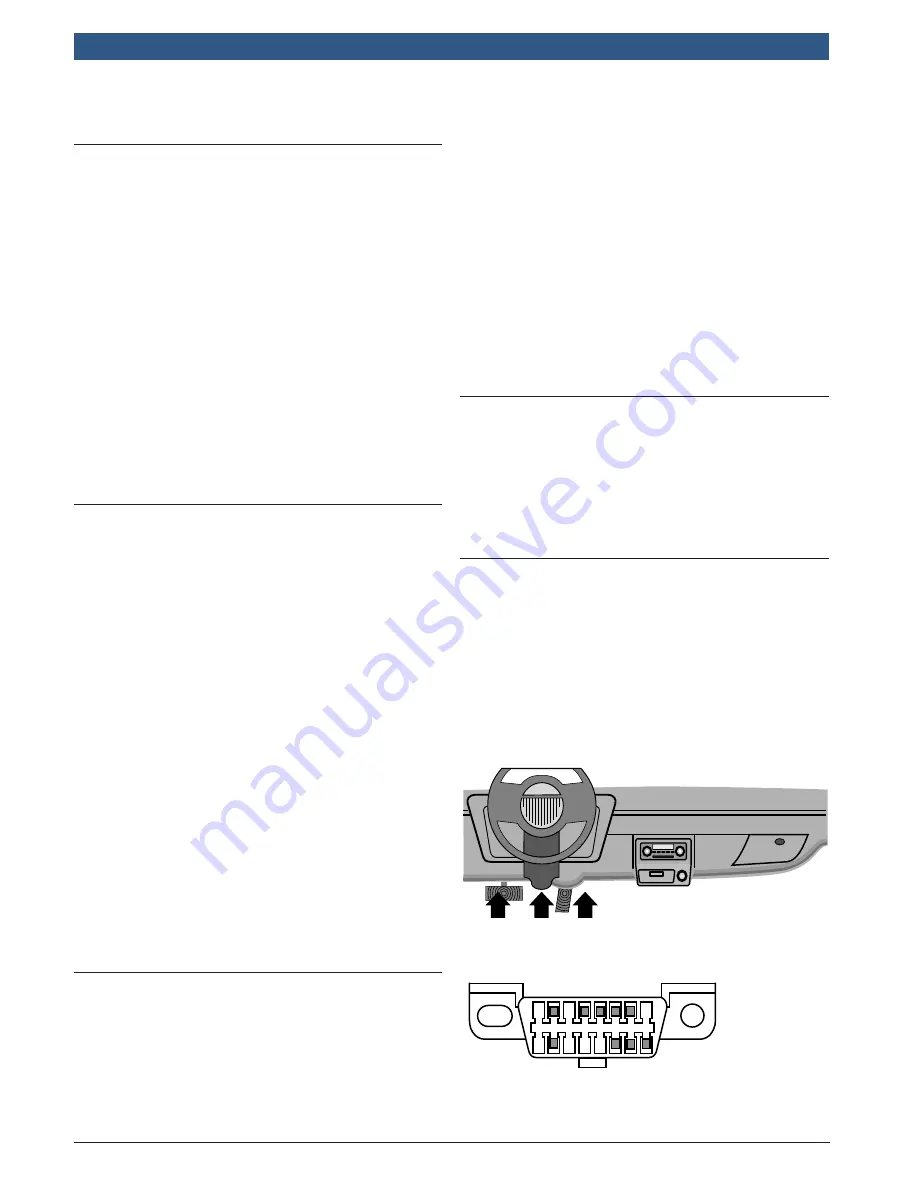
The OBDII data link connector (DLC) allows the scan
tool to communicate with the vehicle’s computer(s).
Beginning in 1996, vehicles use the J1962 (OBDII) DLC,
a term taken from a physical and electrical specification
number assigned by the SAE (J1962). The DLC should
be located under the dashboard on the driver’s side of
the vehicle. If the DLC is not located under the dash-
board as stated, a decal describing its location should
be attached to the dashboard in the area the DLC should
have been located.
OBD II Data Link Connector (DLC) Pins
1 8
9 16
1. Manufacturer reserved
2. J1850 bus+
3. Manufacturer reserved


