English |
17
Bosch Power Tools
2 609 006 717 | (26.11.13)
Technical Data
Noise Information
Typically the A-weighted sound pressure level of the product
is less than 70 dB(A).
Declaration of Conformity
We declare under our sole responsibility that the product de-
scribed under “Technical Data” is in conformity with the fol-
lowing standards or standardization documents: EN 60335,
EN 300 220-1:2006, EN 300 220-2:2007, EN 301 489-
1:2008, EN 301 489-3:2002 according to the provisions of
the directives 2011/65/EU, 2006/95/EC, 2004/108/EC,
1999/5/EC.
11
Robert Bosch GmbH, Power Tools Division
D-70745 Leinfelden-Echterdingen
Leinfelden, 26.11.2013
Assembly
Before any work on the machine itself, pull the mains
plug.
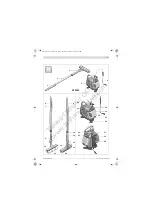
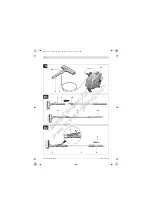
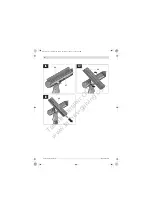
Unreel the Feed Hose (see figure A)
– Open holding clamp
21
and completely unreel feed hose
2
from base unit
5
.
– Lock holding clamp
21
again.
Note:
When painting only with the paint applicator
3
(without
extension
1
), the feed hose
2
can be fastened in one of the
two exterior guide grooves
12
for more convenient working.
Mounting the Extension (see figures B1
–
B2)
– Screw the screw connection
10
of the extension into the
paint applicator
3
.
– Fasten feed hose
2
in the straight guide grooves
12
of
paint applicator
3
and extension
1
.
– Remove remote control
8
from paint applicator
3
and clip
it into holder
6
of extension
1
.
Operation
Before any work on the machine itself, pull the mains
plug.
Preparing for Operation
Working close to the edge of open waters or on neigh-
bouring areas in the direct vicinity of open waters is not
permitted.
When purchasing paint, observe its environmental compati-
bility.
Preparing the Surface to be Painted
The surface to be painted must be clean, dry and free of
grease.
When working indoors, all non-covered surface can be soiled.
Therefore, thoroughly prepare the area around the surface to
be painted:
– Cover or mask off floors, furnishings, door and window
frames, etc.
– Also, sufficiently underlay the paint bucket and base unit
with covering-off material (foil, cardboard, etc.).
Preparing the Paint
– Prepare the paint according to the manufacturer’s instruc-
tions.
– Stir paint thoroughly and dilute as required.
When the painting result is not satisfactory or no paint comes
out: See “Correction of Malfunctions”, page 19.
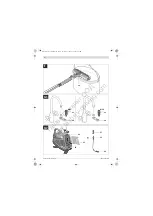
Coupling the Base Unit and the Paint Bucket
(see figures C1
–
C2)
– Set down base unit
5
level on the floor next to the opened
paint bucket.
– Pull the height-adjustable paint-bucket coupling
29
up-
ward to the stop.
– Hold the paint bucket handle upright and slide the hooks of
the paint-bucket coupling down to the edge of the paint
bucket.
Electric Paint Roller
PPR 250
Article number
3 603 BA0 0..
Rated power input
W
35
Paint delivery capacity
ml/min
400
Required time for application of
paint on 2 m
2
min
1
Length
– Paint applicator
– Paint appl extension
– Feed hose
cm
cm
m
40
120
5
Dimensions of paint roll
– Width
– Shank diameter
– Total roll diameter (without pile)
– Pile height
– Pile material
cm
mm
mm
mm
25
8
45 –50
11
Polyester
Weight according to
EPTA-Procedure 01/2003
kg
3.7
Protection class
– Base unit
– Trigger switch with
remote control
IP X4 *
IP X5 **
* Protection against water splash from all directions
** Protection against water jets from all directions
The values given are valid for a nominal voltage [U] of 230 V. For different
voltages and models for specific countries, these values can vary.
Henk Becker
Executive Vice President
Engineering
Helmut Heinzelmann
Head of Product Certification
PT/ETM9
OBJ_BUCH-1513-004.book Page 17 Tuesday, November 26, 2013 4:07 PM
Та
ше
в
-
Га
лв
ин
г
ОО
Д
www.tashev-galving.com

