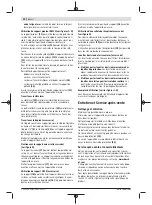
20
| English
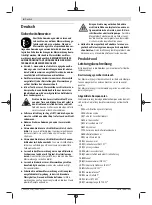
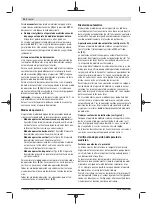
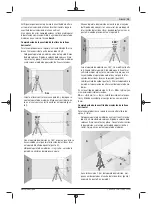
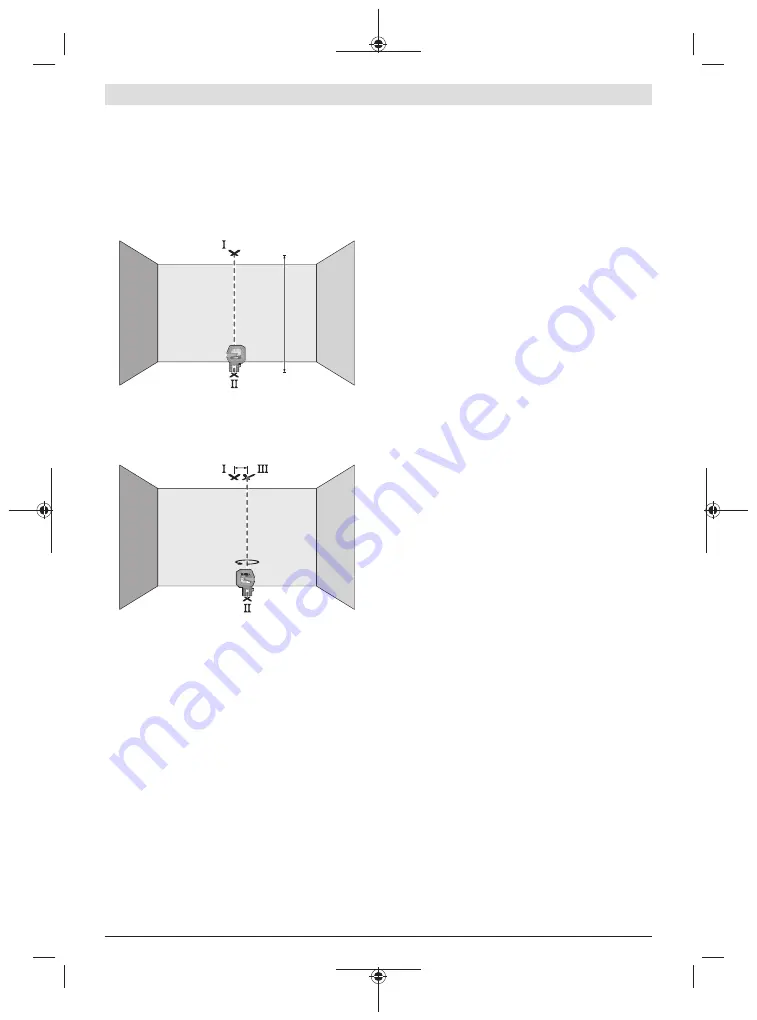
Checking Plumb Accuracy
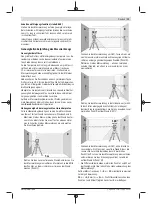
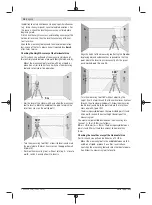
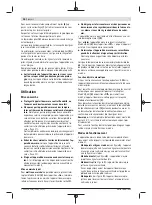
For this check, you will need a clear measuring space on firm
ground with a distance of approx.
5
m between the floor and
the ceiling.
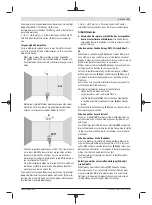
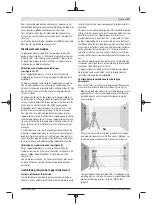
– Mount the measuring tool onto the rotating mount
(11)
and place it on the floor. Select point mode and allow the
measuring tool to level in.
5 m
– Mark the centre of the top laser point on the ceiling
(point I). Also mark the centre of the bottom laser point
on the floor (point II).
d
180°
– Turn the measuring tool by 180°. Position it so that the
centre of the bottom laser point falls onto the marked
point II. Allow the measuring tool to level in. Mark the
centre of the top laser point (point III).
– The discrepancy
d
between the two marked points
Ⅰ
and
Ⅲ
on the ceiling reveals the actual deviation of the meas-
uring tool from the vertical plane.
You can calculate the maximum permitted deviation as fol-
lows:
Doubled distance between floor and ceiling ×
0.7
mm/m
Example: At a floor-to-ceiling distance of
5
m, the maximum
deviation amounts to
2 ×
5
m × ±
0.7
mm/m = ±
7
mm. The points
Ⅰ
and
Ⅲ
must
therefore be no further than
7
mm from each other.
Working Advice
u
Only the centre of the laser point or laser line must be
used for marking.
The size of the laser point/the width of
the laser line changes depending on the distance.
Working with the RM 10 Rotating Mount
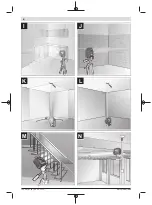
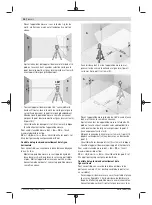
(see figures F–H)
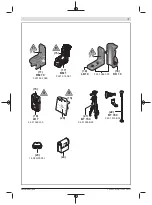
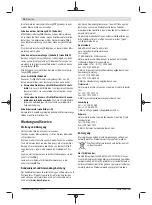
You can use the rotating mount
(11)
to rotate the measuring
tool 360° around a central, always visible plumb point. This
enables you to set up the laser lines without having to
change the position of the measuring tool.
You can use the fine adjustment screw
(14)
to align vertical
laser lines precisely with reference points.
Place the measuring tool with the guide groove
(6)
on the
guide rail
(12)
of the rotating mount
(11)
and slide the
measuring tool all the way onto the platform.
To disconnect the measuring tool, pull it off the rotating
mount in the opposite direction.
Positioning possibilities of the rotating mount:
– Standing on a flat surface,
– Screwed to a vertical surface,
– On metallic surfaces using the magnets
(15)
,
– On crown moulding using the ceiling clip
(16)
.
Roughly align the rotating mount
(11)
before switching on
the measuring tool.
Working with the Laser Target Plate
The laser target plate
(20)
improves visibility of the laser
beam in unfavourable conditions and at greater distances.
The reflective half of the laser target plate
(20)
improves vis-
ibility of the laser line. The transparent half enables the laser
line to be seen from behind the laser target plate.
Working with the Tripod (Accessory)
A tripod offers a stable, height-adjustable support surface
for measuring. Place the measuring tool with the 1/4" tripod
mount
(5)
on the thread of the tripod
(21)
or a conventional
camera tripod. Tighten the measuring tool using the locking
screw of the tripod.
Roughly align the tripod before switching on the measuring
tool.
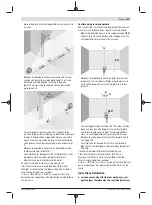
Securing with the universal holder (accessory)
(see figure N)
Using the universal holder
(17)
, you can secure the measur-
ing tool on vertical surfaces, pipes or magnetizable materi-
als, for example. The universal holder is also suitable for use
as a building tripod and facilitates height adjustment of the
measuring tool.
Roughly align the universal holder
(17)
before switching on
the measuring tool.
Working with the Holder LB 10 (accessory)
You can secure the measuring tool on vertical surfaces or
magnetisable materials using the holder
(18)
. In conjunction
with the ceiling clip
(16)
, the measuring tool can also be
aligned vertically.
Roughly align the holder
(18)
before switching on the meas-
uring tool.
1 609 92A 5EN | (20.03.2020)
Bosch Power Tools

