16
ctrlX AUTOMATION First Steps
Step 9 – Configuring an axis
Bosch Rexroth AG R911403760
Edition 01
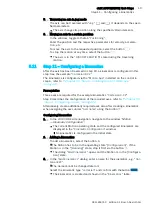
Configuring theEtherCAT Slave
1.
The
“ctrlX I/O Engineering”
tool is used for the configuration. It was
installed in step 1.
Refer to
Installing ctrlX WORKS on the engi-
To open the
“ctrlX I/O Engineering”
, go to the ctrlX CORE side navigation
and then to the window
“Automation”.
The
“Automation”
window shows the widget
“EtherCAT”
.
2.
Select the link
“I/O Engineering”
in the widget.
The tool
“ctrlX I/O Engineering”
opens.
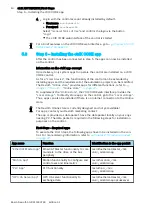
device tree is shown at the left edge of the screen.
The device tree contains three objects in its initial state:
●
: Project node
●
: Control node
●
: EtherCAT Master node
3.
Select the EtherCAT Master node and right-click to open its context menu.
4.
Execute the command
“Scann For Devices...”
.
The dialog
“Bus scann”
opens and shows all slaves available at the bus.
5.
To apply the found slaves to the project, select the button and confirm
the dialog using the button
“Apply”
.
The EtherCAT Slave is added to the device tree below the EtherCAT
Master node.
6.
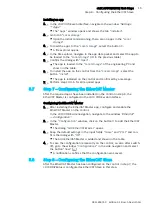
Apply and enable the field bus configuration to the control. Select the
button in the command bar.
The field bus configuration is applied to the control and the bus is
switched to the
“OP”
state.
If there are more components at the bus such as a bus coupler, exe-
cute the command
“Scann For Devices...”
a second time. The modules
connected to the bus coupler are then detected at the bus and can be
applied to the configuration.
7.
Save the configuration to ctrlX I/O Engineering via the button .
8.
The EtherCAT configuration is only saved temporarily after these steps. To
save this configuration remanently on the control, i.e. also after switch-off,
go to the window
“Configurations”
in the side navigation and select the
button
“Save”
.
A notification confirms that the configuration was saved.
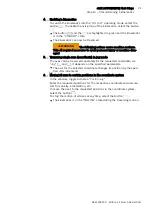
5.9
Step 9
–
Configuring an axis
After the EtherCAT Master has been created in step 8 and the ctrlX DRIVEplus
has been configured as EtherCAT bus device via the
“ctrlX I/O Engineering”
, an
axis is configured in this step and coupled with ctrlX DRIVEplus.
Configuring an axis
The axes are configured via the
“Motion App”
installed on the control is step 6,
refer to
Installing the ctrlX CORE app ” on page 14
1.
In the ctrlX CORE side navigation, navigate to the window
“Motion
Axis
Configuration”.
The current Motion operating state and the configured axes are dis-
played in the
“Axis Configuration”
window.
No axis is configured in the initial state.
Summary of Contents for rexroth ctrlX AUTOMATION
Page 1: ...ctrlX AUTOMATION First Steps Quick Start Guide R911403760 Edition 01 ...
Page 8: ...8 ctrlX AUTOMATION First Steps Bosch Rexroth AG R911403760 Edition 01 ...
Page 10: ...10 ctrlX AUTOMATION First Steps Bosch Rexroth AG R911403760 Edition 01 ...
Page 24: ...24 ctrlX AUTOMATION First Steps Bosch Rexroth AG R911403760 Edition 01 ...
Page 26: ...26 ctrlX AUTOMATION First Steps Bosch Rexroth AG R911403760 Edition 01 ...
Page 28: ...28 ctrlX AUTOMATION First Steps Bosch Rexroth AG R911403760 Edition 01 ...
Page 30: ...30 ctrlX AUTOMATION First Steps Bosch Rexroth AG R911403760 Edition 01 ...
Page 32: ...32 ctrlX AUTOMATION First Steps ctrlX PLC Engineering Bosch Rexroth AG R911403760 Edition 01 ...
Page 34: ...34 ctrlX AUTOMATION First Steps Bosch Rexroth AG R911403760 Edition 01 ...


