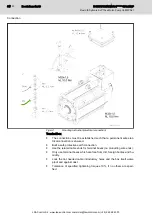
Screw the adapter flange (2) onto the motor (4) via hexagon socket
screw (4.2) and flat washers (4.1). Tightening torque 210 Nm, secure
screw connection with Loctite 243®.
2. Screw the motor with the pump
Use sufficiently measured lifting tools.
Damage by improper assembly opera‐
tion!
NOTICE
Carefully join the motor shaft and pump shaft, aligning without being
jammed. Strikes onto motor or pump can cause damage and are there‐
fore not allowed.
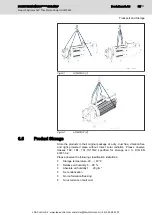
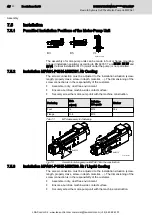
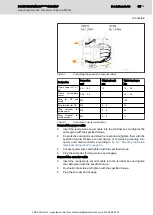
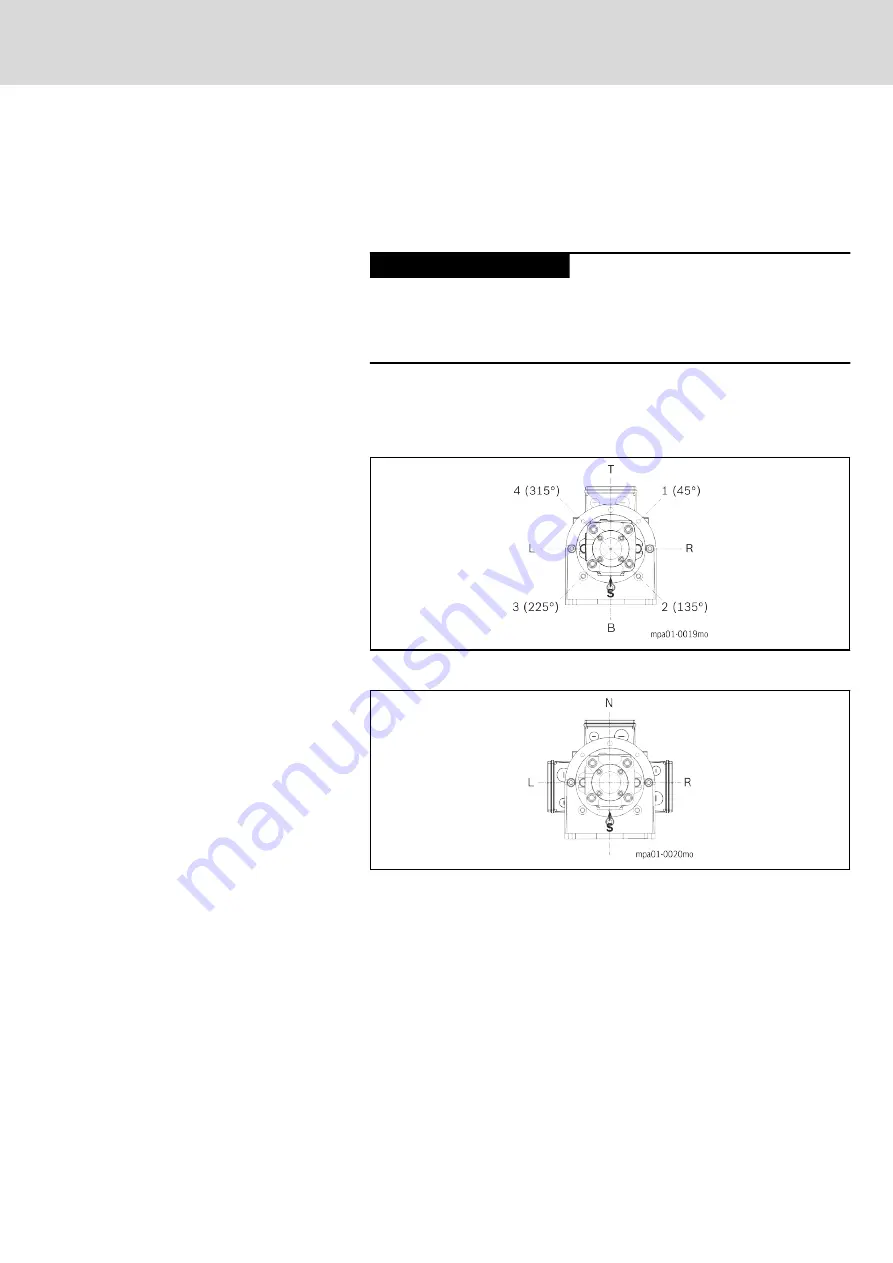
Screw the pump (1)with screws (1.1) and flat washers (1.2) in the re‐
quired orientation (T, 1 (45°), R, 2 (135°), B, 3 (225°), L or 4 (315°) with
the motor (4). Tightening torque 210 Nm, secure screw connection with
Loctite 243®.
S
Suction port (figured option = B)
Fig.7-6:
Pump assembly mounting direction
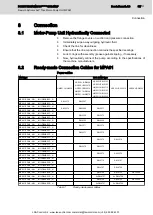
Fig.7-7:
Motor assembly direction
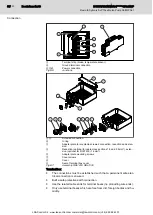
3. Mount pump foot
This mounting step is not necessary in design without pump foot (3).
Screw the pump foot (3) with the screws (3.2), flat washers (3.1, 3.3),
nuts (3.4) and the adapter flange (2). Tightening torque 210 Nm, secure
screw connection with Loctite 243®.
DOK-SYTROX-MPA01******-IT02-EN-P
Rexroth Sytronix SvP 70xx Motor-Pump Unit MPA01
Bosch Rexroth AG
47/123
Assembly
LSA Control S.L. www.lsa-control.com comercial@lsa-control.com (+34) 960 62 43 01

