-21-
•
Make sure that the blade-securing bolt is se-
curely tightened with the wrench provided.
•
Make sure that the switch is in the Off posi-
tion before plugging the saw into an electrical
receptacle.
•
If any part is missing, bent, or broken in any
way, or any electrical part does not work
properly, turn the saw off and unplug the saw.
•
Keep guards in place and in working order.
•
Make sure that the blade guard knob and the
bevel-cut adjustment knob, and depth adjust-
ment knob are tightened before operating the
saw.
•
To avoid cutting into the sliding work table,
make sure that the lowest position of the
blade is less than 9/16” (15mm) below the sur-
face of work table.
•
Always keep the blade-securing arbor and
collars clean.
•
let the saw blade run freely for a few seconds
before cutting a tile piece. If the saw blade
makes an unfamiliar noise or vibrates exces-
sively, switch the saw off immediately and
disconnect it from the power supply. Investi-
gate the cause or consult the customer serv-
ice department for advice. Do not restart the
saw until finding and correcting the problem.
plan Your Cut
•
Never place your hands or fingers in the path
of the tile blade.
•
Never cut freehand. Always use either a rip
fence or a fixture to position and guide the
work so that it won’t twist or bind on the
blade.
•
Keep the table and surrounding area clear, ex-
cept for the tile to be cut.
•
Make sure that the off-cut (piece of tile that
will be cut off) has enough room to move
sideways. failure to do so may result in the
off-cut binding against the blade.
•
Do not attempt to cut pieces too small to
allow for safe handling. Avoid awkward hand
positions where a sudden slip could cause
your hand or finger to come in contact with
the blade. When cutting any material, make
sure that it is fully supported and that the
workpiece is held firmly.
•
Always push the workpiece all the way past
the saw blade.
•
Never feed material into the cutting tool from
the rear of the saw.
•
Never allow the blade to run dry. failure to
keep the water tray topped off will result in
possible over-heating of the diamond blade.
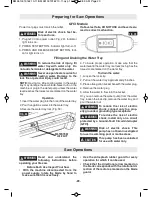
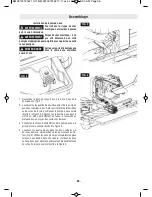
FIG. 31
FIG. 32
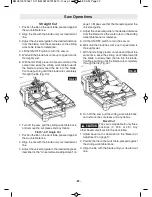
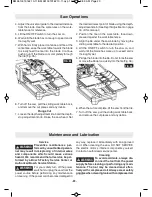
Connect the unit to a power source with the correct
voltage and frequency (120V, 60Hz).
To start the saw:
pull the switch to “I” (ON) posi-
tion (Fig. 31).
To stop the saw:
push the switch to “0” (OFF) po-
sition (Fig. 32).
Do not use the tool and have it
serviced immediately if the
switch does not turn on or off.
!
WARNING
Starting and Stopping
preparing for Saw Operations
BM 2610019162 10-11:BM 2610019162 10-11.qxp 10/20/11 8:59 AM Page 21

