-23-
Service
preventive maintenance per-
formed by unauthorized person-
nel may result in misplacing of internal wires
and components which could cause serious
hazard. We recommend that all service be per-
formed by a Bosch factory Service Center or
Authorized Bosch Service Station.
For your safety, turn off the power
switch and unplug the saw from the
power source before performing any maintenance
or cleaning. If the power cord becomes damaged in
any way, replace it immediately with an approved
cord. When cleaning the saw, DO NOT SERVICE
the electric motor’s internal components yourself.
Contact an authorized service center.
Cleaning
To avoid accidents, always dis-
connect the tool from the power
supply before cleaning or performing any main-
tenance. The tool may be cleaned most effec-
tively with compressed air. Always wear safety
goggles when cleaning tools with compressed air.
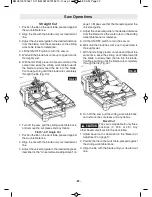
4. Adjust the universal guide to the desired distance
from the blade. Use the scale rules on the work-
table fence for reference.
5. Lift the ON/OFF switch to turn the saw on.
6. Wait until the blade has come up to speed and is
thoroughly wet.
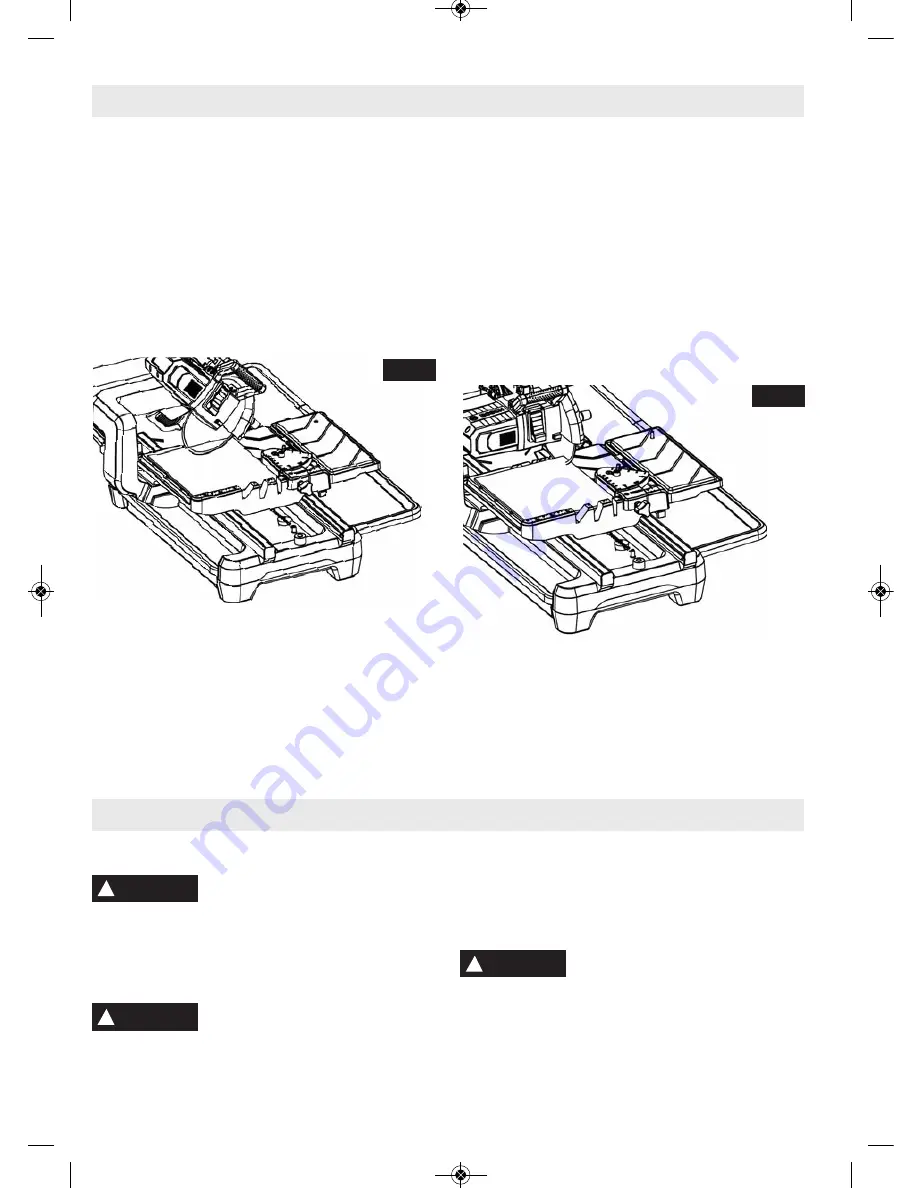
7. With hands firmly placed on fence and tile at the
same time, ease the work table towards the blade
to slowly feed the tile into the blade. Continue
pushing until the blade cuts completely through
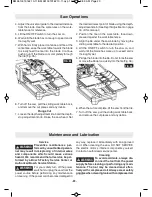
the tile (Fig. 35).
8. Turn off the saw, pull the sliding work table back,
and remove the cut pieces and any debris.
plunge Cut
1. Loosen the depth-adjustment knob and the depth-
stop adjustment knob. Raise the saw head. Set
the desired lowest point of blade using the depth-
adjustment knob. (See Depth Adjustment on page
16 of this manual.)
2. Position the tile on the work table, face down,
pressed against the work table fence.
3. Align the tile under the saw blade by moving the
sliding work table to the desired position.
4. Lift the ON/OFF switch to turn the saw on, and
wait until the blade has come up to speed and is
thoroughly wet.
5. Plunge the blade into the tile. Do not force the saw
or move the blade too quickly into the tile (Fig. 36).
6. When the cut is complete, lift the saw from the tile.
7. Turn off the saw, pull the sliding work table back,
and remove the cut pieces and any debris.
!
WARNING
!
WARNING
FIG. 35
FIG. 36
Maintenance and lubrication
Saw Operations
!
WARNING
BM 2610019162 10-11:BM 2610019162 10-11.qxp 10/20/11 8:59 AM Page 23

