


70
en | Installation
UHI/UHO Series
F.01U.167.418 | 3.0 | 2010.04
Installation Manual
Bosch Security Systems, Inc.
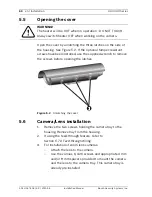
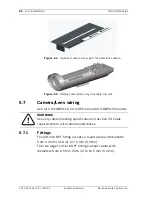
5.10
Camera/Lens adjustment
Verify operation of the camera and lens before final assembly.
Adjust the camera focus and iris as necessary. See camera
installation manual.
5.11
Final assembly
1.
Use the hole plugs provided to plug any unused holes in
the rear cap.
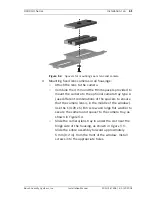
2.
Replace the camera and bracket back into the housing.
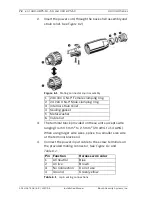
3.
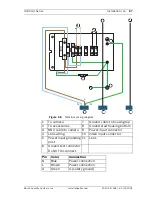
Slide the camera/lens tray into the slot near the clasp side
of the housing. See
Figure 5.3
.
4.
Install screws into the appropriate holes.
5.
Close the cover and secure the latches.
6.
Optional tamper-resistant screws are provided with the
housing. If desired, secure the latch using these three
screws and the provided tamper-resistant wrench.
5.12
Sunshield
1.
Loosen the two screws (M4 x 10) on the top of the
housing.
2.
Slide the sunshield to the desired position. It has a range
of 50 mm (2 in).
3.
Tighten the screws to lock the sunshade into position.
4.
If the sunshield is removed or not installed, plug the two
screw holes with the hole plugs supplied with the housing
hardware kit.
Summary of Contents for UHI Series
Page 2: ......
Page 327: ......
Page 328: ...Bosch Security Systems Inc www boschsecurity com Bosch Security Systems Inc 2010 ...


