AutoDome Easy IP
Settings Menus | en
123
Bosch Security Systems, Inc.
Installation Manual
F01U079609 | 1.0 | 2008.08
6.
Select one of the following options from the Layout drop-
down list:
–
Standard (with JPEG): Sends an e-mail that contains a
JPEG image from the video stream.
–
SMS (max. 160 char.): Sends a text-only e-mail
message to a mobile phone.
7.
Check the box to attach a JPEG image from the camera
from the video stream, with the e-mail.
8.
Type the address that receives the alarm-activated e-mail
message within the Destination address field.
9.
Type a unique name within the Sender name field to
identify the unit that sends the e-mail. This parameter
makes it easier to identify the origin of the e-mail. When
finished, click Set to save all settings.
10. To test the e-mail function, click the
Send Now
button.
12.10
Service Main Menu
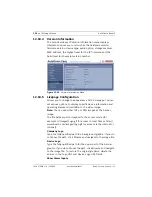
The Service main menu contains the following submenus:
Network, Multicasting, Encryption, Version Information,
Livepage Configuration, Licenses, and Maintenance.
12.10.1
Network Menu
The AutoDome Easy IP incorporates a network video server in
the IP module.
To configure the camera using the AutoDome Easy IP Web
server, do the following:
1.
Set the IP address on the PC to
192.168.0.10
to ensure
that the PC and the AutoDome Easy IP are on the same
Subnet.
2.
Launch Microsoft Internet Explorer and navigate to the
following URL:
http://192.168.0.1
(default address).
The Web browser opens the LivePage for the AutoDome
Easy IP; a security warning message is displayed
3.
Check the Always Trust box, then click YES.
4.
Click the Settings link, located at the top of the LivePage.
5.
Click the Service Settings link, located in the left pane of
the Settings window.
Summary of Contents for VEZ IP Series
Page 1: ...AutoDome Easy IP VEZ IP Series en Installation Manual ...
Page 2: ......


