5
6
ü
ütüümüü
c
ü
t
m
ü
(
a
a
a
ʋ
ʋ
ʋ
ʋ
ʋ
ʋ
ʋ
ʋ
ʋ
ʋ
ʋ
ʋ
ॕ
a
~
ʋ
ʋ
ʋ
ʋ
࣊
ʑ
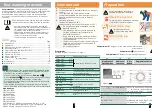
Option buttons
Time, spin speed and kilogramme will rolled diaplay.
You can change the spin speed beforehand and while the selected programme is running.
Spin
You can change the indicated spin speed. The maximum spin speed which can be selected
depends on the chosen programme. If
is selected, the load is held in the rinsing water.
Finish in
When you select a programme, the respective programme duration is displayed. You can delay
the start of the programme before it begins. The finish-in time indicates when the programme will
be finished. It can be set in hour increments up to a maximum of 24h. Press and hold the
Finish in
button until the required number of hours is shown (h=hour). Select
Start
/Reload.
ʑ
Additional
functions
Choose the additional functions before start .
a
Page 7
Speed wash
ē
For a shorter wash time with a comparable washing effect.
Rinse plus
2
Additional rinse cycle, extended washing time. For areas with
very soft water or for further improvement of the rinsing result.
ʑ
Signals
ʑ
Childproof lock
(
Programme will not be changed by accidental operation.
To activate the childproof lock:
After the programme starts or finish in time is activated
,
press and hold the
Start/Reload
button for 5 seconds;
Release when the
(
symbol lights up. If button signal is on, an acoustic signal will be
heard.
(
symbol flashes if the location of programme selector has been changed while
childproof lock is activated. The programme will go on as the original one.
When the programme ends, the
Start/Reload indicator remains on to remind you to
deactivate the childproof lock.
To deactivate the childproof lock:
Select the
Start/Reload
button until the
(
symbol turns off.
Release the button.
Set to
Â
for 5
seconds
Press
and
hold
1 step
clockwise
Button signals
**
Information signals
**
Press
button and
Set volume
*
Press
button and Set
volume
*
1 step
clockwise
Set to
Â
1. Start signal mode
2. Set volume for ...
Release
*
If required, set repeatedly.
**
Button signals : Select additional functions, set programme or
Start/Reload
can be hinted.
Information signals : Programme finished or given an alarm.
direct
Â
en
7
~
Set programmes, additional functions
a
a
ॕ
LF
ॕ
LF
ॕ
ॕ
ॕ
ॕ
ॕ
ॕ
1
ॕ
1
ॕ
d
Important information
Washing preparing/Protecting the laundry and the machine
Empty pockets.
Look out for metal items (paperclips, etc.).
Trousers, knitwear and knitted textiles, e.g. Jersey garments, T-shirts or sweatshirts should
be turned inside out.
Ensure that underwired bras are machine washable.
Wash delicates in a net/bag (tights, curtains, underwired bras).
Fasten zips, do up any buttons.
Brush sand out of pockets and collars.
Remove curtain hooks or place curtains in a net/bag.
Before using for the first time
Do not put any laundry in the washing machine. Turn on the tap, pour ½ measuring cup of
detergent into compartment
II
. Set the
Easy care
40
°C
programme and select
Start
/
Reload. At the end of the programme, set the programme selector to
Â
Off
.
Laundry with different degrees of soiling
Wash new items separately.
Light
Do not prewash.
If required, pretreat stains. Select
Prewash
90
ॕ
Heavy
Load less laundry. If required, pretreat stains. Select
Prewash
90
ॕ
programme.
Starching
Laundry must not be treated with fabric softener
Take starch suitable for 15 liter water and make it into liquid starch in accordance with the
manufactures instructions. Set the programme to
Single rinse
. Select spin speed and then
select
Start
/Reload. Add starch to dispenser
I as soon as water flows into the machine,
close the dispenser.
Dyeing/bleaching
Do not dye/bleach laundry in the washing machine.
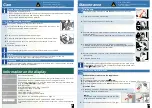
Emergency release
e.g. in the event of power failure
The programme will continue to run when the power is restored.
However, if the laundry has to be removed, the washing
machine door can be opened as follows:
-- The programme will continue to run when the power is restored. The
laundry can be removed when the programme ended.
-- Release emergency release to open the door if the laundry need to be
removed immediately!
Risk of scalding.
The detergent solution and laundry may be hot.
If possible, leave it to cool down.
Do not reach into the drum if it is still rotating.
Do not open the washing machine door if water can be seen through
the glass.
Set the programme selector to
Â
Off and disconnect the mains plug.
Drain the detergent solution
a
Page 10
Pull the emergency release with a tool and release. The washing machine door can then
be opened.
a
g
r
ts
is
to
e.
ॕ


