background image


  E N G L I S H   -   1 5

UNIFY

®

 system overview

The UNIFY intelligent integration system guides you through the initial process of 

 setting up and configuring your system. It helps you choose the correct cables and 

inputs and programs the Bose remote control to operate your connected devices.

Note: 

Before you begin, make sure you have one hour set aside for system setup.

Menu item

What you can do

Bluetooth

 Setup

Manage your 

Bluetooth

 devices.

Device Management

Add another device or accessory to your system.

Network Setup

Connect your system to your home network.

Software Update

Perform a system software update.

Power Macro

Customize the Power button   on your remote control to power on/off 

your system, TV and another HDMI™ source simultaneously.

Auto-off

Disable your system from powering off automatically when there is no 

signal after 20 minutes.

Headphone  

Connector

Set the default usage of your front headphones/AUX input  

(see page 35).

CEC Settings

Adjust the CEC functionality of your console.
• 

Default On:

 CEC is enabled

• 

Alternate On

: Prevents CEC-enabled devices from changing the 

 currently selected source

• 

Off

: CEC is turned off

ADAPTiQ

®

Start the ADAPTiQ audio calibration process. Once completed, this 

menu option disables or enables ADAPTiQ.

TV Remote Setup

Program your remote to control your TV.

Advanced TV  

Audio Setup

Learn more about HDMI (ARC) and set up your preferred usage.

Speaker Management Revisit your system's speaker setup or add an additional Acoustimass

®


wireless bass module.

Language Select

Change the language of the on-screen display.

Tutorial

A series of optional procedures to help guide you through the system’s 
key features, such as  SoundTouch

®

Exit

Close the UNIFY menu.

S E T T I N G   U P   T H E   S Y S T E M

Summary of Contents for LIFESTYLE 550

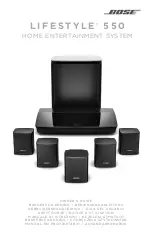
Page 1: ...IDE BRUGERVEJL EDN IN G BEDIEN UN G SANLEI TUNG GEBRUIKER SHA N DL EIDIN G G U A DEL USUARI O K YTT OHJE N OT ICE D UT IL I SATI ON MANUALE DI IST R UZION I KEZEL SI TMUTAT BRUKERVEILEDN IN G P ODR CZ...

Page 2: ...enclosure that may present a risk of electrical shock This symbol means there are important operating and maintenance instructions in this guide Contains small parts which may be a choking hazard Not...

Page 3: ...f 20 cm between radiator and your body This transmitter must not be co located or operating in conjunction with any other antenna or transmitter This device is restricted to indoor use when operating...

Page 4: ...remote screen or the SoundTouch application Activate by pairing with a Bluetooth source Ethernet Deactivate by removing the Ethernet cable Activate by inserting the Ethernet cable External Power Suppl...

Page 5: ...ogo are registered trademarks or trademarks of DTS Inc in the United States and other countries 2020 DTS Inc ALL RIGHTS RESERVED Google Android and Google Play are trademarks of Google LLC The terms H...

Page 6: ...ype IP address 1 Obtain your product s IP address using one of the following methods SoundTouch app From within the app select Y Settings About Select your system to view the IP address Wireless route...

Page 7: ...button 18 Function buttons 18 Adjusting volume 18 Using the MORE button 18 The AV OUTPUT menu 18 The AV SETTINGS menu 19 Remote glow button 19 SoundTouch App Setup Download and install the SoundTouch...

Page 8: ...25 Connect another mobile device 25 Reconnect a device 25 Clear the system s Bluetooth pairing list 25 Advanced Features Disabling Wi Fi capability 26 Re enabling Wi Fi capability 26 Updating the syst...

Page 9: ...adapter 36 Installing the front speakers 37 Connecting the front speakers to the console 38 Installing the rear speakers 39 Connecting the rear speakers to the console 40 Mounting the speakers 40 Appe...

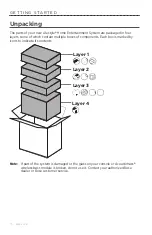
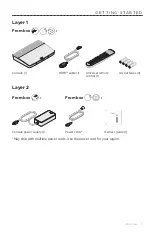
Page 10: ...ain multiple boxes of components Each box is marked by icons to indicate its contents Layer 1 Layer 2 Layer 4 Layer 3 Note If part of the system is damaged or the glass on your console or Acoustimass...

Page 11: ...R T E D Layer 1 From box Console 1 HDMI cable 1 Universal remote control 1 AA batteries 4 Layer 2 From box From box Console power supply 1 Power cords Owner s guide 1 May ship with multiple power cord...

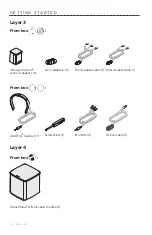
Page 12: ...ly Invisible series II speakers 5 AC 2 adapters 5 Front speaker cable 1 Rear speaker cable 1 From box ADAPTiQ headset 1 Screwdriver 1 IR emitter 1 Optical cable 1 Layer 4 From box Acoustimass wireless...

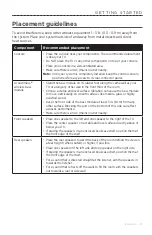
Page 13: ...y on smooth surfaces like marble glass or highly polished wood Keep the front side of the bass module at least 3 in 8 cm from any other surface Blocking the port on the bottom of this side can affect...

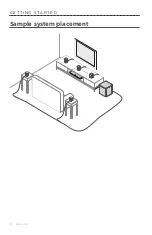
Page 14: ...1 4 E N G L I S H Sample system placement G E T T I N G S TA R T E D...

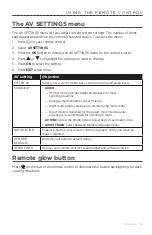
Page 15: ...r system from powering off automatically when there is no signal after 20 minutes Headphone Connector Set the default usage of your front headphones AUX input see page 35 CEC Settings Adjust the CEC f...

Page 16: ...speakers to the console Wireless bass module Connect the Acoustimass wireless bass module to the console TV remote Set up the system s remote control to control your TV Adding devices Connect your ad...

Page 17: ...ot control functions specific to devices that are connected to the front HDMI input Numeric keypad Numbers 1 6 play SoundTouch presets Navigation pad Playback controls Function buttons see page 18 Tel...

Page 18: ...o see your volume level refer to your remote control s display Press to increase the volume Press to decrease the volume Press to mute or unmute the audio Note If you still hear audio from your TV s s...

Page 19: ...balanced playback for most listening situations Dialogue mode enhances speech clarity Night mode adjusts dialog and volume during loud scenes Direct mode is designed for the purest most life like audi...

Page 20: ...he Google Play store Amazon Kindle Fire users download from the Amazon Appstore for Android Follow the instructions in the app to complete setup including adding the speaker to your Wi Fi network crea...

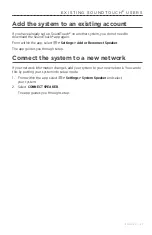
Page 21: ...pp again From within the app select Settings Add or Reconnect Speaker The app guides you through setup Connect the system to a new network If your network information changes add your system to your n...

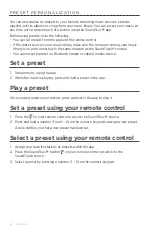
Page 22: ...eam or cabled mobile device Set a preset 1 Stream music using the app 2 While the music is playing press and hold a preset in the app Play a preset Once you personalize your presets press a preset in...

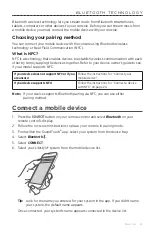
Page 23: ...FC or if you are unsure Follow the instructions for Connect your mobile device If your device supports NFC Follow the instructions for Connect a device with NFC on page 24 Note If your device supports...

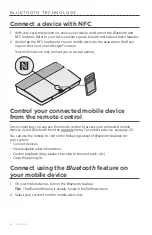
Page 24: ...ntrol Once connected you can use the remote control to access your connected mobile devices Select Bluetooth from the menu To connect a device see page 23 You can use the remote to control the followi...

Page 25: ...t Bluetooth Setup see page 23 Reconnect a device When powered on the console tries to reconnect with the most recently connected device Note The device must be within range and powered on If your devi...

Page 26: ...ystem Updating the system software If your system is connected to your home network it checks for software updates every time the system is used If an update is available it begins downloading automat...

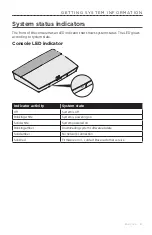
Page 27: ...to system state Console LED indicator Indicator activity System state Off System is off Blinking white System is powering on Solid white System powered on Blinking amber Downloading system software up...

Page 28: ...y System state Blinking amber Ready to connect Solid white Connected to the console Solid amber dim Disconnected from the console Blinking white Downloading system software update Blinking red Firmwar...

Page 29: ...omer service For additional help using the system Visit worldwide Bose com Support LS550 Contact Bose customer service Limited warranty The system is covered by a limited warranty Visit our website at...

Page 30: ...system status indicator on the control console should blink with each press Make sure the remote control s batteries are installed correctly and do not need replacement see page 41 Unplug the power c...

Page 31: ...able insert the cable into a connec tor on your TV labeled Output or OUT Unplug the power cord for the console wait 30 seconds and plug it firmly into a live AC mains outlet Cannot complete network se...

Page 32: ...trol console Select the device options and follow the on screen instructions to set up the device again Replace your remote s batteries see page 41 Set up your IR emitter see page 33 Intermittent audi...

Page 33: ...nect again Refer to your device s documentation See No sound from the system on page 31 Setting up your IR emitter If you are having issues with the responsiveness of your remote and your connected de...

Page 34: ...ms still exist reposition the IR beads and test again Checking for sound 1 Power on your TV 2 If you are using a cable satellite box or other secondary source Power on this source If your secondary so...

Page 35: ...ite mobile device The headphone setting is the default option To use this input as an AUX IN press the button on your remote control and select Headphone Connector from the on screen display Select AU...

Page 36: ...plain silver terminal For rear speakers Insert the bare ends of the two pin cable into the adapter by placing the red wire marked L or R into the red terminal and the plain wire into the plain silver...

Page 37: ...already completed setup refer to the following instructions in order to reassemble the rear portion of your home entertainment system CAUTION Do not connect your speakers while your console is connect...

Page 38: ...t of your TV 3 Insert the adapter connected to the wire marked R into the speaker on the right of your TV 4 Insert the adapter connected to the wire marked C into the speaker in the center 5 Connect t...

Page 39: ...age 16 If you are moving your system but have already completed setup refer to the following instructions in order to reassemble the rear portion of your home entertainment system What you need From b...

Page 40: ...RS connector on the back of your console Mounting the speakers You can mount the speakers on wall brackets floor stands or table stands To purchase these accessories contact your local Bose dealer or...

Page 41: ...ase in range 1 Slide open the battery compartment cover on the back of the remote control 2 Install four AA IEC LR6 1 5V batteries Match the and symbols on the batteries with the and markings inside t...

Page 42: ...you do not have a 3 5 mm stereo cable contact your authorized Bose dealer or Bose customer service To install the 3 5 mm stereo cable 1 On your remote control press SETUP 2 Select Speaker Management 3...

Page 43: ...E N G L I S H 4 3...

Page 44: ...2020 Bose Corporation 100 The Mountain Road Framingham MA 01701 9168 USA AM8121210 0020 Rev 00 w worldwide Bose com Support LS550 m X o s W global Bose com warranty...

Reviews: