Basic Operation
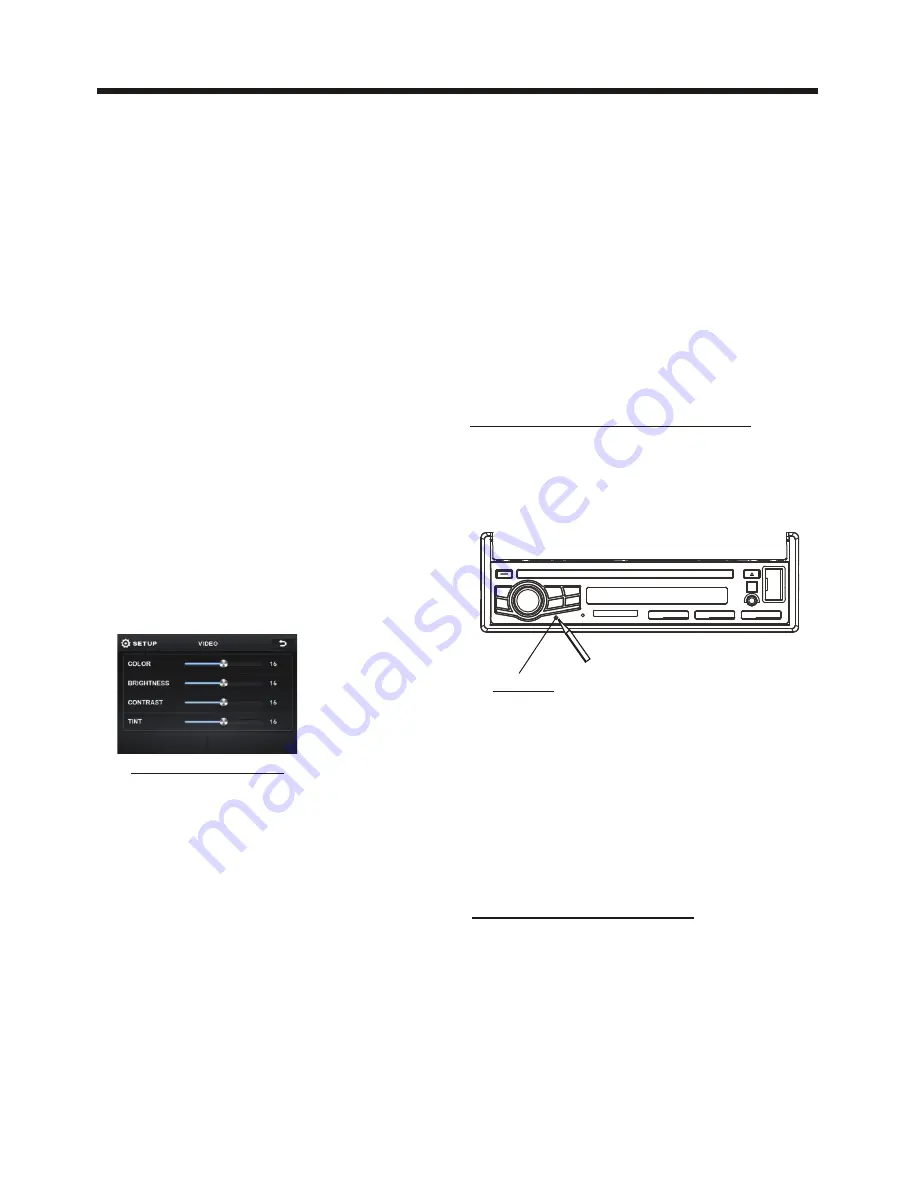
The RESET button is to be activated for
the following reasons:
A. Initial installation of the unit when
all wiring is completed.
B. All the function buttons do not operate.
C. Error symbol on the display.
Rear View Camera
When connecting the rear view camera
the mirror image of the rear view is auto-
matically displayed on the monitor
when you change
the gear to the back
position.
(Note: additional monitor can not display
the image.)
Reset Factory Settings
RESET button is placed on the housing
and must be activated with either a
ballpoint pen or thin metal object.
RESET
TREBLE: -7 to +7
Adjust treble level .
BASS: -7 to +7
Adjust bass level .
SUBWOOFER: touch to adjust subwoofer
volume and frequency.
EQ: touch to select audio mode as follow:
USER -> JAZZ -> CLASSIC -> POP -> ROCK
LOUDNESS: touch to select loudness
effect as :OFF -> LOW -> MID -> HIGH
FADER/BALANCE:
BALANCE: R 0-10 to L 0-10
Adjust sound balance between left
and right speakers .
FADE: F 0-10 to R 0-10
Adjust sound balance between front
and rear speakers .
VIDEO SETUP
COLOR: 0 to 32
Adjust the color for the picture-lighter
or darker.
BRIGHTNESS: 0 to 32
Adjust if the picture is too bright or
too dark.
CONTRAST: 0 to 32
Adjust the contrast of the bright and
dark portion.
TINT: 0 to 32
Adjust the tint if the human skin color
is unnatural.
-Adjustable when “NTSC “ is selected
for “NTSC/PAL “ .
LANGUAGE
Touch to select OSD language.
ILLUMINATION COLOR
Touch to select the backlight for all
buttons. Tap auto icon the backlight
change automatically.
CALIBRATION
Touch the arrow as show to calibration
the display.
Video setup interface
All manuals and user guides at all-guides.com


