background image

1

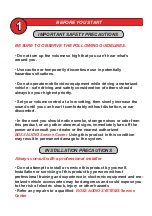
IMPORTANT SAFETY PRECAUTIONS

• 

BE SURE TO OBSERVE THE FOLLOWING GUIDELINES:

Do not turn up the volume so high that you can’t hear what’s 

around you.

 Use caution or temporarily discontinue use in potentially 

hazardous situations. 

 Do not operate mobile video equipment while driving a motorized 

vehicle – safe driving and safety consideration of others should 
always be your highest priority.

 Set your volume control at a low setting, then slowly increase the 

sound until you can hear it comfortably without distortion, or ear 
discomfort.

 In the event you should notice smoke, strange noises or odor from 

this product, or any other abnormal signs, immediately turn off the 
power and consult your dealer or the nearest authorized 

BOSS AUDIO Service Center

Using this product in this condition 

may result in permanent damage to the system.

BEFORE YOU START

Always consult with a professional installer

Do not attempt to install or service this product by yourself. 

Installation or servicing of this product by persons without 
professional training and experience in electronic equipment and mo-
torized vehicle accessories may be dangerous and could expose you 
to the risk of electric shock, injury or other hazards

Refer any repairs to a qualified 

BOSS AUDIO SYSTEMS 

Service 

Center

INSTALLATION PRECAUTIONS
Summary of Contents for MGV550B

Page 1: ......

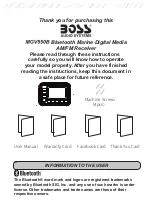
Page 2: ...ective owners INFORMATION TO THE USER your model properly Bluetooth Marine Digital Media AM FM Receiver Please read through these instructions carefully so you will know how to operate After you have...

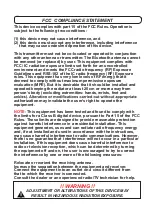
Page 3: ...d be installed and operated keeping the radiator at least 20 cm or more away from person s body excluding extremities hands wrists feet and authorization may invalidate the user s right to operate the...

Page 4: ...should notice smoke strange noises or odor from this product or any other abnormal signs immediately turn off the power and consult your dealer or the nearest authorized BOSS AUDIO Service Center Usi...

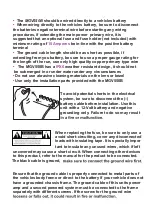
Page 5: ...bezel Use only the installation parts provided with the MGV550B To avoid potential shorts in the electrical system be sure to disconnect the battery cable before installation Use this unit with a 12 V...

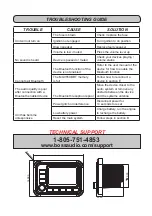
Page 6: ...the device is not enabled Refer to the user manual of the device for how to enable the Bluetooth function The BT memory is full Follow how to reconnect a device in section E The audio quality is poor...

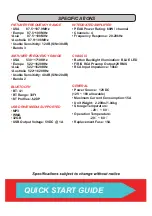
Page 7: ...UNER FREQUENCY RANGE USA 87 5 107 9MHz Europe 87 5 108MHz Asia 87 5 108MHz Australia 87 5 108MHz Bands 3 AM TUNER FREQUENCY RANGE USA 530 1710KHz Europe 522 1620KHz Australia 522 1620KHz Bands 2 BLUET...

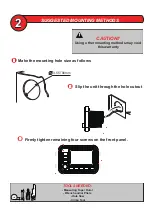
Page 8: ...rranty SUGGESTED MOUNTING METHODS 2 Slip the unit through the hole cutout Firmly tighten remaining four screws on the front panel TOOLS NEEDED Measuring Tape Ruler Wrench and or Pliers Hole Saw Crimp...

Page 9: ...QSXW URZQ 0DLQ 2XWSXW LUH XOOHW 6RFNHW XQFWLRQ 1R RORXU XQFWLRQ 1R RORXU XQFWLRQ 5HG KLWH KLWH HOORZ UH UH FF RQVWDQW 5 5 OXH UHHQ UHHQ ODFN 3XUSOH 3XUSOH 5HPRWH 5 5 QG 55 55 KLWH 6XE 2XWSXW 5HG 6XE...

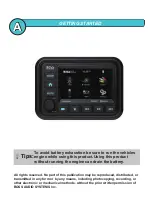
Page 10: ...NG STARTED All rights reserved No part of this publication may be reproduced distributed or transmitted in any form or by any means including photocopying recording or other electronic or mechanical m...

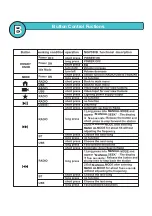
Page 11: ...ROTARY KNOB MODE GETTING STARTED B Button Control Fuctions MANUAL MANUAL MANUAL MANUAL MANUAL MANUAL MANUAL MANUAL GJWF TFDPOET GJWF TFDPOET GJWF TFDPOET...

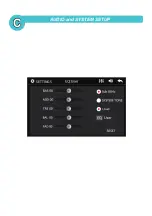
Page 12: ...AUDIO and SYSTEM SETUP C SETTINGS...

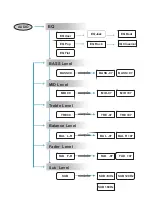
Page 13: ...evel Balance Level BASS 00 BASS 07 BASS 07 MID 00 MID 07 MID 07 TRE 00 TRE 07 TRE 07 BAL L R BAL 07 BAL R 07 Fader Level Sub Level FAD F R FAD 07 FAD 07 SUB SUB 120Hz SUB 160Hz AUDIO EQ EQ User EQ Bea...

Page 14: ...he mobile device must be within 33ft 10m of the MGV550B for Bluetooth to function properly 1 ANDROID users a Go into the Settings Menu of your ANDROID device b Enter the Bluetooth Menu and press SCAN...

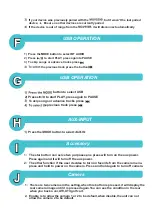
Page 15: ...aux power 2 The other function if the user decides to turn on favorite from the camera menu press and hold to power on the camera Press and hold again to turn off camera Press again and it will turn o...

Page 16: ......

Reviews: