11
DR-3
RESTORING THE FACTORY
SETTINGS
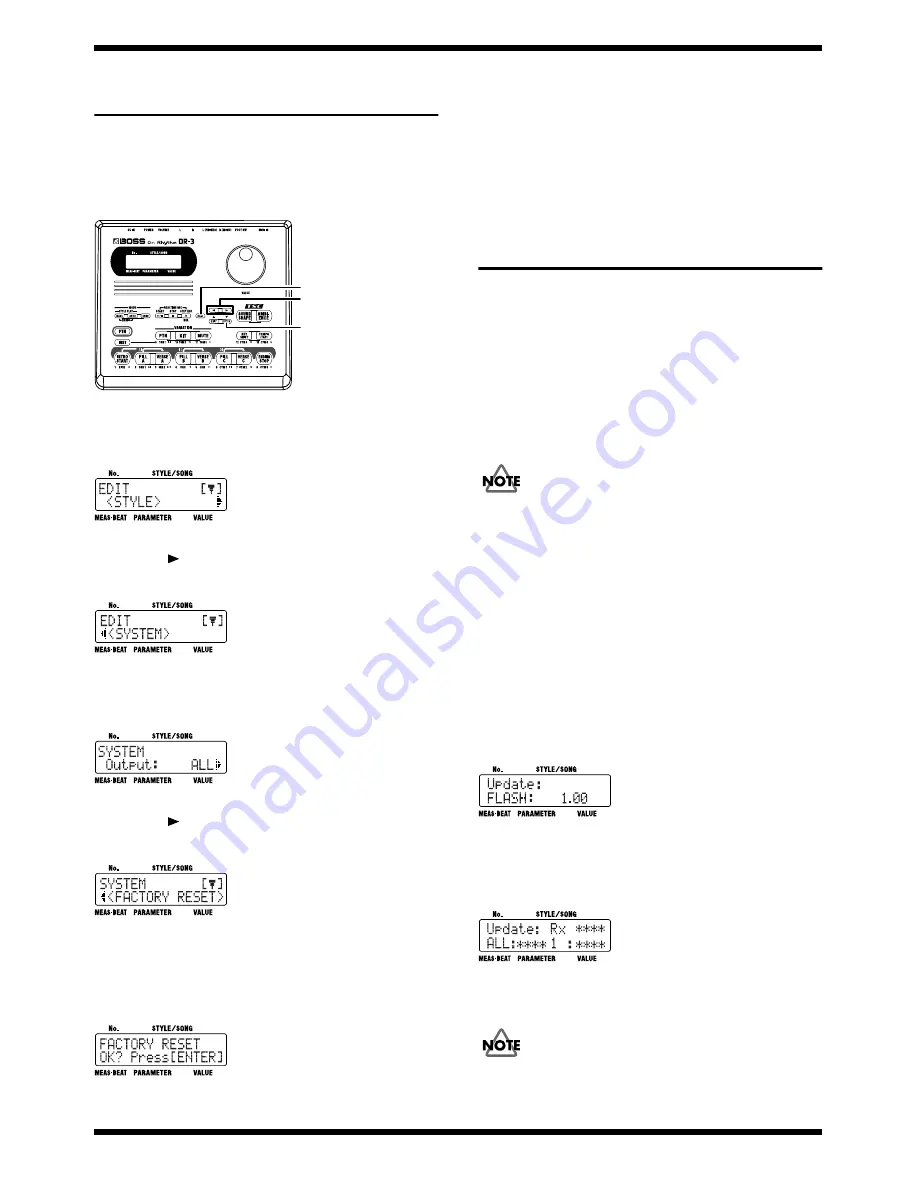
This restores the settings of the DR-3 to their
factory defaults.
1.
Power on the DR-3.
fig.fact-1
2.
Press the [EDIT] button.
fig.fact-2
3.
Press the [
] button and choose “SYSTEM.”
fig.fact-3
4.
Press the [ENTER] button.
fig.fact-4
5.
Press the [
] button and choose “FACTORY RESET.”
fig.fact-5
6.
Press the [ENTER] button.
A message prompting you to confirm execution of the factory-reset
operation is displayed.
fig.fact-6
To cancel, press the [EXIT] button.
7.
To execute a factory reset, press the [ENTER] button.
The factory reset is executed.
When the factory reset ends, the original screen reappears.
All settings are returned to the default values in effect when the unit was
shipped from the factory.
SYSTEM SOFTWARE UPDATE
PROCEDURE
Required equipment
1.
Update CD-ROM (P/No.17041302)
2.
AC Adaptor PSA Series
3.
Sequencer (Capable of playing back SMF)
4.
MIDI cable
Update Method
User-created data cannot be backed up.
When initializing the User memory, send all MIDI files from _00001.mid to
_00071.mid.
When updating the system without initializing the User memory, send the
following MIDI files.
_00001.mid ... _00048.mid
_00063.mid ... _00071.mid
1.
Connect the AC adapter to DC IN on the DR-3 unit.
2.
Use a MIDI cable to connect MIDI OUT on a sequencer capable of
importing Standard MIDI files to MIDI IN on the DR-3.
3.
Hold down the [START] and [STEP REC] buttons on the DR-3 and switch
on the unit.
fig.update-1
4.
When the update operation starts, a display like the one shown below
appears.
fig.update-2
5.
When the update operation ends, a display like the one shown below
appears.
The update operation takes about 40 minutes.
1
2, 4
3, 5, 6


