V- Blade Controllers
25
SmartTouch2
TM
Control
Mounting Instructions
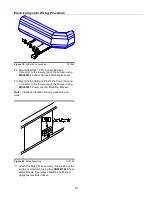
Figure 35.
SmartTouch2
TM
Mounting Hardware
G10311
1. Remove the Swivel Mount and Tab from the
MSC05058
Swivel Mount Kit.
2. Use the enclosed alcohol wipe to clean a spot on
the vehicle interior where you want to place the
SmartTouch2
TM
Control. Wipe dry immediately with
a cloth or paper towel.
3. Do not apply when the surface temperatures are
lower than +60˚F (Working temperature range of
the adhesive is -40˚F to +200˚F).
4. Peel off the paper backing on one side of the
adhesive and apply to Swivel Mount. Apply
maximum pressure to all areas.
5. Apply the Swivel Mount onto the spot of the interior
that was just cleaned. (MAKE SURE IT IS IN THE
CORRECT PLACE) Once it is placed it cannot be
removed without destroying the adhesive.
6. Clean the back of the SmartTouch2
TM
Control with
the alcohol wipe.
7. Peel off adhesive backing of tape, apply to Tab,
and press firmly.
8. Remove remaining backing and apply the Tab to
the back of the SmartTouch2
TM
Control. Apply
pressure for 30 seconds.
NOTICE
After attaching the Swivel Mount, let it sit unused
for 72 hours before attaching the SmartTouch2
TM
Control to allow the adhesive to bond to the
surface and ensure secure mounting.
9. Place SmartTouch2
TM
Control on the Swivel Mount.
Note:
Other mounting options are available. Contact
your BOSS Snowplow dealer for more information.
SWIVEL MOUNT
SWIVEL MOUNT
SWIVEL MOUNT
SWIVEL MOUNT
TAB
TAB
TAB
TAB


