4
Connecting Your VRS Micro Speakers
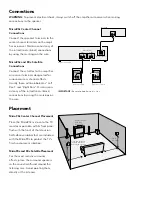
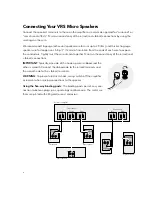
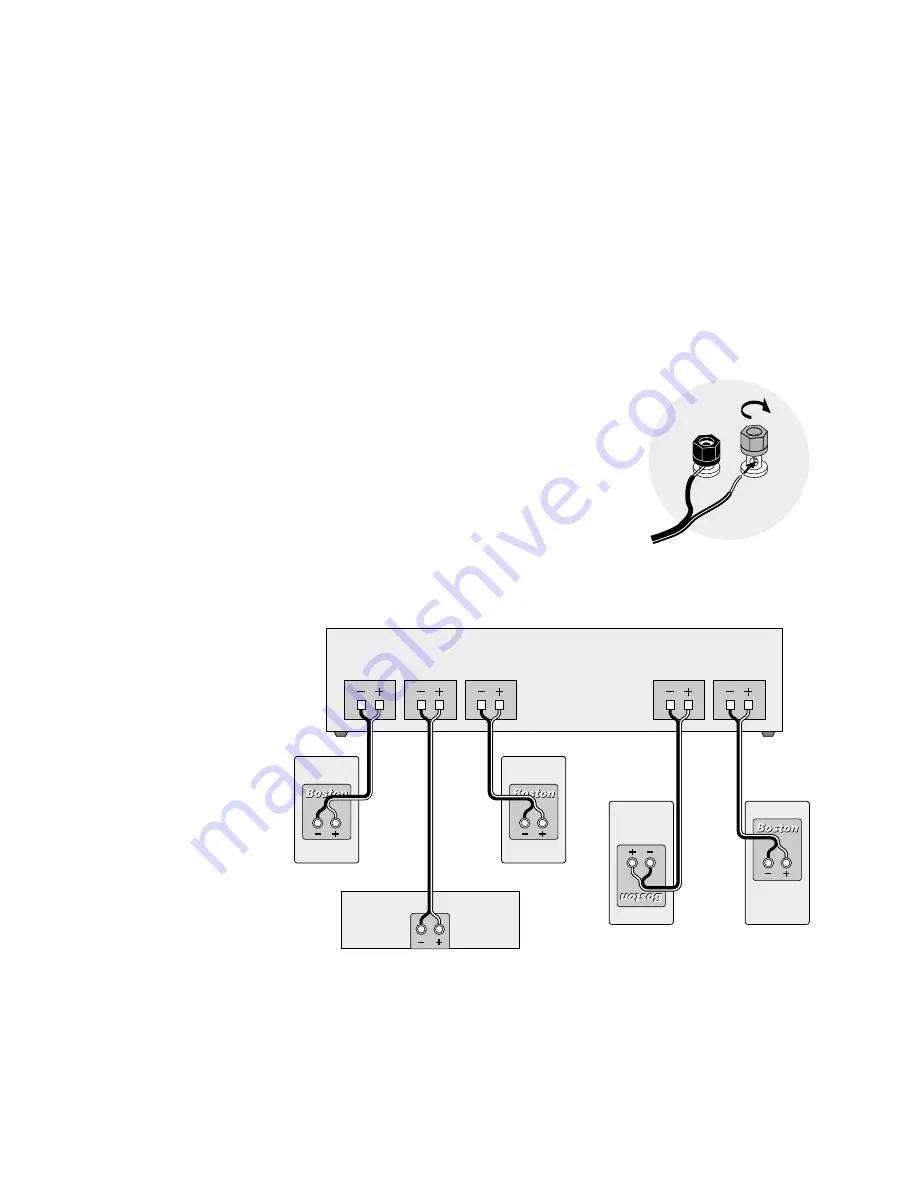
Connect the speaker’s terminals to those on the amplifier or receiver designated for “surround” or
“rear channel effects.” Maintain consistency of the
+
(red) and
–
(black) connections by using the
markings on the wire.
We recommend 18-gauge (or heavier) speaker wire for runs up to 25' (8m), and thicker 16-gauge
speaker wire for longer runs. Strip
1
⁄
2
" (12mm) of insulation from the ends of each wire to expose
the conductors. Tightly twist the wire strands together. Maintain the consistency of the
+
(red) and
–
(black) connections.
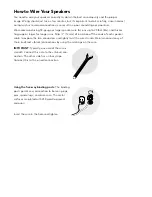
IMPORTANT:
Typically, one side of the hook-up wire is ribbed and the
other is smooth. Connect the ribbed side to the
+
(red) terminals and
the smooth side to the
–
(black) terminals.
WARNING:
To prevent electrical shock, always switch off the amplifier
or receiver when making connections to the speaker.
Using the five-way binding posts:
The binding posts permit easy con-
nection to banana plugs, pins, spade lugs and bare wire. The metal sur-
faces are plated with 24K gold to resist corrosion.
Rear channel
Left
Front channel
Right
Center speaker
Right
Center
Left
Left speaker
Receiver or amplifier
Right speaker
Left VRS Micro
Right VRS Micro

