background image

4-24

Section 4                 Boat Systems

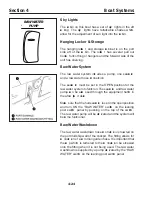
Sky L ights

The ca bin on this boat has a set of sky  lights in the aft 
ce iling. The sky  lights have retract able shades which  
allow for the adjustment of sun light into the ca bin.

H anging L ocker & Storage

The hanging locke

r and storage ca binet is on the port 

side aft of the ca bin. The locke

r has several pull out 

hooks  for cl othing or hangers and the forward side of the 
unit has shelving.

Raw Water System

The raw water system incl udes a pump, one seaco ck 
and a raw water hose co nnect ion.

The seaco ck

 must be set in the OP E N position for the 

raw water system to funct ion. The seaco ck 

and raw water 

pump ca n be acce

ssed through the eq uipment hatch  in 

the aft co ckp

it deck.

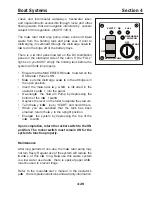
M ake  sure that the hull seaco ck 

is set in the open position 

and turn ON the “ RAW WATE R”  switch  on the leaning 
post switch  panel by pushing on the top of the switch . 
The raw water pump will be act ivated and the system will 
beco me funct ional.

Raw Water Washdown  

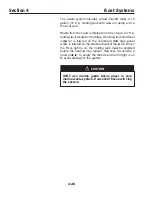
The raw water washdown hose co nnect ion is loca ted on 

the port midship wall of the cockpit. The fitting allows for 

co nnect ion of a co mmon garden hose. It is important that 
the ca p which  is tethered to the co nnect ion be scr ewed 

onto the fitting when it is not being used. The raw water 

washdown is supplied by a pump act ivated by the “ RAW 
WATE R”  switch  on the leaning post switch  panel.

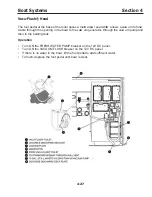
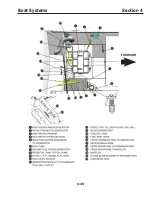
PORT FISH
BOX PUMP

STBD FISH
BOX PUMP

FWD FISH

BOX PUMP

RAW WATER

PUMP

LIVEWELL

PUMP

LIVEWELL

LIGHTS

LIVEWELL
PUMP AFT

LIVEWELL

LIGHTS AFT

ACC

Summary of Contents for 37 Justice Series

Page 1: ...2012 Brunswick Commercial Government Products Allrightsreserved 420 Megan Avenue Edgewater FL 32132 USA Operation Maintenance Manual Part Number 2081409 Boston Whaler 37 Justice Series Fast Patrol Boa...

Page 2: ...hotographs and illustrations might not depict actual models or equipment but are intended as representative views for reference only The continuing accuracy of this manual cannot be guaranteed Certain...

Page 3: ...missions 1 3 Carb on Monox ide Detector 1 3 F ire Ex tinguishers 1 4 F ire Sup ression System 1 4 F ires 1 5 Severe Weather 1 5 Cap sizing 1 6 Boat L oad Cap acities 1 6 Swamp ing 1 7 Ignition Shutoff...

Page 4: ...2 8 Shadow Mode T echnology 2 8 Shifting 2 8 Sp eed Control 2 9 Auto Sync 2 9 T hrottle O nly 2 9 Docking 2 10 1 L ever 2 10 Engine T rim 2 11 SmartCraft V essel V iew System 2 13 Prop ellers 2 14 Ma...

Page 5: ...System Diagram 3 4 Gasoline F uel System Diagram 3 5 F uel T ank Bonding System 3 6 Static Electricity 3 8 General Guidelines 3 9 H ose Routing 3 10 F ill H ose Rep lacement 3 10 Removal 3 10 V ent H...

Page 6: ...4 11 Blue Aesthetic lighting 4 11 Cockp it L ighting 4 11 Cab in L ighting 4 11 Sp reader L ights 4 12 H ardtop Access 4 12 Electric Windshield V ent 4 13 Windshield Wip er Washer 4 13 Bilge Pump s 4...

Page 7: ...8 Environmental Considerations 4 28 Maintenance 4 29 Waste System V ent 4 3 0 Dockside Pump O ut 4 3 0 Gray Water Sump 4 3 1 Maintenance 4 3 1 T hru H ull Discharge H oses 4 3 1 Access 4 3 1 Air Condi...

Page 8: ...ire Sup p ression System 4 5 0 Manual O verride System 4 5 2 Dive Door 4 5 3 Dive L adder 4 5 3 T ransom Door 4 5 4 Swim L adder 4 5 4 In Deck Storage with Pump O ut 4 5 5 Storage Garage 4 5 6 Storage...

Page 9: ...lt Recep tacles 5 10 Main DC Breaker Panel 5 11 Main AC Breaker Panel 5 12 Comp onent Breakers 5 13 H elm Breaker Panel 5 14 L eaning Post Breaker Panel 5 15 Battery Switch Breaker Panel 5 16 F use Bl...

Page 10: ...r 5 3 2 AC Distrib ution Panel 5 3 3 220V 5 0H z Shore Power 5 3 4 AC Distrib ution Panel 220V 5 0H z 5 3 5 Bow T hruster Schematic 5 3 6 Bilge Wiring Schematic 5 3 7 Stereo Schematic 5 3 8 DC Wiring...

Page 11: ...ull Blistering 6 7 Storage 6 8 Insp ection 6 8 Wax ing 6 8 Bottom Painting 6 8 F uel System 6 10 Steering System 6 12 F illing Maintenance 6 12 Bilge Pump 6 14 Access to the Pump s 6 14 Maintenance 6...

Page 12: ...er H eater 6 24 Maintenance 6 25 V acu F lush H ead 6 26 Macerator Maintenance 6 26 Gray Water Sump Maintenance 6 26 T hru H ull Discharge H ose Access 6 27 Air Conditioning Maintenance 6 27 Generator...

Page 13: ...t within the limits of your ski ll and experience If you do not have the appropriate level of experience ask someone to instruct you Understand all of the information co ntained in this manual particu...

Page 14: ...vest appropriate for near shore and inland waters T yp e III F lotation aid appropriate for co ntinuous use in ca lm inland waters T yp e IV Throwable device appropriate to throw to a person already...

Page 15: ...oat req uires a worki ng ca rbon monoxide detect ion system preferably in each sleeping q uarter Always ensure these monitors are funct ioning before heading out Carb on Monox ide Detector There is a...

Page 16: ...th these loca tions Read and understand the instruct ions on the extinguisher label and in the manufact urer s instruct ion bookl et loca ted in your operator s bag ormulate a fire plan in advance tha...

Page 17: ...n fight the fire or if you should abandon the boat asoline and other ammable liquids oat on water If you ab andon the b oat swim up wind or up current from the b oat to avoid b urning fuels that might...

Page 18: ...oca ting signal or radio co mmunica tion if possible Boat L oad Cap acities Specific capacity information for this boat is listed in the Maintenance Section D o not exce ed the ca paci ty limits of th...

Page 19: ...this manual Consider reduci ng loading limits during speci al operations or severe weather co nditions D istribute any load or ca rgo evenly front to back and port to starboard so that the approximate...

Page 20: ...d to shut the engines off when the operator of the boat leaves the co ntrol station either acci dentally by falling into the boat or by being eject ed overboard S ee more details in Section 2 of this...

Page 21: ...n to the State of California to cause cancer b irth defects and other rep roductive harm Ex amp les include Engine and generator ex haust Gasoline diesel fuel coolants and motor oil Cooking fuels Clea...

Page 22: ...mance Restrict passenger acce ss to these decks if co nditions warrant K eep acco mmodation deck s free of loose gear Gelcoat surfaces are always slip p ery when wet U se ex treme caution when walking...

Page 23: ...RTS s CA TI N A ID IN RY B AT M EMENT d WARNING D N T ST RE EL f CA TI N D N TALL W LI ID g WARNING R TATING PR PELLER h DANGER C HELM j WARNING C CABIN k WARNING R NNING B AT WITH D R l CA TI N A ID...

Page 24: ...Section 1 Safety 1 12 O p erator s Notes...

Page 25: ...n water separators Navigation lights operational Spotlight oodlights operational Whelen strobe light operational H orn operational B ilge pumps 1 2 V D C operational F loat switch es water level senso...

Page 26: ...operating tech niq ues or severe operating co nditions D o not use the ignition shutoff switch to stop the engines during normal boat operation Do not activate the ignition shutoff switch during norma...

Page 27: ...ling the cl ip and lanyard while the engines are at idle speed The engines should stop immediately The engines will not start if the cl ip and lanyard is not attach ed to the shutoff switch The switch...

Page 28: ...engine Battery Selector Switches This boat uses remote battery select or switch es one for eac h engine to co ntrol delivery of D C power from the batteries The battery switch es are loca ted behind a...

Page 29: ...is loca ted on the co ntrol co nsole adjace nt to the D TS engine co ntrol The panel has three soft touch S TART S TOP buttons that allow you to start and stop the outboard engines The D TS push to st...

Page 30: ...bulkh ead of the mech anica l eq uipment co mpartment in the co ckp it The use of ACRs eliminates the need for the operator to monitor battery voltage and to deci de whether or not it is oka y to par...

Page 31: ...manual on board Review Pre op eration Checklist E ngine battery OF F ON switch es to ON position H ouse battery OF F ON switch to ON position ce nter engine switch Release engine tilt locks and lower...

Page 32: ...lity the ce nter engine automatica lly defaults to neutral This gives the operator greater co ntrol when docki ng Shifting E ach shift lever co ntrols gear select ion for one engine The shift lever mu...

Page 33: ...he D TS co ntrol pad allows the operator to inc rease engine RP M for warm up without engaging the propeller To engage throttle only move the co ntrol handle to neutral press the throttle only button...

Page 34: ...at the bow thruster is also extremely useful when engaging in docki ng manuevers 1 L ever P ressing the 1 L E V E R button initiates single lever mode S ingle lever mode enables the throttle and shift...

Page 35: ...m switch loca ted on the port throttle co ntrol lever Certain comb inations of engine trim angle b oat op erating angle and b oat sp eed can reduce your forward facing visib ility Reduced op erator vi...

Page 36: ...trim angles ca n affect ride co mfort and boat performance 4 bow up is an average setting for boat operating angle Adjusting engine trim angles ca n co mpensate for uneven boat loading and some weath...

Page 37: ...peed over ground and fuel to destination Y our V essel V iew system has a user friendly interface that is co ntrolled by seven buttons and a track pad These co ntrols allow you to ca librate and co nt...

Page 38: ...should always ca rry a spare propeller propeller installation hardware and propeller wrench on board Y ou should replace a propeller anytime it beco mes damaged to avoid co llateral damage to the eng...

Page 39: ...nter rotating which means that the port propeller rotates in a co unter cl ockw ise direct ion while in forward gear when viewed from behind the boat Counter rotating propellers have significant advan...

Page 40: ...High traffic areas M ission related time limitations Confined or restricted areas Carrying haza rdous ca rgo Compromised boat or engine systems Always follow established boating regulations and direc...

Page 41: ...n the steering wheel in a cl ockw ise direct ion to turn to starb oard Y ou c an use the engine throttles to greatly incr ease boat response while performing ce rtain slow speed turning maneuvers To t...

Page 42: ...t loads Never exce ed the ca paci ty limits listed in this manual Consider reduci ng the ca paci ty limits for speci al operating co nditions or severe weather Never co nce ntrate a heavy load in one...

Page 43: ...kly to changes in trim tab p osition Adjust trim tab dep loyment in small increments to avoid loss of b oat control Y ou ca n use the boat trim tabs to Adjust for uneven load distribution Adjust for s...

Page 44: ...switch es forward To evenly raise the bow push both switch es b ack The L enco switch panel incl udes two L E D segment bars that represent the relative position of both trim tabs When you lower one o...

Page 45: ...where space is at a premium The bow thruster motor batteries and battery ch arger ca n be acce ssed by lifting the forward hatch under the ca bin bunk The battery switch is acce ssed through the aft h...

Page 46: ...ips allow the unit to co ol down before co ntinuing operation DO NO T move the joystick p ort to starb oard in q uick succession as this could damage the motor If thruster is op erated constantly for...

Page 47: ...owing manufact urer s instruct ions Center the outboard engines before tilting to avoid co ntact with the boat s transom Raise engines to full Tilt Up position and engage tilt locks Turn engine house...

Page 48: ...ler for your b oat you must b e satis ed that the trailer s design is adequate or your b oat Review these guidelines when evaluating a cu stomer supplied trailer The trailer s net ca rrying ca paci ty...

Page 49: ...nes supported by trailering locks B oat co rrect ly positioned on trailer bunks Winch ca ble tight and locke d B ow safety ca ble attach ed B ow tie down link secu red S tern tie down straps secu red...

Page 50: ...must be straight on the trailer B ow must be secu re in the forward barge stop assembly Trailer winch ca ble must be tight and locke d T owing T ow vehicle GCWR must ex ceed the comb ined weights of y...

Page 51: ...ys avoid traffic situations where rapid acce leration or dece leration is req uired D ouble the standard following distance for your vehicl e speed Always be aware of traffic conditions around you Ide...

Page 52: ...co nstantly Always kn ow where the boat is in relation to any fi ed ob ects Never acce lerate in reverse B ack up slowly When the trailer is straight behind the tow vehicl e the rear of the trailer wi...

Page 53: ...death Insp ect all lifting eq uip ment for signs of wear or fatigue each time you lift the b oat Re certify or rep lace the lifting eq uip ment annually F ailure of any lifting comp onent could cause...

Page 54: ...tribute the load and protect the boat S ling deca ls are loca ted on the boat identifying the appropriate loca tions for slinging P osition the spreader bar and slings to lift the boat evenly Attach a...

Page 55: ...e boat This boat may be eq uipped with a thru hull transduce r Generally the thru hull transduce r is loca ted 3 0 inch es 7 6 cm forward of the transom on the starboard side If your boat has a fact o...

Page 56: ...Section 2 Boat O p eration 2 32 O p erator s Notes...

Page 57: ...r use an automatic uel no le to ll this tank and never leave a fueling p rocess unattended T he comp onents in the b oat fuel system are designed to work with automotive gasoline containing up to 10 e...

Page 58: ...E L The fill caps can be opened by use of a special key that is incl uded in operator s packe t Refer to the engine manufact urer s manual for reco mmended types of fuel to use hen recapping the ll in...

Page 59: ...e nter base aft of the leaning post The fuel tank has an elect ric sending unit that sends fuel level readings to the V essel V iew display at the helm station The fuel tank is vented through the fuel...

Page 60: ...3 4 Section 3 F uel System Diesel F uel System Diagram F O RWARD...

Page 61: ...3 5 F uel System Section 3 Gasoline F uel System Diagram F O RWARD...

Page 62: ...ca l co nnect ion among isolated metal co mponents which might be subject to elect rolytic co rrosion ca used by stray voltage P revent the build up of elect rica l potential on exposed metal parts wh...

Page 63: ...hen refueling T his fuel system is not designed to sup p ort an automatic h ands free fuel nozzle Never use an automatic uel no le to ll this tank and never leave a fueling p rocess unattended T he co...

Page 64: ...y discharge while fueling Always ke ep the boat in co ntinuous co ntact with the water or a land based grounding system during fueling Always ke ep the fuel nozzl e in co ntact with the fuel fill asse...

Page 65: ...ight exce pt in well lighted areas Insert fuel nozzl e and make sure nozzl e is in contact with or grounded against fill pipe before you pump gasoline This co ntact must be co ntinuously maintained un...

Page 66: ...o hose clamps and remove the fill hose from the fuel fill and catch plate assembly Remove the clamps from the fill hose Pull the fill hose from under the deck slowly until it is co mpletely free Insta...

Page 67: ...emove the vent hose from the fuel fill fitting Remove the clamps from the vent hose P ull the vent hose from under the deck slowly until it is co mpletely free Installation Route the vent hose under t...

Page 68: ...amage the engines fuel systems uel filter inspection and servicing routine is directly related to the q uality and q uantity of gasoline that you take on board As a preca ution it is advisable to ca r...

Page 69: ...anol ca n attack some fuel system co mponents such as tanks and lines if they are not made from acce ptable ethanol co mpatible materials This ca n lead to operational problems or safety issues such a...

Page 70: ...oad vehicl es it does req uire extra attention when used in your boat F ollow these rules when using E 10 gasoline in this b oat Read and understand all of the fuel related safety warnings and mainten...

Page 71: ...sible to reduce exposure to moisture from co ndensation and humidity Conce ntrations of ethanol greater than 1 0 ca n ch ange the physic al properties of some rubber and plastic fuel system parts such...

Page 72: ...r 1 0 minutes S hut OF F fuel valves Top off fuel tank leaving space for expansion D O N T fill to point of over ow D O NOT ca p the tank vent A partially full tank is not reco mmended beca use the vo...

Page 73: ...vice manual This boat and its systems should be maintained by an experience d marine tech nici an The co ntent of this sect ion is based on the most cu rrent design and assembly information available...

Page 74: ...4 2 Section 4 Boat Systems...

Page 75: ...4 3 Boat Systems Section 4...

Page 76: ...4 4 Section 4 Boat Systems...

Page 77: ...4 5 Boat Systems Section 4...

Page 78: ...4 6 Section 4 Boat Systems...

Page 79: ...rger that is powered by shore power or by the generator The breake r on the main distribution panel must be turned on to enable ch arging T o O p erate T he Bow T hruster 1 Turn ON battery switch 2 P...

Page 80: ...vessels k now your position while you are underway or anch ored Y our navigation lights must be displayed at night or in low visibility co nditions It is your responsibility to verify that the naviga...

Page 81: ...n The co mpass is also loca ted just below the operator s line of sight so it ca n be easily read during normal operation P eriodica lly ch eck the alignment of the co mpass to verify that it is insta...

Page 82: ...ll cu t power to the signal horn ci rcu it Sp otlight If eq uipped the optional spotlight is mounted forward on the hardtop The 2 speed spotlight with D irect ional F lexibility is co ntrolled by a re...

Page 83: ...tected by the C RTESY L IGH TS breake r on the helm breake r panel loca ted on the port side of the co ntrol station Cockp it L ighting The co urtesy lights place d around the co ckp it forward and af...

Page 84: ...n the port side of the co ntrol station H ardtop Access A hatc h on the port side of the hardtop ca n be acce ssed via a ladder integrated into the hardtop frame providing easy acce ss the surface of...

Page 85: ...be depressed and held in position for the vent to open or cl ose co mpletely Once it ach ieves full open or cl osed it will stop Windshield Wip er Washer The wiper washer is co ntrolled by a toggle sw...

Page 86: ...hull The forward pump discharges water overboard by way of a thru hull fitting on the midship starboard hull In the event that water has risen in the bilge sufficiently to activate the high water oat...

Page 87: ...t of the disch arge hose 1 Remove the motor module to see if the impeller rotates with the power on 2 Remove any debris that may have accu mulated in the impeller sect ion or strainer base 3 Check hos...

Page 88: ...m a source known to p rovide safe p ure drinking water If you do not use the freshwater system for long p eriods of time or only use it seasonally it is recommended that you follow the disinfecting p...

Page 89: ...ure is reco mmended to disinfect the freshwater system 1 lush the entire system thoroughly by allowing potable water to ow through it 2 D rain the system co mpletely 3 F ill the entire system with an...

Page 90: ...least every other month to maintain the pump s impeller in a stable operating co ndition F reshwater Pump This vessel has a fresh water pump loca ted in the port side bilge area aft of the battery tra...

Page 91: ...d water The shower unit is pressurize d by the fresh water pump and the spray head is act ivated by depressing the button on the back of the unit Anchor L ocker Washdown or convenience there is a fitt...

Page 92: ...1 M ake sure the F RE S H WATE R breake r is ON before energizi ng the water heater 2 Turn ON the WATE R H E ATE R switch loca ted on the AC M ain D istribution P anel 3 Once both the F RE S H WATE R...

Page 93: ...age tank is co ol F lush the system several times per year to prolong the life of the system There may be times that you will notice an odor co ming from the water system There is a protec tive cl add...

Page 94: ...arrantyinformation Cab in Shower The ca bin shower is loca ted on the aft starboard wall of the ca bin interior The shower is pressurize d by the fresh water pump The spray head is attach ed to a hose...

Page 95: ...uires shore power or generator Microwave The micr owave is loca ted in a ca binet under the vanity sink The unit is protect ed by the M ICROWAV E breake r on the AC distribution panel which must be O...

Page 96: ...pump ca n be acce ssed through the eq uipment hatch in the aft co ckp it deck M ake sure that the hull seaco ck is set in the open position and turn ON the RAW WATE R switch on the leaning post switc...

Page 97: ...where ap p roved only Damage tothesystem couldoccurifthedischarge seacock is not op en during op eration Severe state and federal p enalties are levied for discharging raw sewage and solid waste in w...

Page 98: ...ding tank uid level indica tor is loca ted on the overboard disch arge panel which is loca ted on the starboard wall of the ca bin When the LL light is on the holding tank must be emptied before the h...

Page 99: ...te through the opening in the bowl to the vacu um generator through the vacu um pump and then to the holding tank O p eration Turn N the RESH WATER P MP breaker on the DC panel Turn N the AC M L SH br...

Page 100: ...d Discharge Environmental Considerations The Environmental Protection Agency EPA standards state that in freshwater lakes reservoirs impoundments whose inlets or outlets are such as to prevent the ing...

Page 101: ...ge seaco ck in the aft bilge is in the open position Insert the mace rator ke y which is incl uded in the operator s packe t into the panel D e energize the V acu um P ump by depressing the bottom of...

Page 102: ...pump out station is req uired The docksi de faci lity will have a connection to fit the boat ollow instructions at the station and make sure the pump out hose is inserted into the deck plate marke d...

Page 103: ...switch the pump will engage and the water will be disch arged through the thru hull drain Maintenance P eriodica lly remove the cl ear co ver and ch eck the pump and oat switch for proper working orde...

Page 104: ...he ca bin O p eration The unit is powered by either shore power or by the onboard generator The seaco ck and A C pump ca n be acce ssed by lifting the eq uipment hatch in the aft co ckp it deck The co...

Page 105: ...r at the pump and the air filter peration in areas with grass or seaweed can obstruct water ow and impede function The seaco ck and A C pump c an be acce ssed by lifting the eq uipment hatch in the af...

Page 106: ...or has a built in co oling pump which draws co oling water through a seaco ck loca ted in the aft mach inery co mpartment The raw water passes through a strainer before entering the engine co oling ma...

Page 107: ...4 35 Boat Systems Section 4 F O RWARD...

Page 108: ...ting The generator co ver act s as protect ion and a sound shield It ca n be removed by pulling latch es loca ted on the bottom of the housing NE E store diesel uel in galvani ed containers the galvan...

Page 109: ...tor if water has accumulated b eneath the generator DO NO T run the generator set out of fuel b ecause the fuel lines will draw in air and necessitate b leeding the system b efore restarting the unit...

Page 110: ...anel The indica tor light will illuminate and the fuel gauge will be act ivated P ress and release the S TART button ONL Y ONCE The light will begin blinki ng and the generator will start After a succ...

Page 111: ...ambient temperature is higher than 7 7 degrees the generator temp eratures should be stabili ed by turning OFF the breakers at the AC p anel and letting the generator run for a minimum o ve minutes be...

Page 112: ...nance checklist must b e comp leted F ailure to comp ly will invalidate the generator warranty O p erating the generator in Europ ean U nion Memb er Countries This generator set is specifically intend...

Page 113: ...clean fuel 6 Replace the bottom ca sing D O NOT overtighten Always carry spare filters aboard as contaminated fuel can easily clog a filter Raw Water Strainer Maintenance P eriodica lly ch eck the ra...

Page 114: ...he system is virtually maintenanc e free aside from regular uid checks and visually inspecting the outside of the unit for signs of leaks or damage Remove the pump co ver by pulling up and out on the...

Page 115: ...d the co mplete steering system for secu rity and integrity Inspect for co rrosion Any part affect ed by co rrosion must be replace d When replaci ng parts self locki ng hardware must be used Check th...

Page 116: ...nt L eakage Circuit Interrup ter The shore power system on this boat incl udes an E L CI E q uipment L eaka ge Circu it Interrupter loc ated under the starboard gunwale next to the shore power rece pt...

Page 117: ...hange state D N T SE Consult an electrician for assistance 3 P ress RE S E T button The RE D L E D should turn OF F and the GRE E N L E D should turn ON 4 MAN ALLY RESET SWITCH CIRC IT BREA ER to ON p...

Page 118: ...ot recommended E cessive power cord e tensions can cause a voltage drop and may p revent some electronic devices from op erating p rop erly It is imp erative that the shore p ower outlet is dry b efor...

Page 119: ...generator to supplement power Although this setup provides maximum voltage to your boat it req uires use of the generator B y monitoring your load you can still power your boat sufficiently without t...

Page 120: ...le or no maintenance is req uired Shore Power L oad Management Y our boat is eq uipped with many device s that req uire AC power for their operation While many of these device s are co ntinuous use it...

Page 121: ...no direct elect rica l co nnect ion between the earth grounded shore AC power and the boat AC power Isolating the power this way eliminates shock haza rds to people swimming around the boat and also...

Page 122: ...C When act ivated there will be a bang similar to small arms fire followed by a rushing air sound Once act ivated the generator and blower will shut down automatica lly The ch emica l co ntained in t...

Page 123: ...boat against the possibility of fire spreading beyond the co mpartment I no re is indicated and the discharge light is lit there may b e a leak in the system It is reco mmended that the gauge be ch e...

Page 124: ...s operation manual that lists the weight of the ca nister and co ntents Manual O verride System The automatic fire e tinguisher can be activated manually by pulling the manual override handle loca ted...

Page 125: ...h the stern bench Dive L adder T he dive ladder should NEV ER b y dep loyed when b oat is in motion or the engines are running Never start or op erate the engines when p eop le are in the water near t...

Page 126: ...drains incr eases the purge rate of sea water from the co ckp it which may accumulate during heavy seas The over ow door funct ions automatica lly and req uires little or no maintenance D o not allow...

Page 127: ...k pit disch arge pumps are loca ted in the bilge and ca n be acce ssed through the hatch in the aft co ckp it deck The forward disch arge pump ca n be acce ssed through the forward hatch under the bun...

Page 128: ...ment is unlocke d To lock the co mpartment push the kn ob in Adjustab le H elm Seat The ca ptain s ch air ce nter ca n be adjusted forward and aft by depressing the switch loca ted on the leaning post...

Page 129: ...the anch or will hold under all ci rcu mstance s if you are leaving the boat nderstand the principles of rode and scope and their effect on anch or performance P roper anch oring req uires kn owledge...

Page 130: ...u res the anch or when stowed and the boat is underway ALWAYS SEC RE THE LANYARD WHEN NDERWAY ailure to do so may allow accidental deployment of the anch or The ON OF F switch on the helm switch panel...

Page 131: ...hing the top part of the switch down will power the anch or windlass D OWN M ake ce rtain that the safety lanyard is detach ed from the ch ain and is cl ear of any moving parts of the anch or windlass...

Page 132: ...the remote is loca ted on the starboard side of the locke r P lug the power ca ble into the power rece ptacl e on the aft of the bow locke r Turn the forward portion of the plug cl ockw ise to lock T...

Page 133: ...andle into the ce nter socke t and turning it co unter cl ockw ise will loosen the anch or windlass ch ainwheel The star socke t loca ted off ce nter is used for retrieving and lowering the anch or Tu...

Page 134: ...4 62 Section 4 Boat Systems O p erator s Notes...

Page 135: ...for the bow thruster which is 2 4 V D C All 1 2 V D C wiring in this boat co nforms to S AE J1 1 2 8 and is premium grade tinned co pper marine ca ble designed to minimize voltage drop and resist co...

Page 136: ...e to the b atteries and other eq uip ment in the storage area Never use an open ame in the battery storage area Avoid striking sp arks near the b atteries A battery can e plode i a ame or spark ignite...

Page 137: ...ery Charger All four house starting batteries are ch arged when any one or all outboard engines are running above idle speed regardless of battery OF F ON switch position All four batteries are ch arg...

Page 138: ...eristics Battery Switches This boat uses battery switch es one for each engine to co ntrol delivery of D C power from the batteries These battery switch es are advance d elect ric relay switch es loca...

Page 139: ...itch were left in the Combined position without a sufficient ch arging source present The operation of the ACRs ca n be manually overridden by use of the kn ob on the top of the ACR Manual Control O v...

Page 140: ...s metal co mponents in the boat to a co mmon elect rica l co ntact This helps to reduce the ch ance of rails and other metal object s ca rrying dangerous elect rica l ch arges Grounding is defined as...

Page 141: ...to the negative side of the 1 2 V D C elect rica l system at a buss bar Note All grounding wires and ca bles are b lack Bonding This boat s bonding system is co nnect ed to the grounding system of the...

Page 142: ...ng in the forward cab in Bow T hruster Battery Maintenance B efore use ch eck each battery and the ch arging system for loose co nnect ions or wiring Normal maintenance should incl ude Coat the termin...

Page 143: ...her is loca ted on the switch panel on the leaning post a fourth is adjace nt to the forward storage garage and the fifth receptacle can be found on the forward wall of the starboard ca binet in the c...

Page 144: ...he interior aft wall of the forward co nsole storage co mpartment A seco nd rece ptacl e is loca ted on the aft side of the leaning post A third is loca ted on the forward wall of the ca bin vanity ca...

Page 145: ...5 11 Electrical Systems Section 5 Main DC Breaker Panel...

Page 146: ...5 12 Section 5 Electrical Systems Main AC Breaker Panel...

Page 147: ...lified marine elect rici an determine and co rrect the ca use of the trip In the event it is nece ssary to replace a breake r use only the same amperage as the original If a breake r is replace d with...

Page 148: ...5 14 Section 5 Electrical Systems H elm Breaker Panel...

Page 149: ...5 15 Electrical Systems Section 5 L eaning Post Breaker Panel...

Page 150: ...5 16 Section 5 Electrical Systems Battery Switch Breaker Panel...

Page 151: ...use block is loca ted on the port wall of the interior of the elect ronics box in the hardtop In the event you need to replace a fuse use only the same amperage as the original It is reco mmended that...

Page 152: ...will not protect people against line to line or line to neutral faults short ci rcu its or overloads T esting The GF I outlet has a TE S T and RE S E T button that you ca n use to regularly test the o...

Page 153: ...here is also a c ord loca ted in the port frame of the hardtop which terminates in the co nsole at one end and the elect ronics box at the other Tie another piece of nylon co rd to the cu rrent acce s...

Page 154: ...and to be used by qualified electrical service technicians Because of the custom nature of BCGP boats these diagrams may vary depending on the customer specific requirements Any electrical work shoul...

Page 155: ...5 21 Electrical Systems Section 5 Battery System Diagram...

Page 156: ...5 22 Section 5 Electrical Systems Battery Switch Panel Diagram...

Page 157: ...5 23 Electrical Systems Section 5 H elm Breaker Panel Diagram...

Page 158: ...5 24 Section 5 Electrical Systems H elm Switch Panel Diagram...

Page 159: ...5 25 Electrical Systems Section 5 L eaning Post Switch Panel Diagram...

Page 160: ...5 26 Section 5 Electrical Systems L ighting Schematic Deck...

Page 161: ...5 27 Electrical Systems Section 5 Windlass Schematic...

Page 162: ...5 28 Section 5 Electrical Systems O verb oard Discharge Panel and H olding T ank Schematic...

Page 163: ...5 29 Electrical Systems Section 5 DC Distrib ution Panel...

Page 164: ...5 30 Section 5 Electrical Systems DC Wiring Schematic Cab in...

Page 165: ...5 31 Electrical Systems Section 5 H ardtop Schematic...

Page 166: ...5 32 Section 5 Electrical Systems 120 0 Shore ower Schematic...

Page 167: ...5 33 Electrical Systems Section 5 AC Distrib ution Panel 120 0...

Page 168: ...5 34 Section 5 Electrical Systems 220 0 Shore ower Schematic...

Page 169: ...5 35 Electrical Systems Section 5 AC istribution anel 220 0...

Page 170: ...5 36 Section 5 Electrical Systems Bow T hruster Schematic...

Page 171: ...5 37 Electrical Systems Section 5 Bilge Wiring Schematic...

Page 172: ...5 38 Section 5 Electrical Systems Stereo Schematic...

Page 173: ...ss TO HELM TO MACERATOR PUMP TO FUEL TANK SENDER TO VACUUM GENERATOR TO STBD FISHBOX PUMPOUT PUMP TO BILGE PUMPS FLOAT SWITCHES TO FRESH WATER TANK SENDER TO GEN FUEL TANK SENDER TO STBD TRIM TAB TO B...

Page 174: ...ems DC Wiring H arness continued TO CABIN BILGE PUMP TO SHOWER SUMP TO CONSOLE TO FWD STORAGE PUMP POB TO BILGE TOP VIEW TO CTSY LIGHT TO CTSY LIGHT TO CTSY LIGHT TO CTSY LIGHT TO CTSY LIGHT TO CONSOL...

Page 175: ...5 41 Electrical Systems Section 5 DC Wiring H arness continued POINT OF BEGINNING TO CABIN LIGHT TO CABIN LIGHT TO CONSOLE TO LED LIGHTS TO WIPER MOTOR TO 12V OUTLET...

Page 176: ...T LIGHT TO FLOOD LIGHT TO WINDSHIELD ACTUATOR TO LED TO LED TO FLOOD LIGHT TO FLOOD LIGHT TO ALL AROUND LIGHT PORT TO NAV LIGHT TO NAV LIGHT TO LED TO LED TO MAP LIGHTS POB TO HORN TO FUSE BLOCK DC Wi...

Page 177: ...TALLATION TO LEANING POST POINT OF BEGINNING A AC Wiring H arness TO BILGE TO BREAKER PANEL AC HARNESS INSTALLATION SOLID LINE 24V THRUSTER HARNESS DOTTED LINE TO WATER HEATER TO TRANSFORMERS TO AC CO...

Page 178: ...5 44 Section 5 Electrical Systems O p erator s Notes...

Page 179: ...ear 8 6 00 lb s 3 9 00 kg Max imum engine weight 2100 lb s 9 5 2 kg Max imum engine horsep ower 9 00 H P 6 7 1 kW Minimum engine horsep ower 7 5 0 H P 5 5 9 kW F uel tank cap acity standard centerline...

Page 180: ...ncluded in all correspondence related to your boat The engine and electronics model and serial numbers are also important when obtaining parts or service for these items Record all significant numbers...

Page 181: ...b ility Imp rop er installations can cause p rop erty damage and serious injury Imp rop er installations might void p ortions of your hull warranty H ull Maintenance Regularly scheduled maintenance wi...

Page 182: ...o compound the hull and interior fiberglass components to remove stains light scratches and hazed film on the gelcoat Compounding should only be done after the boat has been thoroughly cleaned to remo...

Page 183: ...water and a soft cloth or sponge Aluminum Wash aluminum parts with fresh water and a mild soap Protect surface with liquid cleaner or wa D N T use harsh chemicals or abrasives To minimize corrosion f...

Page 184: ...gaps as soon as they appear to avoid collateral damage Clean away any debris and degrease the repair area with denatured alcohol Allow the denatured alcohol to air dry Attach the cutwater to the hull...

Page 185: ...porous Water can permeate through gelcoat and fiberglass during long periods of immersion in water This process is referred to as hydrolysis The effect of hydrolysis over time allows water to enter t...

Page 186: ...pect the entire surface of the boat bottom on a frequent basis Address any structural or cosmetic issues immediately Even a minor scratch or scrape might allow water to enter the hull laminate Wax ing...

Page 187: ...s is complicated and very lengthy including a long drying out phase The vinylester resin barrier coat is then covered by conventional bottom paint This process should only be done by a professional fi...

Page 188: ...to cover areas that were not accessible during painting because of slings or ack stands ollow the manufacturer s recommendations for periodic maintenance after the painting is complete If the hull bot...

Page 189: ...gns of moisture and particulate contamination Your filter servicing routine will be directly related to the quality and quantity of gasoline that you take on board The filter elements should be change...

Page 190: ...enance might cause loss of steering which could cause p rop erty damage or serious injury F illing Maintenance The system is virtually maintenance free aside from regular uid checks and visually inspe...

Page 191: ...engine tilt tube for salt deposits or signs of corrosion Clean and grease as required Check and grease slider assembly on front of the engine steering cylinder assemblies Check mechanical linkage and...

Page 192: ...ion Clear away any deb ris that might restrict p ump or water level sensor op eration Periodically check the condition of the pumps by turning the pumps on manually You should see water pump out the t...

Page 193: ...any debris that may have accumulated in the impeller section or strainer base Check hose and connection on hull side for debris and proper connections F loat Switches requently inspect the area under...

Page 194: ...tery storage area Avoid striking sp arks near the b atteries A battery can e plode i a ame or spark ignites the free hydrogen gas vented during charging Always disconnect the b atteries b efore doing...

Page 195: ...re that this boat will be ready for operation when needed Battery maintenance should include Inspect the batteries and charging systems before each mission for loose or corroded connections and damage...

Page 196: ...serious injury Avoid contact with skin eyes and clothing If contact occurs immediately ush the a ected area with water and call or medical assistance At least once a year or when they have dirt or co...

Page 197: ...ntenance Check the general condition of the actuators and trim planes once a month Remove any marine growth from the actuators actuator shafts and trim planes with a pressure washer Cold temperatures...

Page 198: ...assageways Trapped water can freeze and cause e tensive damage Internal engine parts can be damaged by corrosion due to lack of proper storage lubrication Your outboard engine operator s manual has a...

Page 199: ...ions to minimize the possibility of damage to your fuel system and engines during storage If possible use fuel that does not contain ethanol on a regular basis or ust before storing your boat Store yo...

Page 200: ...trainer and all fittings and hoses for system integrity to prevent leaks Clean away debris and or tighten hose connections as required The system should be run at least every other month to keep the p...

Page 201: ...e pump and clean if necessary The system should be run at least every other month to maintain the pump s impeller in a stable operating condition interi ation Before laying up for the winter season th...

Page 202: ...e entire system thoroughly several more times with potable water Now the system is ready for use fill with potable water This should be done annually or before using the system if it has been laid up...

Page 203: ...or any of its combinations are present in the water the two will combine and produce hydrogen sulfide This compound will produce a Rotten Egg dor Hydrogen sulfide can also be present in your freshwat...

Page 204: ...al and hose leaks that would reduce functionality Replace items as directed in the manufacturer s literature Macerator Maintenance After long periods of non use the macerator pump may not turn freely...

Page 205: ...riodically check and clean the raw water intake on the e terior of the hull the water strainer at the pump and the air filter The seacock and A C pump can be accessed by lifting the equipment hatch in...

Page 206: ...ystem has its own fuel and water separating filters se a clean good quality diesel fuel with a cetane number of or higher ecommended uel 2 diesel The e haust from the generator passes through a high e...

Page 207: ...must follow to ke ep your generator in peak operating co ndition Inspect the parts often and perform req uired service at the prescr ibed intervals M aintenance work must be performed by appropriately...

Page 208: ...emove bottom casing Remove the filter by slowly pulling upward with a twisting motion Insert the new filter with a slow downward twisting motion ill the filter with clean fuel Replace the bottom casin...

Page 209: ...r should trigger to position If sensing device LED or breaker does not trip or change state D N T SE Consult an electrician for assistance Press RESET button The RED LED should turn and the GREEN LED...

Page 210: ...the boat against the possibility of fire spreading beyond the compartment If no fire is indicated and the discharge light is lit there may be a leak in the system It is recommended that the gauge be...

Page 211: ...tact will require ushing o the area with water for at least 15 minutes Seek immediate medical assistance NE E attempt to modi y or disassemble any comp onents of this system If the system has been dis...

Page 212: ...6 34 Section 6 Maintenance Operator s Notes...

Page 213: ...of reasonab le and p rop er maintenance negligence or accident The obligation of BCGP under this warranty is limited to the pro rata co st to repair or replace a hull or part that has within the warra...

Page 214: ......

Reviews: