background image

pitching your tent

· 

BELL 

T

ENT

 ·

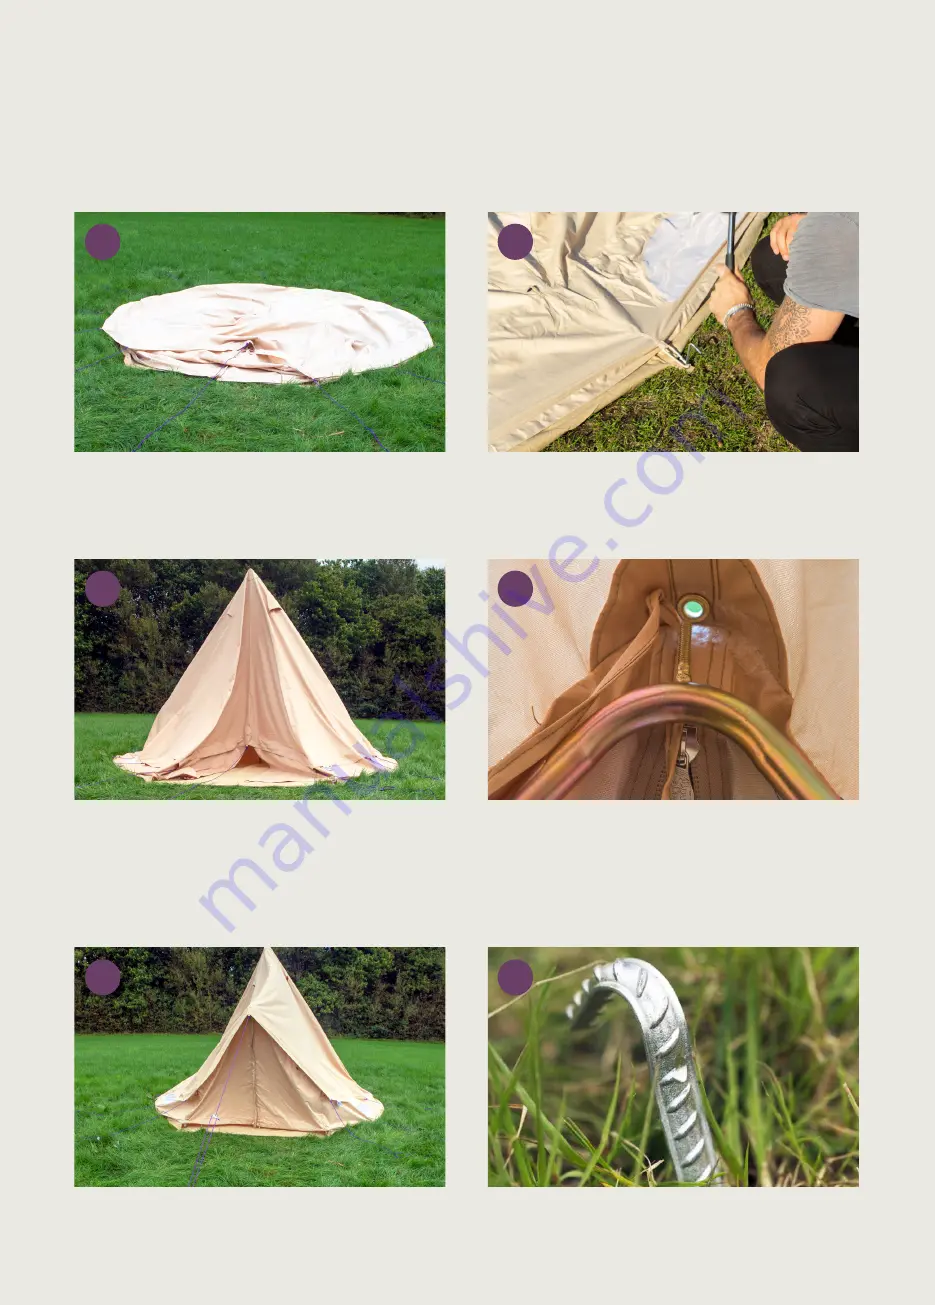
Unpack your tent and lay it out with the groundsheet 

floor facing. Make sure the ground is flat and free of any 

sharp objects. Find the door and rotate to face desired 

direction. 

Locate the centre pole and bring inside of the tent. Push 

the pole upwards to the cone (this will be the end with 

the integrated loop) and erect it vertically - ensuring it’s 

located at the centre points of both the floor and roof.

Zip up the door and secure the extra long guy rope 

above.

Using the thicker ribbed pegs, peg out the guy ropes at 

least 1m around the tent, not putting any of them under 

too much tension.

Fix together the segments of the a-frame and inside of 

the tent, place the pole along the seam of the doorway. 

Push the spike through the hole found at the top of the 

doorway. Slot the feet of the a-frame into the pockets 

and secure into place by tightly knotting together the 

ties.

* For multi door tents, repeat this stage accordingly.

Keeping the tent fabric on top of the base, stretch 

the groundsheet the form a perfect circle. Locate the 

elastic rings and use the smaller pegs to fix your base 

to the ground. Spread the ropes and use the sliders to 

shorten each rope to approx. 1m in length.

1

2

3

5

6

4

Summary of Contents for Bell Tent

Page 1: ...www boutiquecamping com bell tent INSTRUCTION MANUAL...

Page 2: ...ed guy ropes and groundsheet tent bag rubber mallet full set of steel pegs x1 centre pole x1 4 a frames instruction manual spares bag Please note if you ve opted for multiple doors the same pitching m...

Page 3: ...ribbed pegs peg out the guy ropes at least 1m around the tent not putting any of them under too much tension Fix together the segments of the a frame and inside of the tent place the pole along the se...

Page 4: ...om front to back Now it s time to dress the outside of your perfectly pitched Bell Tent We find that layering accessories in triangular groupings work a treat It s now time to relax and enjoy your new...

Page 5: ...and pegs out of the tent and if necessary give them a clean and towel dry before packing away Try to keep the canvas on top of the groundsheet and not in contact with the grass Bring the curved edge...

Page 6: ...adjusted to achieve a smooth finish The groundsheet zip must be concealed and hidden by the skirt of the tent waterproofing leak prevention On the first occasion that your canvas tent endures a heavy...

Page 7: ...and hanging it to dry separately Store your tent away in a dry place free of damp and excessive condensation We would advise placing it up high so that rodents cannot reach the tent Your tent will hav...

Page 8: ...SINCE 2010 From pitching time lapses to finished setup shots we love seeing how you use your new Boutique home away from home TAG US in your posts to be featured or give us a follow and swipe through...

Reviews: