background image

s


1.  Plastic dust cover 

2.   Turntable 

3.    Adapter - Use this when playing 45rpm records with cut out centres. 
4.    Tonearm lift lever 
5.   Tonearm 

6.   Auto stop control 

7.    Speed selection - Three speed for choice: 33.3, 45, 78 rpm. 
8.   Ceramic cartridge with diamond needle 
9. Volume button 
10. Tuning button 
11.  Radio Full range Power   
12.  AM/FM channel selector 
13. Function selector 

14. 

3.5mm headphone socket


15. 

 Auxiliary Input


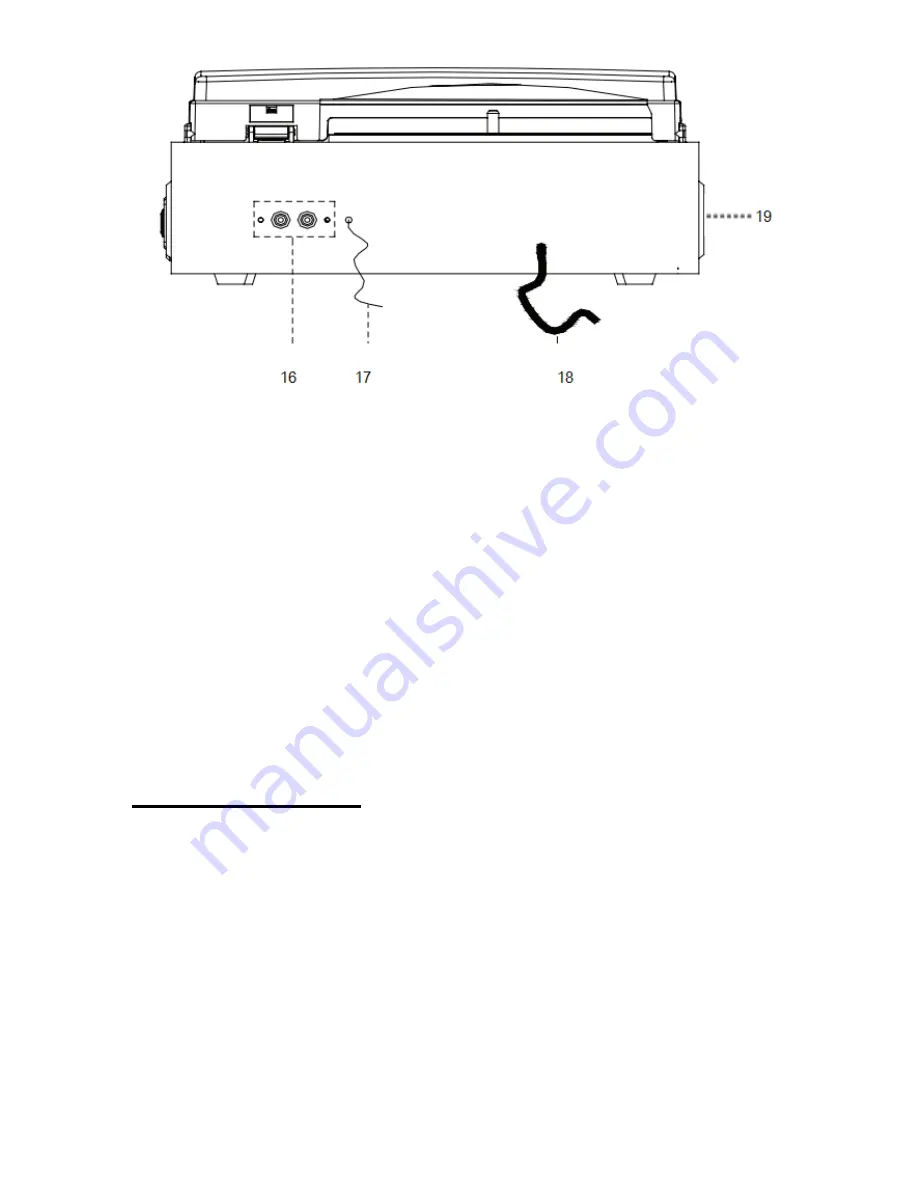
16. 

Line out sockets


17. FM wire antenna 
18. AC power cord 


INITIAL SET-UP 

MAINS CONNECTION 

Ensure that the mains voltage of your home corresponds to the operating 

voltage of the unit. Your unit is ready to be connected to a mains voltage 

of 110V/60Hz. 
 

AMPLIFIER CONNECTION (if required) 

Whilst you listen to your new vinyl disc through the speakers of turntable 

player, you may wish to connect to your existing Hi Fi system. Connect 

the audio to achieve it - plugs to the AUX input on your mixer or amplifier 

Summary of Contents for BT-13B

Page 1: ...Turntable With AM FM Radio Model Number BT 13B BT 13G INSTRUCTION MANUAL ...

Page 2: ...s to reduce the risk of fire or electric shock Electrical safety and cord handling Before installing this equipment make sure your outlet voltage corresponds to the voltage stated on the appliance rating label To prevent contact with high voltage components inside do not attempt to open the equipment When connecting the equipment align the plug properly and insert it fully to prevent electric shoc...

Page 3: ...ualified personnel Contact the after sales support line for advice Unplug the unit from the power outlet after use to avoid possible damage during electrical storms or when the equipment will be unattended or unused for a long period of time Do not let the cord hang over the edge of a table or counter or touch any hot surface Do not allow anything to rest on or roll over the power cord and run any...

Page 4: ...ntilation and to protect the unit from overheating To ensure proper operation do not cover them with things such as newspapers tablecloths curtains etc Do not place heavy objects on top of the equipment or step on it Do not place objects filled with water such as vases or any naked flame sources such as lit candles incense sticks or cigarettes on top of the unit The equipment is not intended for u...

Page 5: ...et before cleaning Clean the unit only with a dry clean cloth Do not use liquid or aerosol cleaners We assume no liability for any damage caused by non compliance with these instructions or any other improper use or mishandling of the equipment Description ...

Page 6: ...lector 14 3 5mm headphone socket 15 Auxiliary Input 16 Line out sockets 17 FM wire antenna 18 AC power cord INITIAL SET UP MAINS CONNECTION Ensure that the mains voltage of your home corresponds to the operating voltage of the unit Your unit is ready to be connected to a mains voltage of 110V 60Hz AMPLIFIER CONNECTION if required Whilst you listen to your new vinyl disc through the speakers of tur...

Page 7: ... Put down the stylus slowly on to the record to play When a record comes to the end the turntable will stop automatically if the auto stop switch is in the ON position If the switch is in the off position then it will keep revolving until the tone arm is returned to the tone arm rest Lift up the tone arm and put it on the rest when finished Replace the protective cap on the stylus and close the to...

Page 8: ...vel and extend this wire 9 When you have finished listening to the radio turn the volume knob in a counterclockwise direction to switch the unit off Unplug it from the power supply if you are not going to use it for a while FM and FM stereo mode FM mode use the radio band selector to select the FM band Programs are received in mono mode Use this mode when stereo reception is weak FM Stereo mode us...

Page 9: ... will continue turning at the end of the record 5 Place the record on the turntable use the 45 rpm adaptor if required 6 Move the lift lever towards the back to raise the tone arm from the arm park then slowly move the arm to the record as illustrated on the right The turntable will start rotating 7 Move the lift lever towards the front the tone arm will gently drop onto the record and playback wi...

Page 10: ...om accidental movement Turn the volume knob in a counterclockwise direction to switch the unit off Unplug it from the power supply if you are not going to use it for a while NOTE Should your record stop before the last track finishes set the auto stop control to OFF Your record will now play to the end but you will have to stop the turntable rotation manually Return the tone arm to its rest manual...

Page 11: ...our radio to an alternative location to see if the reception improves Check that you do not have other electrical equipment too close to your radio which may cause interference Maintenance REPLACING THE STYLUS Refer to the figures 1 8 INSTALLING A NEW STYLUS CARTRIDGE Refer to the figures 5 6 NOTES We advise you to clean your records with an anti static cloth to gain maximum enjoyment from them an...

Page 12: ...ally approximately every 250 hours Dust the stylus from time to time using a very soft brush dipped in alcohol brushing from back to front of the cartridge WHEN TRANSPORTING YOUR RECORD PLAYER DO NOT FORGET TO Replace the protective cap on the stylus Put the rest clip into the pick up arm ...

Reviews: